Understanding the Importance of Roof Warranties for Atlanta Homeowners

SEO Analysis • February 20, 2025


If you could protect yourself from taking a sudden financial hit, would you? Of course, you would. We all would. Products like insurance policies and warranties are just two of the ways we protect ourselves. But not many people know that when they purchase a roof replacement, they can also have a warranty that covers more eventualities than they imagine. Finding a roofing company that offers superior coverage should be the goal of every homeowner.


Roof warranties play a crucial role for Atlanta homeowners, providing peace of mind and financial protection for residential roofing. Many homeowners overlook the importance of understanding their warranty policy, which can lead to unexpected costs during roof replacement. This article will cover the types of roof warranties available, what they typically cover, and how Atlanta's local climate can impact their effectiveness. By engaging with this content, homeowners will learn how to select the right warranty that meets their needs, safeguarding their investment and ensuring a well-protected attic for years to come.


Why Roof Warranties Matter for Atlanta Homeowners


Investing in a roof warranty is essential for Atlanta homeowners, offering protection against diverse residential roofing challenges. Key reasons to consider a warranty include understanding the different types available, the long-term financial benefits, and protection against common Atlanta weather issues. Furthermore, roof warranties play a crucial role in enhancing property value, making it a wise choice for any homeowner working with a roofing contractor or company.


Key Reasons to Invest in a Roof Warranty


Investing in a roof warranty offers Atlanta homeowners a greater sense of security by guaranteeing the longevity of their roofing systems. Such warranties act as an insurance policy that can save significant amounts of money in the event of damage or the need for replacement. By understanding the specifics of the contract, homeowners can ensure that they are protected for the length of time recommended by experienced professionals, allowing them to budget for potential repairs more effectively.


Furthermore, obtaining a roof warranty adds value to a property, which can be especially beneficial for homeowners considering resale in the future. It assures potential buyers that the roofing system is backed by a reliable contract, reducing worries about the expense of unexpected repairs. The savings accrued from outside repairs can be substantial, making the initial investment in a warranty a wise choice for those wanting to maintain their home's condition and investment over time.


Understanding Different Types of Roof Warranties


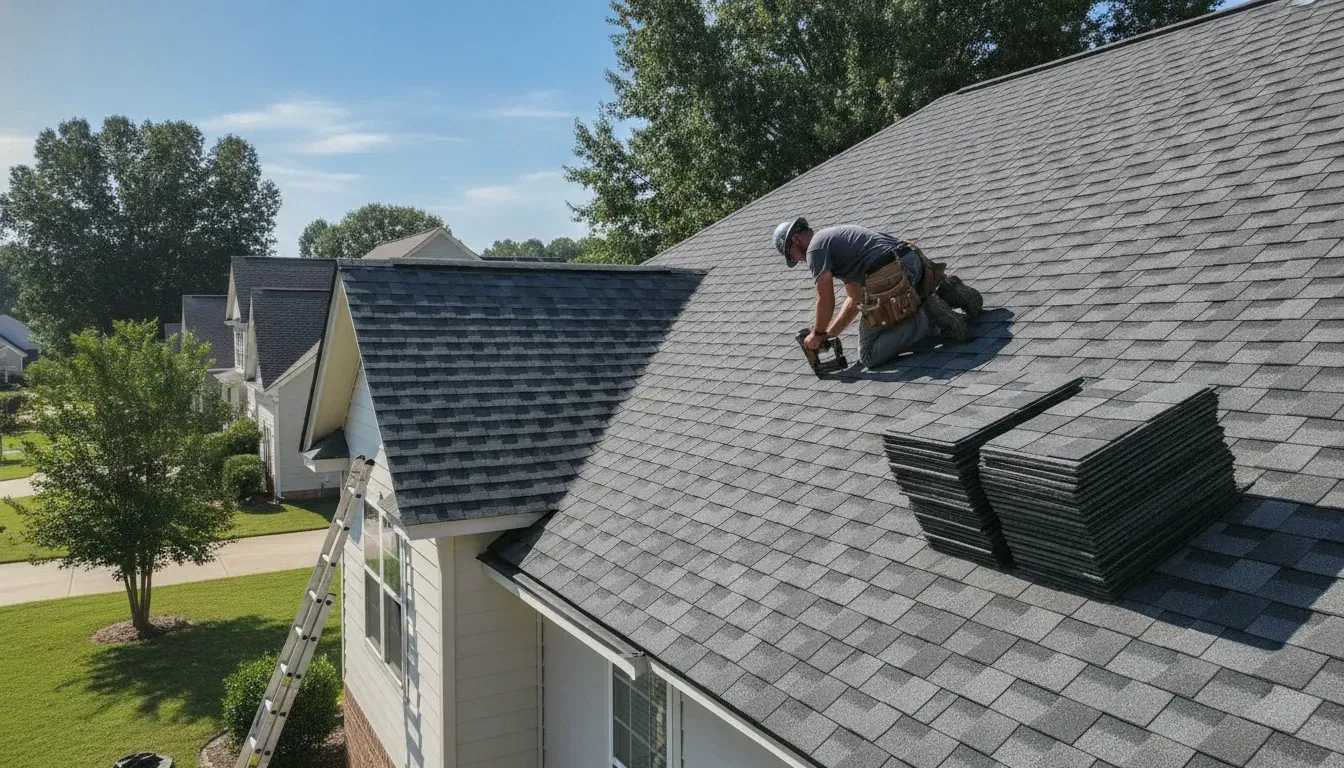
Understanding the different types of roof warranties is crucial for Atlanta homeowners seeking to protect their investment. A manufacturer's warranty, often provided by companies like CertainTeed, covers defects in the materials, ensuring that any issues, including leaks, are addressed without direct cost to the homeowner. Additionally, labor warranties, typically offered by professional roofers, cover the workmanship involved in installation, providing peace of mind that any roof repair needed due to poor installation will be fixed without additional charges.


Homeowners should also consider warranties that include ventilation components, as proper airflow is essential for a durable roofing system. Such warranties can safeguard against the problems created by poor ventilation, which may lead to significant repair costs down the line. By fully understanding these options, Atlanta residents can choose the warranty that best suits their needs, ensuring long-term protection and maximizing the lifespan of their roofs.


The Long-Term Financial Benefits of Roof Warranties


Roof warranties provide Atlanta homeowners with significant long-term financial benefits, especially for those who invest in quality materials such as Owens Corning products. By protecting against unexpected repairs and replacement costs, these warranties can prevent homeowners from facing hefty bills due to damage from common weather challenges, making them a prudent choice. In the context of commercial roofing, having a warranty ensures that any defects or installation errors are covered, which can save business owners from potentially costly renovations.


Moreover, warranties can enhance the overall value of a property, including any vinyl siding or flat roof elements. When homeowners decide to sell, a transferable warranty can be an appealing feature for buyers, as it indicates that the roofing system has been backed by a reputable company. This assurance can lead to faster sales and potentially higher offers, reinforcing the importance of obtaining a warranty that aligns with both the homeowner's current and future financial needs.


How Roof Warranties Protect Against Common Atlanta Weather Issues


Roof warranties offer vital protection against common Atlanta weather issues such as heavy rain and strong winds that frequently impact the region. By securing an extended warranty, homeowners protect their investment from costly storm damage, including leaks and blown-off shingles. Such warranties often cover repairs that arise due to severe conditions, ensuring that any unexpected fees related to weather-related damages are addressed without burdening the homeowner financially.


Understanding the fine print of roof warranties is crucial for maximizing their benefits. Many warranties specifically outline coverage related to weather events, detailing how they shield homeowners from the consequences of extreme weather. This information allows Atlanta residents to confidently navigate the implications of storm damage, knowing that their roofing warranty provides security in facing the unpredictable elements typical of the local climate.


The Role of Roof Warranties in Enhancing Property Value


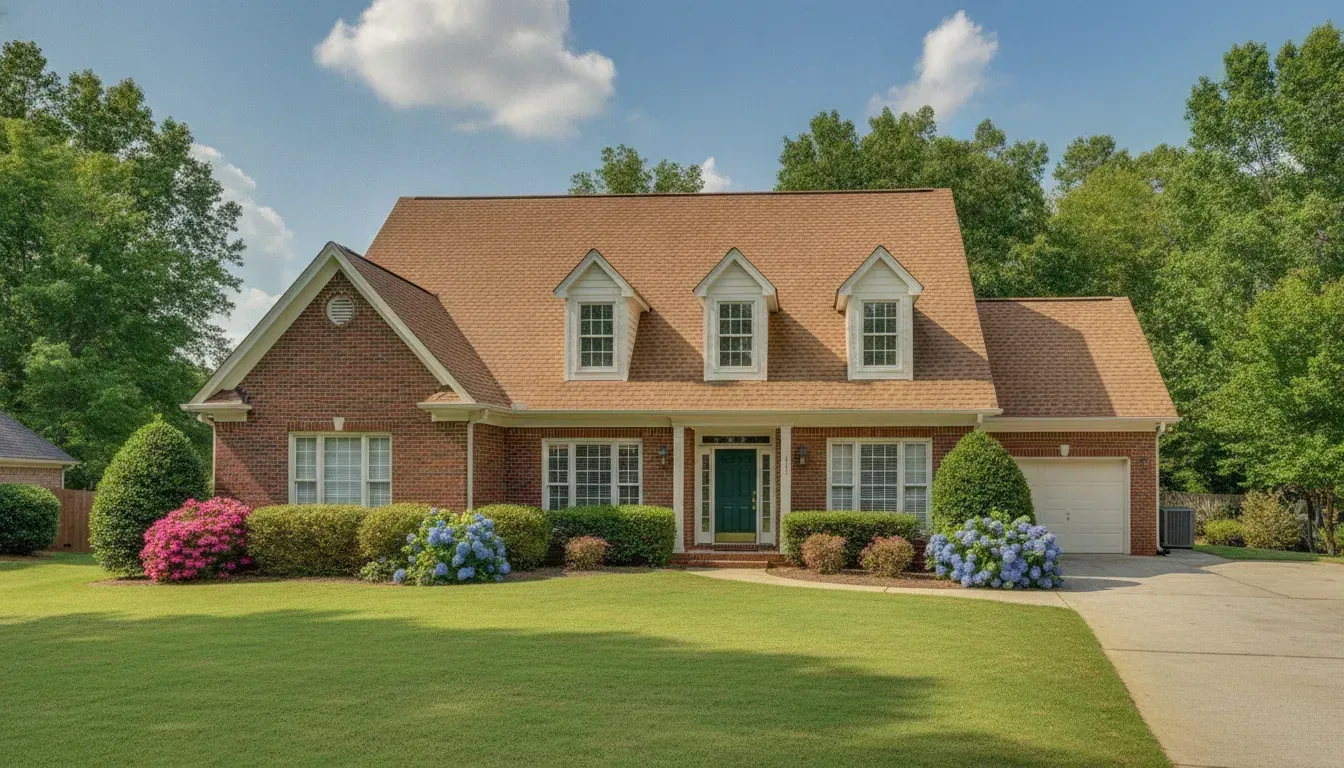
Roof warranties play a significant role in enhancing property value for Atlanta homeowners. When potential buyers view a home with an extended warranty, such as those covering asphalt shingle roofs, they gain confidence in the quality of the roofing system and the workmanship involved in its installation. This assurance can lead to smoother sales transactions, as buyers appreciate the security of knowing that any future repairs will be managed, reducing their financial concerns.


Additionally, reputable roofing companies often highlight the benefits of roof warranties during property inspections, further reinforcing the home’s value. A strong warranty reflects the homeowner's commitment to maintaining the property, making it more attractive to prospective buyers. This can result in higher offers and quicker sales, illustrating how investing in a warranty not only protects a homeowner’s roof but also enhances the overall marketability of their property.


Types of Roof Warranties Available in Atlanta


Understanding the different types of roof warranties available in Atlanta is essential for homeowners. The discussion will cover the manufacturer's warranty, which addresses material defects; the workmanship warranty, ensuring quality in roof installation; and extended warranties that provide added protection. It will also highlight notable brands offering robust roof warranties, including options suitable for metal roofs, ensuring reliable building insulation for long-lasting roofs.


Manufacturer's Warranty Explained


The manufacturer's warranty provides essential coverage for defects in roofing materials, ensuring that Atlanta homeowners are protected against issues such as algae growth or bitumen deterioration. This warranty guarantees that if the roof experiences problems related to manufacturing defects, homeowners will not incur the full roof replacement cost associated with repairs. By understanding this warranty, property owners can budget their roof maintenance more effectively, knowing they have support should any issues arise.


Workmanship Warranty Overview


A workmanship warranty is crucial for Atlanta homeowners, as it guarantees the quality of installation performed by roofing professionals. This type of warranty is typically offered by commercial roofing contractors and is especially important for those selecting GAF roofing products, like those from GAF Master Elite certified contractors. Homeowners can trust that any issues arising from poor installation will be addressed without incurring additional costs, ensuring the longevity and durability of their roofing system.


For example, a reputable roofing company with a strong workmanship warranty can provide added peace of mind for homeowners investing in commercial roof maintenance. This level of assurance protects them from potential repair expenses resulting from installation errors, allowing them to focus on maintaining their property’s value. By choosing contractors who emphasize workmanship warranties, homeowners can make informed decisions that safeguard their investments and promote long-term roofing success.


Extended Warranties and Their Advantages


Extended warranties provide significant benefits for Atlanta homeowners, particularly in safeguarding against severe weather challenges common in the area. These warranties typically cover issues such as flashing failures and material defects, ensuring that homes remain protected during storms with high wind speeds and extreme weather conditions. Homeowners can avoid the financial burden of unexpected repairs, knowing they have coverage when facing the elements.


Moreover, selecting an extended warranty can extend the lifespan of roofs, especially those made from metal, which is increasingly popular due to its durability. By integrating additional protection, homeowners gain peace of mind knowing that their investment is secure against potential damage caused by harsh weather patterns. This proactive approach not only mitigates repair costs but also improves the overall value of the property, making it an appealing option for future buyers.


Notable Brands Offering Roof Warranties


Several notable brands provide robust roof warranties that cater to the diverse needs of Atlanta homeowners. Companies such as GAF and CertainTeed offer comprehensive warranties, addressing potential issues like material failure and ensuring reliable coverage. These manufacturers typically require proof of purchase to validate any warranty claims, which reinforces the importance of maintaining receipts and documentation for effective warranty management.


Certain brands also include extended warranties that provide extra protection against unforeseen circumstances. For example, Owens Corning offers warranties that cover factory defects and installation errors, highlighting their commitment to quality. By choosing products from these reputable manufacturers, homeowners can enjoy peace of mind, knowing they are protected from unexpected repair costs and potential damages related to roofing issues.


What Roof Warranties Cover for Atlanta Homeowners


Roof warranties provide crucial protection for Atlanta homeowners by covering both materials and labor essential for maintaining a roofing system. Homeowners must also be aware of limitations and exclusions that may apply, as well as the process for filing a claim when issues arise. Evaluating warranty terms and conditions is vital to ensure comprehensive coverage and peace of mind in protecting their investment.


Coverage for Materials and Labor


Roof warranties provide Atlanta homeowners with essential coverage for both materials and labor associated with roofing systems. When homeowners invest in quality roofing products, these warranties ensure that any defects in materials—such as leaks or deterioration—are addressed without incurring unexpected expenses. This protection not only enhances homeowner confidence but also safeguards their financial investment against potential repair costs.


Moreover, labor coverage within roofing warranties guarantees that any workmanship-related issues are resolved by the contractor without added charges. This aspect is vital, as improper installation can lead to significant long-term problems. With a strong warranty in place, homeowners can trust that their roofing system is safe and reliable, allowing them to focus on enjoying their property without the looming worry of potential repair costs.


Limitations and Exclusions to Consider


When considering roof warranties, Atlanta homeowners must be aware of the limitations and exclusions that can affect coverage. Many warranties do not cover damage caused by natural disasters, lack of maintenance, or improper installation practices. Homeowners should carefully review their warranty terms to understand what specific scenarios may lead to denial of claims, ensuring they are fully informed about their level of protection.


Moreover, it is vital for homeowners to note that some warranties may have specific conditions for maintenance and inspections. Failing to adhere to these requirements could void the warranty. By keeping comprehensive records of maintenance and adhering to recommended guidelines, Atlanta homeowners can safeguard their coverage and enjoy peace of mind regarding their roofing investment.


How to File a Claim Under a Roof Warranty


To file a claim under a roof warranty, Atlanta homeowners should start by gathering essential documentation, including the warranty agreement, purchase receipts, and any previous inspection reports. This information helps establish the claim's legitimacy, ensuring that all factors surrounding the issue are addressed promptly and clearly. Homeowners must then contact the roofing contractor or manufacturer listed in the warranty, as they typically provide specific instructions on how to initiate the claims process.


Next, it is important for homeowners to document the problem thoroughly. Taking photographs of the damaged area and noting the circumstances surrounding the issue can significantly support the claim. After submitting the claim with the required information, homeowners should follow up with the contractor or manufacturer to ensure timely handling, allowing them to resolve their roofing concerns efficiently and effectively.


Evaluating Warranty Terms and Conditions


Evaluating warranty terms and conditions is essential for Atlanta homeowners to ensure comprehensive coverage for their roofs. Homeowners should carefully read the fine print, as some warranties may have specific requirements or limitations that could affect their protection. Understanding the criteria for filing claims, maintenance obligations, and potential exclusions can help homeowners make informed decisions and avoid unexpected costs in the future.


In practical terms, many warranties require regular maintenance and inspections to remain valid, so keeping records of all service done on the roof is crucial. By evaluating these conditions thoroughly, Atlanta homeowners can safeguard their investment and ensure that any issues with materials or workmanship are addressed promptly. This proactive approach not only protects the homeowner's financial interests but also enhances the longevity of the roofing system.


The Impact of Local Climate on Roof Warranties


Atlanta homeowners must consider how local climate influences roof warranties. Addressing humidity and storm damage concerns is vital, as these factors can lead to significant wear on roofing materials. Understanding recommended roofing materials tailored for Atlanta's climate is essential. Lastly, climate conditions can impact warranty duration and coverage, making it crucial for homeowners to choose the right options for lasting protection.


Addressing Humidity and Storm Damage Concerns


Atlanta homeowners face unique roofing challenges due to the region's humidity and frequent storms. High moisture levels can lead to mold and mildew growth, which deteriorates roofing materials over time. Homeowners should ensure their roof warranty covers damage from these issues, providing protection against costly repairs that arise from moisture-related damages and helping maintain the roof's integrity.


Storms in Atlanta can be intense, resulting in sudden leaks or damage from wind and debris. A robust roof warranty is vital as it typically includes provisions for repairs related to storm damage, easing the financial strain on homeowners. By selecting a warranty that addresses these climate-specific concerns, residents can protect their investment and achieve peace of mind in the face of unpredictable weather conditions.


Recommended Roofing Materials for Atlanta's Climate


For Atlanta homeowners, choosing the right roofing materials is crucial for ensuring durability and resilience against the local climate. Materials such as asphalt shingles are popular due to their affordability and effectiveness in coping with humidity and rain. Additionally, metal roofs provide long-lasting protection and are increasingly favored for their ability to withstand storm damage while offering energy efficiency through better insulation.


Another effective choice for roofing in Atlanta is architectural shingles, known for their aesthetic appeal and enhanced durability compared to traditional options. These shingles are designed to resist the wear caused by moisture and debris from storms, thereby reducing repair costs over time. By selecting roofing materials that align with Atlanta's weather patterns, homeowners can maximize the benefits of their roof warranties and ensure their investments are well protected.


How Climate Affects Warranty Duration and Coverage


Local climate significantly influences the duration and coverage of roof warranties for homeowners in Atlanta. The area’s high humidity levels and frequent storms can lead to quicker wear on roofing materials, potentially reducing the effectiveness of standard warranties. Manufacturers often tailor their warranty terms based on regional weather patterns, meaning homeowners may need to seek out options that specifically account for such environmental factors to ensure comprehensive protection.


Additionally, Atlanta homeowners must understand that some warranties may have different coverage stipulations in response to severe weather conditions. For instance, warranties may not cover damage caused by high winds or hail unless specific criteria are met. By choosing a warranty that explicitly addresses these climate-related concerns, homeowners can enhance their peace of mind and better protect their financial investment in roofing systems against local weather challenges.


Real-Life Cases of Roof Warranties in Action


This section highlights real-life cases that illustrate the significance of roof warranties for Atlanta homeowners. It explores success stories from local residents who benefited from their warranties, key lessons learned from warranty claims, and addresses common misconceptions about these protections. These insights provide valuable context on the practical application of roof warranties, enhancing the understanding of their true worth.


Success Stories From Atlanta Homeowners


Many Atlanta homeowners have shared positive experiences regarding their roof warranties, highlighting the timely assistance they received during unexpected repairs. For instance, one homeowner faced significant storm damage that caused leaks throughout their house. Thanks to their warranty, the roofing company promptly addressed the issues without any added expenses, demonstrating how a warranty can save homeowners from costly repairs and restore their peace of mind.


Another success story involves a homeowner who opted for a workmanship warranty when installing a new roof. After just a few months, they discovered issues stemming from improper installation. Because of the warranty, the contractor covered all necessary repairs at no extra cost, reinforcing the importance of choosing a reliable roofing contractor. Through these stories, Atlanta residents can see the value of roof warranties in protecting their homes from unforeseen challenges.


Lessons Learned From Warranty Claims


Homeowners in Atlanta have learned valuable lessons from their experiences with roof warranty claims. One key takeaway is the importance of thoroughly reviewing warranty details before making a purchase. Understanding coverage limitations and exclusions can prevent surprises down the line, especially for those facing severe weather conditions common in the region. For instance, some warranties specifically exclude damage from high winds or hail, which can be crucial information for residents living in storm-prone areas.


Another lesson highlighted by homeowners is the significance of maintaining detailed records of all roof inspections and maintenance activities. Many warranties require regular upkeep to remain valid, and failing to adhere to these stipulations can lead to denied claims. By keeping thorough documentation, Atlanta homeowners can ensure their warranties provide the intended protection against unexpected roofing issues, reinforcing their investment in the safety and longevity of their homes.


Common Misconceptions About Roof Warranties


A common misconception among Atlanta homeowners is that roof warranties cover all types of damage without any limitations. In reality, many warranties have specific exclusions related to natural disasters or lack of maintenance, which can leave homeowners vulnerable if they are not careful. Understanding these nuances is essential for homeowners to ensure they receive the protection they expect when investing in a roofing warranty.


Another frequent misunderstanding is that all roof warranties are the same and provide identical coverage. In truth, warranties vary greatly depending on the manufacturer, the type of coverage, and the installation quality. Homeowners should take the time to review the details of their warranties carefully, as this knowledge can prevent issues later on, especially when filing claims for storm-related damage or installation errors.


How to Choose the Right Roof Warranty for Your Needs


Choosing the right roof warranty is essential for Atlanta homeowners and involves considering several key factors. Homeowners should evaluate coverage options, duration, and exclusions while making informed comparisons. It's important to ask specific questions to their roofing contractor to clarify any uncertainties. Additionally, maintaining thorough records and adhering to warranty requirements can ensure long-term protection and peace of mind.


Factors to Consider When Selecting a Warranty


When selecting a roof warranty, Atlanta homeowners should first evaluate the coverage options available to them. It is essential to understand what is included in the warranty, such as how it addresses material defects and whether it covers workmanship issues. By examining these elements, homeowners can choose a warranty that aligns with the specific needs of their roofing system, protecting their investment effectively against potential damage.


Another critical factor is the warranty duration and its limitations. Homeowners must consider how long the warranty lasts and what exclusions may apply, particularly regarding storm damage or maintenance neglect. Being informed about these terms helps Atlanta residents make calculated decisions, ensuring they select a warranty that not only suits their immediate needs but also provides long-term security for their roofing investment.


Questions to Ask Your Roofing Contractor


When selecting a roof warranty, Atlanta homeowners should engage their roofing contractor with specific inquiries regarding coverage options. Questions about what materials the warranty protects, the duration of coverage, and whether it includes both workmanship and material defects will clarify the extent of protection available. Understanding these details is essential for ensuring that the warranty aligns with the homeowner's needs and provides adequate safeguards against potential issues.


Homeowners should also ask about the claims process should a problem arise. Inquiring about the steps for filing a claim, documentation required, and typical response times can help homeowners feel prepared and informed. This proactive approach allows Atlanta residents to understand how to navigate any future warranty claims smoothly, ensuring their investment in a roof warranty remains beneficial and stress-free.


Comparing Different Warranty Options


When comparing different warranty options, Atlanta homeowners should focus on the coverage provided by each warranty type. A manufacturer's warranty typically protects against material defects, while a workmanship warranty secures the quality of installation. Understanding these distinctions allows homeowners to determine which options best suit their specific needs and enhances the overall protection of their roofing systems.


Moreover, homeowners should consider the duration of the warranties and any associated limitations. For instance, some warranties may exclude coverage for damage caused by severe weather conditions common in Atlanta. By closely examining these factors, property owners can make informed decisions, ensuring they select a roof warranty that provides maximum security against potential problems and contributes positively to their investment's longevity.


Tips for Maintaining Your Roof Warranty


To maintain a roof warranty effectively, Atlanta homeowners should prioritize regular inspections and maintenance of their roofing systems. Scheduling annual check-ups with a professional contractor can help identify potential issues before they escalate. This proactive approach not only preserves the warranty coverage but also enhances the longevity and durability of the roof, ensuring that the investment remains protected against common Atlanta weather challenges.


Homeowners must also keep meticulous records of all maintenance performed on their roofs. Documenting repairs, inspections, and any services completed helps ensure compliance with warranty requirements. By maintaining these records, Atlanta residents can quickly address any issues that arise under warranty, making the claims process smoother and safeguarding their financial investment in their roofing system.


Related Resources for Atlanta Homeowners


Atlanta homeowners can benefit from various resources aimed at enhancing their understanding of roof warranties and maintaining their roofing systems. This section includes recommendations for local roofing contractors who can provide expert services, a comprehensive roof inspection checklist to ensure proper maintenance, seasonal maintenance tips to preserve roof integrity, and insights into how home insurance works in relation to roof warranties. These topics collectively support homeowners in protecting their investments and ensuring their roofs remain in optimal condition.


Recommended Local Roofing Contractors


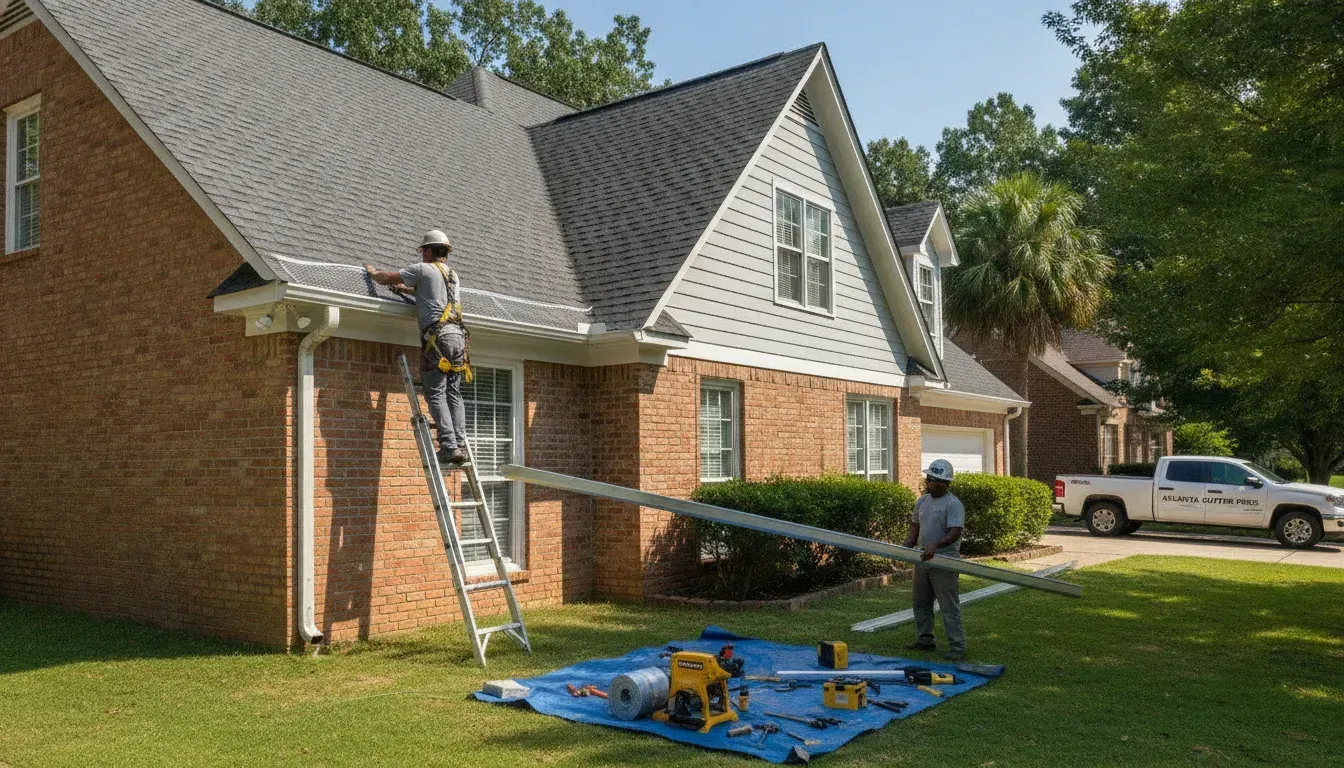
Finding reputable local roofing contractors is essential for Atlanta homeowners seeking to secure effective roof warranties. These professionals not only offer quality installation services but also provide valuable insights into the types of warranties available. By choosing a licensed and insured contractor, homeowners can ensure that their roofing systems are not only installed correctly but also covered under comprehensive warranty agreements, safeguarding their investment against potential issues.


In addition, established roofing contractors in the Atlanta area often have extensive experience dealing with the unique challenges posed by the local climate. They can recommend warranties tailored to withstand the region's heavy rain and humidity, ensuring robust protection for the home. Engaging with knowledgeable contractors who prioritize customer satisfaction enables homeowners to make informed decisions regarding their roofing needs and warranty options, ultimately leading to enhanced peace of mind and lasting durability.


Roof Inspection Checklist for Homeowners


A comprehensive roof inspection checklist is essential for Atlanta homeowners to ensure their roofs remain in optimal condition, especially considering the region's unique climate challenges. Homeowners should examine areas such as shingles for signs of wear or damage, check for debris accumulation in gutters, and inspect flashing around chimneys and vents for leaks. Regular inspections, ideally every six months, help identify potential problems early, allowing homeowners to address them before they escalate into costly repairs and potentially impacting warranty coverage.


Seasonal Roof Maintenance Tips


Seasonal roof maintenance is essential for Atlanta homeowners to preserve the integrity of their roofs and ensure longevity. During spring, homeowners should clear debris from gutters and downspouts to prevent water backup, which can lead to leaks. Regularly checking for any signs of wear, such as cracked shingles or loose flashing, allows the homeowner to address issues before they escalate, maintaining both the roof's condition and the effectiveness of the associated warranty.


In the fall, performing a thorough inspection is equally important. Homeowners should look for signs of damage from summer storms and ensure that the roof is cleared of leaves and branches that could trap moisture. Taking these proactive measures not only protects the roofing system but also safeguards the validity of warranties, allowing homeowners to enjoy peace of mind knowing their investment is well-protected against Atlanta’s diverse weather conditions.


Understanding Home Insurance in Relation to Roof Warranties


For Atlanta homeowners, understanding the interaction between home insurance and roof warranties is vital for comprehensive property protection. Home insurance typically covers damage caused by external factors like storms or fire, but it may not include repairs due to roofing issues linked to normal wear and tear. Conversely, a roof warranty ensures that defects or installation problems are addressed without additional costs, filling in the gaps left by standard insurance coverage.


Homeowners should review their insurance policy in conjunction with their roof warranty to identify overlaps and exclusions. For instance, some insurance plans might not cover storm-related roofing damage if the warranty is still valid. By coordinating these protections, Atlanta residents can ensure their investment is safeguarded, reducing potential out-of-pocket expenses when unexpected roofing repairs are necessary.


By Stephen Griswell February 25, 2026
There’s a special kind of pride in completing a home improvement project yourself. But when that project involves cutting a large hole in your roof, the stakes are incredibly high. A skylight installation is a complex task that requires a professional’s touch, blending advanced skills in roofing, carpentry, and, most importantly, waterproofing. One small misstep in the process can compromise your roof’s integrity and lead to persistent leaks that damage your home’s interior. Before you decide to take on this challenge, it’s essential to understand exactly what the job entails. This guide breaks down the critical steps and highlights why trusting an expert is often the smartest decision for your home and your peace of mind. CONTACT US Key Takeaways Skylights offer more than just light : They are a functional upgrade that improves ventilation to reduce stuffiness, lowers electricity bills by brightening rooms naturally, and adds significant value to your property. Professional installation is non-negotiable : A skylight's performance depends on a perfect, leak-proof seal. Hiring an experienced contractor ensures the job is done right, protects your home from water damage, and keeps your manufacturer's warranty valid. Simple maintenance protects your investment : To keep your skylight working perfectly for years, regularly clean the glass, inspect the seals for any wear, and clear away leaves or debris from the surrounding roof area. Why Install a Skylight? Thinking about adding a skylight? It’s one of those home improvements that does more than just look good. A skylight can completely change the feel of a room, bringing the outdoors in and solving common issues like dark corners and stuffy air. It’s not just a window for your roof; it’s a functional upgrade that adds light, air, and character to your home. From making a small bathroom feel more spacious to turning a dim hallway into a bright, welcoming path, the benefits are immediate and lasting. But the advantages go beyond aesthetics. Installing a skylight can lead to a healthier, more comfortable living environment and even put some money back in your pocket through energy savings. Plus, it’s a feature that can make your home more attractive to future buyers. If you’re looking for a project that delivers on multiple fronts, a professionally installed skylight is a fantastic choice. At Total Roof Solutions, we handle skylight services with the same care and precision as our roofing projects, ensuring a beautiful, leak-proof result that enhances your home for years to come. Let’s look at the specific reasons why a skylight might be the perfect addition to your space. More Natural Light for a Healthier Home There’s nothing quite like natural sunlight to make a space feel alive. Skylights are masters at this, channeling daylight into the heart of your home. They can illuminate rooms that traditional windows can’t reach, like interior bathrooms, hallways, or kitchens with limited wall space. This flood of natural light makes rooms feel larger, more open, and far more inviting. Beyond the visual appeal, exposure to sunlight has a real impact on our well-being. Studies show it can improve your mood and create a more positive atmosphere throughout your home. It’s a simple way to make your living space a happier and healthier place to be. Improve Ventilation and Air Quality Some rooms just need a little help breathing. Kitchens, bathrooms, and laundry rooms are prime spots for moisture and stale air to build up. A vented skylight is an elegant solution. It allows warm, humid air to rise and escape, pulling fresh air in and creating natural circulation. This process helps reduce humidity, prevent mold and mildew growth, and clear out lingering odors. By improving your home's ventilation, you’re also improving its indoor air quality. It’s a practical way to keep your home feeling fresh and comfortable, especially in rooms that can get a bit stuffy. Save on Energy Bills A skylight can be a smart move for your wallet, too. By brightening your home with natural light, you’ll find yourself flipping on fewer light switches during the day. This simple change can lead to noticeable savings on your electricity bill over time. Modern skylights are also built for performance. With features like double-paned glass, low-E coatings, and proper sealing, they are incredibly energy-efficient. A high-quality, ENERGY STAR certified skylight helps keep your home cooler in the summer and warmer in the winter by preventing heat transfer, which means your HVAC system doesn’t have to work as hard. It’s an investment that pays you back. Add Value to Your Property When it comes to home improvements, you always want to choose projects that add real value. Skylights are a great example. They are a unique and desirable feature that can make your home stand out in the real estate market. The abundance of natural light and the feeling of spaciousness they create are major selling points for potential buyers. A well-placed, professionally installed skylight enhances your home’s aesthetic appeal and signals a well-maintained property. It’s an upgrade that not only improves your daily life but can also provide a solid return on your investment when it’s time to sell. Choose the Right Skylight for Your Home Picking the right skylight is about matching its function to your room’s needs. Do you want to simply brighten a dark hallway or air out a steamy kitchen? Each type offers unique benefits, so let's break down the main options to find the perfect fit for your space. Fixed Skylights Think of fixed skylights as picture windows for your roof. They are sealed units that don’t open, designed for one primary purpose: to let in natural light. This makes them a fantastic choice for areas where you want a bright, airy atmosphere without needing extra ventilation, like living rooms or stairwells. Because they have no moving parts, they are a simple and durable way to illuminate your home. Vented Skylights If you want both light and fresh air, a vented skylight is the way to go. These units open, either manually or automatically, to allow air to circulate. This makes them ideal for rooms that trap moisture and heat, such as kitchens and bathrooms. Opening a vented skylight helps release steam or cooking fumes, improving your home’s air quality. They offer the beauty of a skylight with the practical function of a window. Tubular Skylights What about small, interior spaces where a traditional skylight won’t fit? That’s where tubular skylights, or sun tunnels, come in. These devices use a small dome on the roof to capture sunlight and channel it down through a highly reflective tube. The light shines through a diffuser in the ceiling, looking much like a standard light fixture. They are perfect for brightening up hallways, closets, and laundry rooms. How to Choose Your Skylight So, how do you decide? Start by thinking about the room's purpose. Does it need ventilation, or just light? Next, consider the size of the space and where your roof faces. Finally, think about your home’s design and how the skylight will look. Thinking through these points will help you narrow down your options, but getting some professional guidance ensures you make a choice you’ll love. How Is a Skylight Installed? Putting a skylight in your roof is more than just cutting a hole and dropping in a window. It’s a precise process that involves carpentry, roofing, and waterproofing. When done correctly, a skylight seamlessly integrates with your roof. When done poorly, it can lead to leaks, drafts, and structural damage. Understanding the key steps can help you appreciate the craftsmanship involved and decide whether to tackle it yourself or call in a professional. Let's walk through what a standard installation looks like from start to finish. Plan Your Project and Get Permits Before any tools come out, the first step is careful planning. You need to evaluate your roof’s structure to find the best placement for a skylight, ensuring you avoid rafters, electrical wiring, and plumbing. This initial assessment is key for a successful installation and prevents costly surprises down the road. You’ll also need to check with your local McDonough or county building department for permit requirements. Many municipalities have specific codes for roof alterations to ensure they are safe and structurally sound. Getting this sorted out first saves you major headaches later. Gather Your Tools and Materials A proper skylight installation requires a specific set of tools and materials. Beyond the skylight kit itself, you’ll need a circular saw, power drill, utility knife, and a chalk line for precise cuts. Essential safety equipment, including safety goggles, gloves, and a sturdy ladder, is non-negotiable. For the roofing work, you'll need roofing nails, shingles that match your existing roof, and a hammer. Most importantly, you’ll need the correct flashing kit designed for your specific skylight and roof type. Having everything on hand before you start ensures the process goes smoothly and safely. An Overview of the Installation Steps The installation process begins inside your home, where you’ll mark and cut an opening in the ceiling. From there, the work moves to the roof. A corresponding hole is carefully cut through the roof deck and underlayment. The skylight frame is then set into the opening and secured according to the manufacturer’s instructions. After the unit is in place, new shingles are installed around it to blend with the rest of the roof. The final interior step involves building a light shaft or tunnel and finishing the drywall for a clean, polished look. The Importance of Flashing and Waterproofing This is the most critical part of the entire installation. Flashing is a series of metal pieces layered with the shingles to direct water away from the skylight. If the flashing isn't installed in the correct order and properly sealed, your new skylight is almost guaranteed to leak. This is where professional expertise really shines. An experienced installer understands how to create a watertight seal that stands up to Georgia’s heavy rains and humidity. Proper waterproofing is essential for protecting your home’s interior and the integrity of your roof structure, making our skylight services a reliable choice for a leak-free installation. Should You Hire a Pro or DIY? Deciding to add a skylight is exciting, but the installation is a serious project that directly impacts the integrity of your roof. While tackling home improvement projects yourself can be rewarding, installing a skylight is one of those jobs where the risks often outweigh the satisfaction of doing it yourself. It involves cutting a hole in your roof, which, if not done perfectly, can lead to significant problems down the road. Before you grab your tools, let’s walk through why bringing in a professional is almost always the best choice for your home and your peace of mind. As an Owens Corning Platinum Preferred contractor, we have seen firsthand what can happen when an installation goes wrong. Making the right choice from the start saves you from costly repairs and ensures you can enjoy your new skylight for years to come. Why Hire a Professional Hiring a professional for your skylight installation is about more than just convenience; it’s about ensuring quality and safety. A certified contractor has the specific expertise to make sure your skylight is sealed perfectly against the elements, which is the most critical factor in preventing leaks. They are also up-to-date on local building codes and safety standards, protecting you from potential liabilities. Plus, many manufacturers require professional installation to keep the product’s warranty valid. As skylight maker VELUX notes, professional installation is essential to ensure your skylight doesn't leak and meets all necessary safety requirements. A pro handles everything, from proper placement to flawless waterproofing, giving you a beautiful, worry-free result. The Risks of a DIY Installation The idea of saving money with a DIY installation is tempting, but it comes with major risks. A skylight isn't like a simple light fixture; it requires advanced skills in both roofing and carpentry. One of the biggest dangers is improper sealing, which can lead to persistent roof leaks and serious water damage inside your home. As one industry expert points out, homeowners often skip critical installation steps that can cause these exact issues. Cutting a new opening in your roof structure must be done precisely to avoid compromising its strength. Without the right experience and tools, you could end up with a much bigger, more expensive problem than you started with, turning your dream home improvement project into a costly mistake. When to Always Call a Pro There are certain situations where calling a professional is non-negotiable. First and foremost is the warranty. If a skylight isn't installed correctly by a certified installer, you could void the manufacturer's warranty, leaving you completely unprotected if a defect appears later. Waterproofing is another major challenge that makes professional expertise invaluable. Even a tiny gap can allow water to seep in over time. If you’re not 100% confident in your ability to create a permanent, watertight seal, it’s time to call for help. Working with an experienced team like Total Roof Solutions ensures the job is done right, protecting your investment and your home. Common Installation Challenges to Know Installing a skylight is more than just cutting a hole in your roof and dropping in a window. It’s a precise project that involves carpentry, roofing, and waterproofing. Even a small mistake can lead to big problems like persistent leaks, drafts, or even structural damage. Knowing the common challenges ahead of time can help you understand what it takes to get the job done right, whether you’re a seasoned DIYer or looking to hire a professional. A successful installation means you can enjoy all the benefits of your new skylight without any of the headaches. When you work with an experienced team, you can be confident that your project is handled correctly from the start. Our skylight services are designed to address these challenges head-on, ensuring a beautiful and leak-proof result that lasts for years. We manage every detail, from structural assessments to perfect waterproofing, so you can simply enjoy the view. The Need for Advanced Skills and Safety Putting in a skylight requires a specific blend of skills. You’re not just working with shingles; you’re altering the structure of your roof. This calls for advanced knowledge in both roofing and carpentry to cut the opening correctly and frame it securely without compromising your roof’s integrity. Safety is another major factor. Working at heights with power tools is inherently risky, and a professional team is trained and equipped to handle the job safely. If you don’t have deep experience in these areas, it’s often best to leave this project to the experts. Understand Your Warranty and Insurance Your new skylight comes with a manufacturer’s warranty, but it often depends on proper installation. If a skylight is installed incorrectly and fails, the manufacturer may not cover the damage, leaving you with the bill for repairs or a full replacement. Hiring a certified contractor ensures the installation meets the manufacturer’s exact specifications, keeping your warranty intact. As an Owens Corning Platinum Preferred contractor , we follow the highest industry standards, giving you peace of mind that your investment is protected from day one. Getting the Flashing Right Flashing is the secret to a leak-proof skylight. This system of metal and waterproof materials directs water away from the skylight and down your roof. Installing it correctly is a detailed process where the order of operations matters immensely. For example, the metal pieces must be layered precisely with the shingles, and the pan piece of the flashing needs to sit under the rubber gasket to create a perfect seal. A small gap must also be left between the shingles and the skylight to allow for proper drainage. These small details make all the difference in protecting your home from water damage. How to Maintain Your New Skylight Your new skylight is a fantastic addition, bringing in light and opening up your space. To make sure it stays that way for years to come, a little bit of regular maintenance is all you need. Think of it as simple upkeep that protects your investment and prevents small issues from turning into bigger headaches. By staying on top of a few key tasks, you can ensure your skylight remains a beautiful, leak-free feature of your home. These straightforward steps will help you keep everything clean, clear, and working perfectly. Simple Cleaning and Inspection Keeping your skylight looking its best is easy. For the glass, just use a soft cloth and a mild, non-abrasive cleaner or even just clean water. It’s important to avoid harsh chemicals or scrub brushes that could scratch the surface. While you’re cleaning, take a moment to inspect the seals and frame for any signs of wear or cracking. If your skylight has a natural wood frame, plan to clean and recoat it every couple of years to protect it from moisture and keep the wood in great shape. A quick check-in twice a year is usually enough to catch any potential issues early. Your Seasonal Maintenance Checklist A little seasonal care goes a long way in keeping your skylight in top condition. As the seasons change, make it a habit to clear away any leaves, branches, or debris from the roof area around your skylight. This is also the perfect time to ensure your gutters are clean and flowing freely, which helps prevent water from backing up onto the roof. Inside, you can prevent condensation by making sure your home is well-ventilated. Opening windows for a few minutes each day helps manage humidity levels and keeps the air fresh, protecting both your skylight and your home. How to Prevent and Spot Leaks Early Leaks are the biggest concern for any skylight owner, but they are almost always preventable. The key is to know what to look for. Keep an eye out for any water stains on the ceiling or walls around the skylight, condensation forming between the glass panes, or any visible cracks in the frame or seals. Catching these signs early is critical. If you notice anything that doesn’t look right, it’s best to address it immediately. A professional inspection can diagnose the problem and provide a solution before it leads to more significant damage to your residential roofing system. Ready to Start Your Skylight Project? Feeling ready to bring more natural light into your space is an exciting step. To make sure your project is a success from start to finish, it’s helpful to have a clear plan. Whether you’re replacing an old unit or installing a brand new one, focusing on quality and craftsmanship will ensure you can enjoy your skylight for years to come. The single most important decision you’ll make is choosing the right installer. While a DIY approach might seem tempting, skylight installation requires precision to prevent leaks and structural issues. A professional team not only handles the complexities of cutting into your roof but also ensures the final product is perfectly sealed and weatherproof. Working with an experienced contractor like Total Roof Solutions means your skylight services are backed by deep expertise and a commitment to quality. Professionals manage the entire process, from helping you select the right skylight to securing permits and guaranteeing the installation meets local building codes. When you partner with a qualified team, you can also address common concerns upfront. During a consultation, you can discuss worries about potential leaks, heat gain in the summer, or how to control the amount of light. An expert can guide you to the best products with features like UV-blocking coatings, built-in blinds, and advanced flashing systems. They will provide a clear quote and walk you through what to expect on installation day, giving you peace of mind that your home is in good hands. Related Articles Installing skylights on your roof | Total Roof Solutions, GA What Are the Different Types of Skylights? Total Roof Solutions Seamless Gutter Installation Cost Guide: Pricing Insights for Homeowners CONTACT US Frequently Asked Questions Are skylights really prone to leaking? This is the number one concern for most people, and it’s a valid one. In the past, older skylights earned a bad reputation for leaks. However, modern skylights are engineered with advanced designs and materials to prevent water intrusion. The real key to a leak-free skylight isn't just the product itself, but the quality of the installation. When a certified professional installs the unit with a proper flashing kit, creating a watertight seal, the risk of leaks is virtually eliminated. Will a skylight make my room too hot in the summer or too cold in the winter? Not if you choose the right one. Today’s skylights are incredibly energy-efficient. Look for models with features like double-paned glass, argon gas fills, and special low-emissivity (Low-E) coatings. These technologies are designed to block UV rays and prevent heat transfer, so your room stays comfortable year-round without putting extra strain on your HVAC system. Some models even come with built-in blinds for extra light control. How long does a typical skylight installation take? For a straightforward installation by a professional crew, the process usually takes one to two days. The first day often involves preparing the interior, cutting the openings in the ceiling and roof, and setting the skylight. The second day is typically for finishing the interior work, like drywall and painting the light shaft. The exact timeline can vary depending on the complexity of your roof and the type of skylight you choose. Can I add a skylight to an existing roof? Absolutely. Skylights can be installed on most existing roofs, a process known as retrofitting. A professional installer will first assess your roof's structure to find the ideal placement, making sure to work around rafters and any wiring or plumbing. They will then carefully integrate the skylight with your current roofing material, whether you have asphalt shingles, metal, or another type of roof. What kind of maintenance does a skylight require? Skylights are surprisingly low-maintenance. The main task is to keep the glass clean so you can enjoy a clear view. You should also periodically check to make sure the area around the skylight on your roof is free of leaves and debris. A quick inspection of the interior seals once or twice a year is also a good idea to catch any potential issues before they become problems.
By Stephen Griswell February 24, 2026
A new vinyl siding installation can completely transform your home’s appearance, but a few common mistakes can turn that dream into a costly headache. Issues like buckling, warping, and moisture leaks are almost always traced back to small errors made during the installation process. The good news is that these problems are entirely preventable when you know what to look for. This guide is designed to be your roadmap to a flawless finish. We’ll cover the critical details that separate a professional job from a DIY disaster, from proper nailing techniques to sealing windows and doors correctly for a truly weather-tight result. CONTACT US Key Takeaways Let your siding breathe : Vinyl siding expands and contracts with temperature changes, so proper installation is key. Always leave a small gap between the nail head and the panel and where siding meets trim to allow for natural movement and prevent buckling. A great finish requires a solid start : Before installing new siding, it's crucial to prepare your home's exterior. This means removing the old material, inspecting the sheathing for damage, and installing a water-resistive barrier to protect your home from moisture. Master the details for a watertight seal : The areas around windows, doors, and corners are most vulnerable to leaks. Correctly installing flashing and trim pieces is essential for creating a complete protective system that directs water away from your home's structure. Why Choose Vinyl Siding for Your Home? Choosing the right siding for your home is a big deal. It defines your home’s curb appeal, protects it from the elements, and can even impact your energy bills. With so many options out there, it’s easy to feel overwhelmed. But there’s a reason vinyl siding remains one of the most popular choices for homeowners. It offers a fantastic blend of durability, low maintenance, and style, making it a smart investment for almost any home. Let’s look at what makes it such a great option. It's Durable and Weather-Resistant Here in Georgia, our homes face everything from intense summer sun and humidity to heavy rain and wind. You need a material that can handle it all without breaking a sweat. Vinyl siding is known for its durability and resistance to harsh weather. Unlike wood, it won’t rot, warp, or splinter when exposed to moisture, and it’s resistant to pests like termites. This means you can count on it to protect your home and look great for years to come, with far fewer worries about weather-related damage. It’s a long-lasting option that provides peace of mind through every season. It's Easy to Maintain Let’s be honest, most of us would rather spend our weekends doing anything other than exterior home maintenance. One of the biggest draws of vinyl siding is that it’s incredibly low-maintenance. Forget about the constant cycle of scraping, sanding, and repainting that comes with wood siding. To keep vinyl looking fresh, it just needs to be cleaned about once a year with mild soap and water. A simple wash with a soft cloth or sponge is usually all it takes to remove any dirt or grime. This saves you a significant amount of time, effort, and money over the life of your siding. It Can Improve Energy Efficiency Your home’s siding can play a surprising role in your energy consumption. When installed correctly, vinyl siding adds a layer of insulation to your home’s exterior. This helps your house stay warmer in the winter and cooler in the summer, taking some of the strain off your HVAC system. Proper installation is key to creating this protective thermal barrier, which can lead to more comfortable indoor temperatures and lower energy bills throughout the year. It’s a practical benefit that pays you back every month, making your home more efficient. It Offers Versatile Style Options Your home should reflect your personal style, and your siding is the perfect canvas. Vinyl siding comes in a huge variety of colors, styles, and textures, giving you the freedom to create the exact look you want. Whether your home’s architecture is traditional or modern, there’s a vinyl option to match. You can choose from classic horizontal panels, sleek vertical boards, or even styles that convincingly mimic the look of natural wood grain or stone. This versatility allows you to update your home’s appearance and significantly enhance its curb appeal without compromising on performance. Gather Your Tools and Materials Before you even think about hanging the first panel, it’s time to get organized. A successful siding project is all about preparation. Taking the time to gather every tool and piece of material you need will save you from frustrating mid-project runs to the hardware store. Think of it as setting up your workshop for success. When everything is within arm's reach, the entire installation process feels less like a chore and more like a satisfying home transformation. A little planning now will make the actual work go much more smoothly, ensuring you get the clean, professional results you’re looking for. Essential Tools for the Job You’ll need a few key tools to get this job done right. Start with the basics: sturdy ladders or scaffolding, a measuring tape, a level, and a chalk line for creating straight guidelines. For cutting and fitting the panels, you’ll want a fine-toothed saw and a utility knife. A hammer is essential for fastening, but use it correctly to avoid damaging the siding. You may also need specialty items like a snap-lock punch and a zip tool. Having the right equipment is the first step toward a beautiful, long-lasting siding installation. Siding Materials and Components Vinyl siding is more than just the panels; it’s a complete system designed to protect your home. Your wall sheathing, typically plywood or OSB, provides the base. Never install siding directly onto wall studs. Over the sheathing, you must install a water-resistive barrier, or housewrap, to keep moisture out. The system starts with a starter strip at the bottom, followed by the siding panels, J-channels around windows and doors, and corner posts. Finally, flashing and caulk seal any remaining gaps. Understanding how these exterior components work together is crucial for a weatherproof finish. Don't Forget Safety Gear Working on your home’s exterior comes with risks, so don’t overlook safety. At a minimum, always wear safety goggles to protect your eyes from flying debris, dust, and stray nails. A good pair of work gloves will save your hands from sharp edges and splinters. Since you’ll be working on a ladder, wear sturdy, closed-toe shoes with good grip to prevent slips and falls. This project is about improving your home, and that includes staying safe while doing it. A commitment to safety is a hallmark of any trusted contractor , and it should be your top priority. Prep Your Home for New Siding Before you can get to the exciting part of seeing your new siding go up, there’s some important prep work to do. Think of it like painting a room; you wouldn’t just start rolling paint over dusty, cracked walls. The same principle applies here. A successful siding project depends on a solid, well-prepared foundation. Taking the time to get your home ready ensures your new siding will not only look fantastic but will also protect your home effectively for years to come. Let's walk through the essential steps to prep your home for its new look. Assess Your Current Exterior First, take a good, hard look at your home's exterior. Your goal is to create a smooth, solid canvas for the new siding. Walk around your house and check for any issues with the walls. Are there any loose boards or signs of rot that need to be replaced? The surface needs to be as flat and level as possible. You’ll also need to temporarily remove any obstructions. This includes things like gutters , downspouts, light fixtures, mailboxes, and house numbers. Getting these items out of the way now will make the installation process much smoother and lead to a cleaner, more professional finish. Remove Old Siding and Debris While it might seem easier to install new vinyl siding over your old siding, it’s almost always better to remove the existing material first. Taking off the old siding allows you to inspect the sheathing underneath for hidden damage or moisture issues that need to be addressed. It also ensures your new siding will fit snugly and securely, especially around windows and doors, creating a proper seal against the elements. This step is crucial for preventing future problems and is a standard part of professional exterior renovations. Clearing away the old material gives you a fresh start and a much more reliable result. Install the Substrate and House Wrap With the old siding gone, the next step is to protect your home’s structure with a water-resistive barrier, commonly known as a house wrap. This material is installed over the exterior sheathing, creating a protective layer that stops water from getting into your walls while still allowing moisture vapor to escape. Think of it as a raincoat for your house. This barrier is absolutely essential for preventing rot, mold, and water damage down the line. Proper installation of the house wrap is a critical part of a durable, long-lasting siding system that will keep your home safe and dry for decades. Make Sure Your Walls Are Flat Vinyl siding is flexible, which means it will conform to whatever surface it’s installed on. If your walls are wavy or uneven, your new siding will be too. That’s why ensuring a flat surface is so important for a clean, professional look. Siding should be installed over a continuous, solid substrate like plywood or oriented strand board (OSB), not directly onto the wall studs. If your home has uneven surfaces, your contractor may need to install furring strips to create a level plane. This step guarantees that your siding panels will hang straight and lock together properly, giving you that beautiful, seamless finish you’re looking for. Your Step-by-Step Installation Guide Once your home is prepped, it’s time to start the installation. Getting these first few steps right is crucial for a professional-looking finish that lasts. Think of it like building a foundation; every other piece relies on the proper placement of the first few. We’ll walk through the core process, from setting your first strip to nailing the last panel. Install Starter Strips and Corner Posts The starter strip is the most important piece of your entire siding project. It guides every panel that follows, so it has to be perfectly level. To get it right, find the lowest corner of the wall you’re working on and measure up. Attach a chalk line, pull it tight to the next corner, and use a level to ensure it’s straight before securing it. Before you install the corner posts, you’ll also want to flash the inside and outside corners with a water-resistive barrier. This extra layer of protection is a non-negotiable step for preventing moisture from getting behind your siding and causing problems down the road. It's a critical part of any professional residential exterior project. Measure and Cut Your Panels The old saying "measure twice, cut once" definitely applies here. To figure out how much siding you need, break down your walls into simple shapes like rectangles and triangles, measuring each one. Don't forget to account for the space around windows and doors to minimize waste. When it’s time to cut, here’s a pro tip: for a clean, smooth edge, use a fine-toothed plywood blade installed backward in your circular saw. This technique is especially helpful in colder weather when vinyl can be more brittle. Take your time and cut slowly for the best results. Precision and patience are what separate an amateur job from the detailed craftsmanship you should expect from an experienced team . Use Proper Nailing Techniques How you fasten the siding is just as important as how you cut it. Vinyl siding is designed to expand and contract with temperature changes, so you can’t nail it down tightly. Drive your nails into the center of the nailing slots, leaving a small gap—about the thickness of a dime—between the nail head and the siding. If you fasten it too tightly, the panels will buckle and warp when the weather changes. Make sure you’re using the right fasteners, too. Corrosion-resistant nails with a head at least 5/16-inch wide are best. This technique is fundamental to both residential and commercial siding jobs and ensures the final product is durable and looks great for years. Work from the Bottom Up Always start installing your siding panels at the bottom of the wall and work your way up. Each panel is designed to lock into the one below it and overlap slightly, creating a weather-tight seal. This system works just like the shingles on a roof, shedding water down and away from your home’s structure. If you were to install siding from the top down, water could easily get trapped behind the panels, leading to rot, mold, and serious structural damage. Proper installation ensures your home’s exterior works as a complete system, with siding and gutters working together to direct water safely away from your foundation. Work Around Corners, Windows, and Trim Once you get into a rhythm with the main walls, you’ll find that installing siding goes pretty quickly. The real test of a great installation, however, comes down to the details. Working around corners, windows, and doors requires precision and patience. These are the areas most vulnerable to water intrusion, so taking your time here is essential for a professional, weather-tight finish. Getting these trim pieces right not only makes your home look sharp but also protects the structure underneath from moisture damage for years to come. Install Corner Trim and J-Channels Corner posts and J-channels are the framework for your siding panels. Before you install any corner posts, make sure you flash both inside and outside corners with a water-resistive barrier that extends at least 10 inches on each side. When you place the corner post, leave a 1/4-inch gap at the top where it meets the soffit. Place your first nail at the very top of the upper nail slot on both sides, letting the post hang from these two nails. All other nails should go in the center of their slots, spaced about 8 to 12 inches apart. Remember to leave a tiny (1/32-inch) gap between the nail head and the vinyl to allow for movement. Fit Siding Around Windows and Doors Here’s a critical point to remember: your siding sheds water, but it isn’t the primary waterproofing layer. The real protection for your home comes from what’s underneath. Before a single panel goes up, you must ensure your house wrap is properly installed and that all windows and doors are sealed with flashing tape and caulk. This barrier is what truly keeps water out. If you’re unsure about the integrity of your existing seals, it’s worth addressing them first. Properly installed windows and doors are fundamental to a dry and secure home exterior, creating the perfect base for your new siding. Add the Finishing Touches As you work your way up a wall, the final piece of siding will need to be cut to fit and secured with a utility trim piece at the top. One common mistake is to seal the ends of the siding panels with caulk. You want to avoid this, as the siding needs to "breathe" and allow any moisture that gets behind it to escape. Also, be sure to use the right fasteners. Galvanized roofing nails or rust-proof screws will prevent unsightly rust streaks from running down your beautiful new siding. These final steps ensure your project looks clean and performs well, but if you run into any trouble, our expert siding installation services are always here to help. Account for Expansion and Contraction One of the most important things to understand about vinyl siding is that it’s a dynamic material. Unlike wood or brick, vinyl physically changes size with the temperature, expanding in the heat and contracting in the cold. This isn't a flaw; it's just the nature of the material. A successful installation is all about accounting for this movement. If you don't give the siding room to breathe, you’ll end up with wavy, buckled, or warped panels down the road. Getting this part right is what separates a professional-looking job from a DIY disaster. It requires precision and an understanding of how the material behaves in different conditions. Every cut, every nail, and every overlap must be done with expansion and contraction in mind. This attention to detail ensures your siding not only looks great on day one but continues to perform beautifully for years, protecting your home through every season. How Vinyl Responds to Temperature Think of vinyl siding panels as living things that react to the weather. When the sun beats down on a hot summer day, the panels get slightly longer. On a frigid winter night, they shrink and become a bit shorter. This movement can be significant, with a single 12-foot panel changing in length by as much as half an inch or more throughout the year. Your installation strategy must accommodate this constant, subtle shifting to prevent stress on the panels and fasteners. This is a key part of the detailed craftsmanship that ensures a long-lasting exterior. Overlap Panels Correctly To manage the change in length, horizontal siding panels are designed to overlap. This creates a seamless look while allowing the panels to slide past each other as they expand and contract. The key is getting the amount of overlap just right. For standard panels, you’ll want to overlap the factory notches by about 1 to 1-1/4 inches. The exact measurement depends on the temperature during installation. Colder weather means the panels are contracted, so you’ll need a slightly larger overlap to accommodate for summer expansion. This detail is crucial for a smooth, uniform appearance that lasts. Leave Room for Movement Besides overlapping, you also need to leave a small gap wherever a panel meets a piece of trim, like a corner post or a J-channel around a window. This space gives the ends of the panel room to move. A good rule of thumb is to leave a 1/4-inch gap if you’re installing in temperatures above 40°F. If it’s colder, increase that gap to 3/8-inch. Finally, don’t nail the siding down tight. The fasteners should be centered in the nailing slots and left about 1/32-inch loose (roughly the thickness of a dime). This allows the panel to hang freely and move side-to-side without buckling. Avoid These Common Installation Mistakes Even with the best tools and materials, a few small mistakes can turn your beautiful new siding into a future headache. Getting the details right is what separates a professional-looking job from one that might cause problems down the road. Let’s walk through some of the most common installation slip-ups and, more importantly, how you can steer clear of them. Paying attention to these points will ensure your siding not only looks great but also protects your home effectively for years to come. These are the kinds of details that professional exterior renovations focus on to guarantee a lasting finish. Nailing and Fastening Errors One of the most frequent mistakes is improper nailing. Vinyl siding needs to move; it expands in the heat and contracts in the cold. If you hammer the nails in too tightly, you restrict this movement, which can cause the panels to buckle, warp, or crack. To avoid this, drive your nails into the center of the nailing slot, not at the ends. Leave a small gap, about the thickness of a dime, between the nail head and the siding panel. This gives the siding the room it needs to shift naturally with temperature changes, keeping it flat and secure against your wall without causing stress. Poor Waterproofing and Sealing Your siding is your home's first line of defense against the elements, but it isn't completely waterproof on its own. A critical mistake is failing to install a proper weather-resistive barrier, or house wrap, underneath. This barrier is your home's true raincoat, preventing any moisture that gets behind the siding from reaching the sheathing and causing rot or mold. You also need to install flashing correctly around all windows, doors, and other openings. Skipping this step can lead to serious water damage that is expensive to repair. Proper waterproofing is a core principle of protecting any home, whether it's siding or residential roofing. Installing in the Wrong Direction This might sound basic, but it happens. Always install siding from the bottom of the wall and work your way up. Think of it like the shingles on a roof; each new piece should overlap the one below it. This design uses gravity to its advantage, ensuring that rainwater runs down and away from your house. If you start from the top and work down, you create a series of ledges that can catch and trap water, funneling it behind the panels and against your home’s structure. Following the correct bottom-up process is a fundamental technique that experienced installers from our team never overlook. Using the Wrong Caulk or Materials Not all caulk is created equal, and using the wrong kind can lead to failed seals. A common error is using silicone-based caulk with vinyl siding. While great for bathrooms, most silicones don't adhere well to vinyl and will eventually peel away, leaving gaps for moisture and pests to enter. Instead, you should choose the right caulk for the job, which is typically a flexible, paintable sealant like a urethane or butyl-based product designed for exterior use with vinyl. Taking a moment to read the label and select the correct material is a small step that makes a huge difference in the longevity and effectiveness of your siding installation. Know When to Call a Professional Tackling a home improvement project yourself is incredibly rewarding, but there’s also wisdom in knowing when to tag in an expert. While many siding jobs are manageable, some situations can quickly become complicated. If you’re facing a particularly tricky installation or just want the peace of mind that comes with a professional touch, it might be time to make a call. Let’s look at a couple of scenarios where hiring a pro is the smartest move for your home and your sanity. For Complex Installation Jobs Putting new vinyl siding over old wood siding, for example, is a much bigger project than it sounds. It takes a lot of time and precision, and if you're new to this, it can be a real challenge. Many pros recommend removing the old siding first. This extra step makes it much easier to properly seal the house and get a clean, tight fit around windows and doors. Since the main job of siding is to protect your home from water damage, getting that seal right is non-negotiable. For these more involved exterior renovations , bringing in someone with experience can save you major headaches down the road. The Benefits of Expertise and Warranties Beyond just handling the tough stuff, a professional contractor brings a lot to the table. They have the right tools and can often get materials at a better price, but the real value is in their expertise. A certified installer knows the local building codes and understands exactly how to install siding to protect your home and keep your manufacturer’s warranty valid. A flawless installation isn't just about looks; it's about ensuring your home is protected for years to come. When you work with a team that has decades of experience , you’re not just getting new siding, you’re getting confidence that the job was done right. Maintain Your New Vinyl Siding Once your beautiful new vinyl siding is up, a little bit of care is all it takes to keep it looking fresh for years. One of the biggest draws of vinyl is how low-maintenance it is, but that doesn't mean you can forget about it completely. A simple annual routine will protect your investment, maintain your home's curb appeal, and stop small issues from turning into bigger, more expensive problems. Think of it as a quick check-up for your home's exterior. By staying on top of cleaning and inspections, you ensure your siding performs exactly as it should, protecting your home from the elements while looking fantastic. This proactive approach not only preserves the material's lifespan but also gives you peace of mind, knowing your home is well-protected and continues to be a source of pride in your neighborhood. It's a small effort that pays off big in the long run, preventing the buildup of grime that can dull the color and ensuring the structural integrity of the installation remains sound. Taking these simple steps helps you get the most value out of your home improvement project. Clean and Inspect It Regularly Giving your siding a good wash at least once a year is the easiest way to keep it looking brand new. Over time, dirt, pollen, and grime can build up, but a simple cleaning solution is usually all you need. Just mix some mild soap or a vinyl-safe cleaner with water and use a soft-bristle brush to gently scrub the surface. Start from the bottom and work your way up to avoid streaks, then rinse thoroughly with a garden hose. While you're cleaning, take the opportunity to give your exterior renovations a quick inspection. Look for any panels that seem loose, cracked, or warped so you can address them right away. Handle Minor Repairs and Damage Vinyl is incredibly tough, but it’s not indestructible. Stray baseballs, harsh weather, or even overgrown landscaping can sometimes cause damage. A great preventative step is to keep trees and shrubs trimmed back from your house. This prevents branches from scratching the panels during high winds and discourages pests from making a home behind your siding. If you do spot a small crack or a loose panel, it’s important to get it fixed promptly to keep moisture out. While some minor fixes can be a DIY project, calling a professional ensures the repair is seamless and properly sealed, protecting the integrity of your entire siding system. Tips for Long-Term Care A few simple habits will go a long way in preserving your vinyl siding. If you decide to use a pressure washer for cleaning, be very careful. Use a low-pressure setting and keep the nozzle pointed straight at the siding, not at an upward angle, to avoid forcing water behind the panels. It’s also smart to keep heat sources, like barbecue grills, a safe distance away from the siding to prevent melting or warping. By taking these small precautions, you can count on your siding to look great and perform well for decades. When you work with an experienced team like Total Roof Solutions , you get durable materials and craftsmanship you can trust. Related Articles Which type of home siding do I need? | Total Roof Solutions ATL, GA What are seamless gutters for my home? | Total Roof Solutions How to choose the proper roof vents for your home | Total Roof Solutions PVC Roofing vs. TPO Roofing | Total Roof Solutions CONTACT US Frequently Asked Questions How long can I expect new vinyl siding to last? High-quality vinyl siding is built to be incredibly durable, often lasting for several decades. With proper installation and some simple, regular maintenance like annual cleaning, you can expect it to protect your home and look great for 20 to 40 years, and sometimes even longer. The key is starting with a quality product and ensuring it's installed correctly to handle Georgia's weather. Can I paint my vinyl siding if I want a new color later on? Yes, you can paint vinyl siding, but it requires the right preparation and specific type of paint. You'll need to use a "vinyl-safe" acrylic paint that is formulated to accommodate the siding's expansion and contraction. It's also crucial that the siding is thoroughly cleaned before painting. Keep in mind that painting does add a maintenance step that unpainted vinyl doesn't require. Is it a bad idea to install siding myself to save money? While a DIY installation can seem like a good way to cut costs, it comes with significant risks. The most common issues we see are improper nailing and poor waterproofing around windows and doors, which can lead to buckling panels and serious water damage. A professional installation not only ensures the job is done right but also protects your manufacturer's warranty, giving you peace of mind that your investment is secure. What's the single most important thing to get right during installation? The most critical detail is accounting for expansion and contraction. Vinyl siding needs room to move with temperature changes. This means you must not nail the panels down tightly; instead, leave a small gap between the nail head and the vinyl. Forgetting this step is the number one cause of warped, wavy, and damaged siding. How often should I clean my siding, and is pressure washing safe? A gentle cleaning once a year is usually enough to keep your siding looking its best. A soft brush with mild soap and water is all you need to remove most dirt and grime. You can use a pressure washer, but you have to be careful. Use a low-pressure setting, a wide-angle spray tip, and keep the stream level with the siding, never pointing it upward, to avoid forcing water behind the panels.
By Stephen Griswell February 23, 2026
A water stain on the ceiling is more than just an eyesore; it’s a sign of a problem that immediately brings financial questions to mind. How serious is it? Can I fix it myself? How much will a professional charge? The cost of a skylight leak repair can vary widely depending on the cause, the extent of the damage, and the type of skylight you have. This guide is designed to give you a clear picture of the potential costs involved, breaking down the factors that influence the price and helping you weigh the pros and cons of repairing versus replacing your unit. CONTACT US Key Takeaways Pinpoint the Problem's Origin : Most skylight leaks stem from a few common issues, such as damaged flashing, failing seals, or debris that blocks proper drainage. Look for tell-tale signs like water stains or musty smells to understand the root cause before attempting a fix. Distinguish DIY Fixes from Pro Jobs : While you can handle minor tasks like clearing debris or applying new sealant, always prioritize your safety. Persistent leaks, cracked glass, or signs of structural damage are clear indicators that it's time to call an experienced professional. Prioritize Proactive Maintenance : You can avoid future leaks with a little routine care. Make it a habit to inspect your skylight twice a year, clear away any collected leaves or branches, and check the seals to address small problems before they turn into costly repairs. What's Causing Your Skylight to Leak? Finding a puddle on your floor or a water stain on your ceiling is never a welcome sight. When the source is your skylight, it can feel especially frustrating. Skylights are meant to bring in natural light, not rainwater. The good news is that most leaks come from a handful of common issues. Understanding what’s causing the problem is the first step toward a lasting fix. From the initial installation to everyday wear and tear, several factors can compromise your skylight and the integrity of your residential roofing system. Let's walk through the most frequent culprits so you can pinpoint what’s happening with yours. Faulty Installation Unfortunately, improper installation is one of the leading causes of skylight leaks. If a skylight isn't fitted, sealed, and integrated into the roof deck correctly from the start, it creates immediate vulnerabilities. The leak might show up after the first big storm or take a few years to appear, but the root cause is the same. This is why working with an experienced and certified team is so important. A professional ensures every component is perfectly aligned and sealed, giving you peace of mind that the job was done right. Our team at Total Roof Solutions has the credentials and experience to guarantee a secure, leak-free skylight installation. Damaged Flashing Flashing is a thin layer of metal installed around your skylight to create a waterproof barrier. Its job is to direct water down and away from the skylight and into the gutters . Over time, this flashing can be damaged by severe weather, lift due to temperature changes, or corrode. When the flashing is bent, loose, or has gaps, it creates a direct path for water to seep under your shingles and into your home. A thorough inspection can reveal if the flashing is the source of your leak, which often requires professional repair to ensure it’s properly sealed again. Cracked Glass While it may seem obvious, a crack in the skylight pane itself is a common reason for leaks. Hail is a frequent offender, but falling tree branches or other debris can also cause damage. Sometimes, the crack can be a hairline fracture that’s difficult to spot from the ground, yet it’s large enough to let water in during a downpour. If you suspect an impact has damaged your skylight, it’s best to have it inspected closely. A cracked pane almost always requires a replacement to restore its watertight seal and structural integrity. Worn-Out Seals Just like the weatherstripping around a door or window, your skylight has seals that prevent water and air from getting in. These seals are constantly exposed to the elements, from intense sun and heat to freezing temperatures. Over the years, this exposure can cause the sealant to dry out, become brittle, and crack. As the seals degrade, they pull away from the frame and the glass, creating small gaps where water can easily penetrate. Resealing a skylight is a common repair that can often solve a persistent leak without needing to replace the entire unit. Debris and Poor Drainage Your roof is designed to shed water efficiently, but sometimes debris can get in the way. Leaves, pine needles, and dirt can accumulate around the top and sides of your skylight, especially on lower-pitched roofs. This buildup acts like a dam, trapping water and preventing it from draining properly. When water pools around the skylight, it has more time to find tiny cracks and weak points in the seals or flashing. Keeping the area around your skylight clear is a simple but effective way to prevent this. It’s also a good idea to ensure your gutters are clean, as proper roof drainage is key to preventing water issues. Signs of a Leaking Skylight A leaking skylight can start subtly, but catching it early is the key to preventing bigger, more expensive problems down the road. Water damage can compromise your home’s structure, ruin drywall, and lead to mold growth. Knowing what to look for helps you act fast. Pay close attention to the area around your skylight, especially after heavy rain, and keep an eye out for these common warning signs. If you spot any of them, it’s time to investigate further. Visible Water Stains This is often the most obvious sign of a leak. You might notice yellowish or brown discolored spots on the ceiling or walls surrounding your skylight. These stains are created as water seeps through your roof and into the drywall. They can be small at first but will grow larger and darker over time with continued water exposure. Don't just paint over them and hope for the best. A water stain is a clear signal that moisture is getting in where it shouldn't, and our professional skylight services can pinpoint the source of the leak and fix it correctly. Musty Smells or Mold Sometimes you can smell a leak before you can see it. A persistent musty or moldy odor near your skylight is a major red flag. This smell indicates that water has been present long enough for mold or mildew to begin growing, often hidden within your ceiling or wall cavities. Mold not only causes structural damage but can also affect your home's air quality and your family's health. If you notice an earthy, damp smell that you can’t trace to another source, it’s a good idea to have your skylight and roof inspected for hidden moisture. Condensation Between Panes A little condensation on the inside of your skylight during a cold morning isn't unusual. However, if you see fog, moisture, or water droplets trapped between the two panes of glass, you have a problem. This means the seal that creates an airtight space between the panes has failed. A broken seal compromises your skylight's insulating properties, leading to energy loss and creating a pathway for water to eventually find its way inside your home. This is a sign that your skylight is failing and likely needs repair or replacement. Damp Drywall Even without visible stains, the drywall around your skylight can tell you if there’s a leak. Gently press on the ceiling or wall area near the skylight. If it feels soft, spongy, or cool to the touch, it’s likely absorbing moisture. Damp drywall is a serious issue because it means water is saturating the material from the inside out. Over time, this will weaken the structure, cause the paint to bubble or peel, and eventually lead to more significant damage. Addressing dampness early can save you from a much larger residential roofing repair project . Should You Fix a Leaking Skylight Yourself? When you spot a leak, your first instinct might be to handle it yourself. A DIY approach can seem like a quick and cost-effective solution, and for very minor issues, it might be. However, skylight repair involves working on your roof, which comes with its own set of challenges and risks. Before you pull out the ladder, it’s important to honestly assess the scope of the problem, your own skill level, and whether a DIY fix is the safest and most effective option. Making the wrong call could lead to a bigger mess or, worse, a serious injury. Prioritize Your Safety Working on a roof is dangerous, even for seasoned professionals. Your safety should always be your top priority. Before you even think about climbing up there, remember that falls are a major risk. Never sit, step, or walk directly on a skylight; the glass and frame are not designed to support your weight and can easily break. Always use a sturdy, properly secured ladder and wear slip-resistant shoes. If you feel at all unsteady or uncomfortable with heights, it’s best to leave the job to a professional. Your well-being is far more valuable than any potential savings from a DIY repair. Gather Your Tools and Materials A successful repair depends on having the right equipment. For a simple fix, you’ll likely need a utility knife to remove old sealant, a caulk gun, and a tube of high-quality, waterproof silicone sealant appropriate for outdoor use. You’ll also want a wire brush for cleaning debris, a bucket, and some rags. Make sure you have all your materials ready before you head up to the roof to avoid multiple trips up and down the ladder. If the job requires more than these basic tools, it might be a sign that the problem is more complex than you initially thought. When to DIY a Skylight Repair You can tackle some minor skylight issues on your own if you feel confident and have the right tools. Small fixes, like clearing away leaves and debris from the flashing or applying a fresh layer of sealant around the edges, are often manageable. If you notice the weatherstripping around the glass is old and brittle, replacing it can also be a straightforward DIY task. These simple maintenance steps can often stop a small leak in its tracks. However, if you see any signs of widespread water damage, cracked glass, or damaged flashing, it’s time to put the tools down and call for help. Avoid These Common DIY Mistakes One of the biggest pitfalls of DIY repair is accidentally creating a bigger problem. Applying sealant over a dirty or wet surface, for example, won't create a proper bond and will fail quickly. A common mistake is simply patching over the visible issue without identifying the root cause. This might stop the drip for a little while, but it often just masks the real problem, allowing water to cause hidden damage to your roof deck and home’s interior. And if the skylight glass itself is cracked, this is not a safe repair to attempt yourself. For complex issues, a professional skylight inspection is the best way to ensure a lasting solution. How to Fix a Leaking Skylight Yourself If you've pinpointed a minor leak and feel confident working on your roof, a DIY repair might be a good option. Tackling a small issue yourself can be empowering, but remember that safety always comes first. These steps are designed for simple fixes, like sealing small gaps. For larger problems, complex leaks, or if you're not comfortable with heights, it's always best to contact a professional for residential roofing services . With the right tools and a bit of patience, you can often stop a small leak in its tracks. 1. Clean and Prep the Area Before you can fix anything, you need a clean slate. Grab a bucket of water with a little mild detergent and a few rags. Carefully climb up to the skylight and thoroughly clean the glass and the surrounding frame. You’ll want to remove all the dirt, leaves, and grime that have built up. This step is more important than it sounds; new sealant won't stick to a dirty surface. Once everything is clean, wipe it down with a dry rag and give it plenty of time to air-dry completely before you move on to the next step. 2. Remove Old Sealant Next, it’s time to get rid of the old, failing sealant. This is often the culprit behind a leak. Using a putty knife or a utility knife, carefully scrape away any cracked, peeling, or brittle caulk around the edges of the skylight. Be patient and methodical here. You want to remove all the old material without scratching the glass or damaging the metal flashing. A clean, smooth surface is essential for creating a new, watertight seal that will last. Take your time to ensure you’ve cleared away all the old sealant before proceeding. 3. Apply New Sealant With the area prepped, you’re ready to apply new sealant. Choose a high-quality, 100% silicone sealant that’s rated for exterior use and is waterproof. Using a caulk gun, apply a thick, continuous bead of sealant along the seam where the skylight glass meets the frame. You also want to seal the seam where the frame meets the roof flashing. Once applied, you can smooth the bead with a caulk tool or your finger for a clean finish. This fresh seal is your new line of defense against water. Our team’s professional skylight services always include meticulous sealing to ensure a durable repair. 4. Tighten Loose Hardware Over time, the screws and bolts holding your skylight in place can loosen due to weather changes and vibrations. This can create tiny gaps just large enough for water to seep through. While you’re on the roof, take a moment to inspect all the visible hardware. Use a screwdriver or wrench to gently tighten any loose screws around the skylight’s frame and flashing. If you notice any screws that are rusted or stripped, it’s a good idea to replace them with new ones of the same size. Just be careful not to overtighten, which could cause damage. 5. Inspect and Test Your Work After you’ve cleaned, sealed, and tightened everything, it’s time to see if your hard work paid off. Wait for the sealant to cure completely, following the manufacturer's instructions (this can take anywhere from a few hours to a full day). Once it’s ready, have someone stand inside underneath the skylight while you use a garden hose on a gentle setting to run water over the repaired area. Your helper inside can let you know if any drips appear. If it stays dry, congratulations! If you still see a leak, the problem may be more complex, and it’s time to call in the experts. When to Call a Professional While tackling a home repair project yourself can be incredibly satisfying, some jobs are best left to the experts, especially when they involve your roof. A leaking skylight can seem like a simple fix, but it often points to a more complex problem that a quick patch won't solve. Knowing when to put down the sealant and pick up the phone can save you time, money, and a lot of frustration. It also ensures the job is done safely and correctly, protecting your home from further damage. If you're on the fence, consider these signs that it’s time to call in a professional. Signs You Need an Expert Sometimes, a DIY fix only puts a bandage on a bigger issue. It's often best to get a professional roofer to fix a leaking skylight, as a simple patch might just hide the real problem. An expert can identify whether the leak is coming from worn-out seals, damaged flashing, or an installation issue that you might not see. They have the experience to diagnose the root cause accurately, ensuring the repair is permanent. If you’re unsure about the source of the leak or if it seems to be coming from the roof structure itself, it’s a clear sign you need a professional opinion. Structural Damage or Safety Risks Your safety should always come first. If the roof surface around your skylight feels soft, spongy, or unstable in any way, do not attempt to walk on it or fix it yourself. This indicates potential water damage to the roof deck, which is a serious structural concern. Working on a compromised roof is extremely dangerous without the proper training and safety equipment. A professional team has the gear and expertise to assess the situation safely and perform the necessary roof repairs without putting anyone at risk. The Leak Persists After Your DIY Fix It’s frustrating when you spend a weekend fixing a leak, only to see a new water stain appear after the next rainstorm. If the leak comes back after you tried to fix it yourself, it's time to call a professional . A persistent leak usually means the problem is more complicated than it appears. It could be an issue with the flashing integration, improper sealing, or even a problem with the roof slope and drainage around the skylight. A professional has the tools and knowledge to find the hidden cause and provide a lasting solution. Your Skylight is Old or Worn Like any part of your home, skylights have a lifespan. If your skylight is old, has visible cracks, or is constantly foggy with condensation, pouring money into frequent repairs might not be the best investment. You should consider replacing it if the skylight is badly damaged, isn't energy-efficient, or if the cost of fixing the leaks is getting too high. A professional can assess its condition and help you decide if a repair is sufficient or if a full skylight replacement would be a more cost-effective and energy-efficient choice for the long term. What Does Professional Skylight Repair Cost? When you discover a leak, one of the first questions that comes to mind is, "How much will this cost to fix?" The truth is, the price for a professional skylight repair can vary quite a bit. A simple fix might only cost a little, but a more complex problem involving roof damage will naturally cost more. The final price depends on the specific cause of the leak, the type of skylight you have, and how difficult it is to access. Understanding these factors will help you get a clearer picture of the potential investment and prepare you for a conversation with a roofing professional. The best way to get an accurate number is to schedule a professional inspection, where an expert can assess the damage firsthand and give you a detailed quote. Average Repair Costs Generally, you can expect to pay between $50 and $800 for a leaking skylight repair. Minor issues, like reapplying sealant around the edges, will fall on the lower end of that spectrum. However, if the problem is more serious, such as damaged flashing or cracks in the glass, the cost can climb toward $1,500. The price reflects not just the materials but also the labor and expertise required to ensure the fix is durable and effective. A professional roofer can diagnose the exact problem and provide a precise estimate, so you know exactly what to expect before any work begins. What Affects the Price? Several key factors influence the final cost of your skylight repair. The extent of the damage is the biggest one; a small crack is much simpler to address than widespread water damage that has compromised the surrounding roof structure. The type of skylight also matters. Fixed, non-opening skylights are less complex than ventilated ones with moving parts. Another major factor is accessibility. A skylight on a steep, high roof requires more safety equipment and time to repair than one on a low-slope, easily accessible roof. Our team is equipped to handle all types of skylight services, no matter the placement or complexity. Repairing vs. Replacing: The Cost Sometimes, a repair might not be the most cost-effective solution. If your skylight is old, severely damaged, or very energy-inefficient, replacing it might be a better long-term investment. Think of it this way: if the repair cost is more than half the price of a new unit, replacement is often the smarter choice. A new skylight not only solves the leak but also comes with a fresh warranty and can improve your home's energy efficiency. A trusted contractor can help you compare the costs and benefits, ensuring you make the best decision for your home and budget. Will Insurance Cover It? Many homeowners wonder if their insurance will help with the cost. In many cases, it will. Most standard home insurance policies cover damage from sudden and accidental events, like a storm or a fallen tree branch. However, leaks caused by old age, wear and tear, or improper installation are typically not covered. The best first step is to review your policy to understand your coverage. Be sure to document the damage with clear photos. A reputable company like ours can provide the detailed documentation you’ll need to support your insurance claim and make the process smoother. What to Expect from a Professional Repair When you decide to call in a professional, you’re not just paying for a repair; you’re investing in peace of mind. A qualified roofer brings the right tools, materials, and expertise to diagnose the problem correctly the first time. It’s easy to see a drip and assume the fix is simple, but water is tricky. It can travel from the point of entry along rafters and beams before it ever shows up on your ceiling. While a DIY patch might seem to work temporarily, it often just covers up the real issue, leading to hidden moisture, mold growth, and more extensive structural damage later. A professional will trace the leak to its source and provide a lasting solution that protects your home. At Total Roof Solutions, our team is trained to handle everything from minor fixes to complete skylight replacements, ensuring the job is done right. We understand that your home is your biggest investment, and we treat it with the care it deserves. We start with a comprehensive assessment to understand exactly what’s going on, so you know what to expect every step of the way. This transparency means no surprises, just a reliable repair that lets you get back to enjoying the natural light without worrying about the next rainstorm. The Initial Inspection The first thing a professional contractor will do is perform a detailed inspection of your skylight and the surrounding roof area. This isn't just a quick glance from the ground. We get up on the roof to check for the common culprits: cracked or dried-out sealant, damaged metal flashing, loose hardware, or even debris that’s blocking proper water drainage. We’ll also inspect the interior for signs of water damage that might not be immediately obvious. This thorough approach helps us pinpoint the exact cause of the leak, ensuring we fix the root problem instead of just treating a symptom. How Pros Fix Leaks Once we’ve identified the source of the leak, we get to work on the repair. The exact method depends on the cause. If the sealant has failed, we’ll remove the old material and apply a new, high-quality waterproof seal. For damaged flashing, we’ll either reshape and secure it or replace it entirely to create a watertight barrier. If the glass itself is cracked, we’ll discuss replacement options with you. Attempting these kinds of roof repairs yourself can be dangerous and may lead to more costly issues if not done correctly, which is why we always recommend leaving it to an experienced team. Timelines and Warranties Most straightforward skylight repairs can be completed in just a few hours, typically between one and three. We understand your time is valuable, so we work efficiently to get the job done with minimal disruption to your day. Before any work begins, we provide a clear, written agreement that outlines the scope of the repair, the total cost, and the terms of the contract. A reputable contractor will always stand behind their work, which is why we also include detailed warranty information. This ensures you have full confidence in the quality and durability of our skylight services. How to Prevent Future Skylight Leaks After you’ve dealt with a leak, the last thing you want is a repeat performance. The good news is that a little proactive care can go a long way in keeping your skylights watertight and your home dry. Preventing future leaks is often simpler and much less expensive than fixing them. By staying on top of a few key maintenance tasks, you can extend the life of your skylight and protect your home from water damage. Think of it as a small investment of your time that pays off big in peace of mind. Schedule Regular Inspections One of the easiest ways to prevent major issues is to catch them early. Regular maintenance is crucial for skylights, so make it a habit to check on them. At least twice a year, clear away any leaves, twigs, or other debris that has collected around the frame, as this can trap water and lead to rot. While you’re up there, take a close look at the seals for any signs of cracking or peeling. It’s also a good idea to trim back any tree branches hanging directly over the skylight. For a more thorough check-up, a professional roof inspection can spot subtle problems you might miss. Follow Seasonal Maintenance Tips Your skylights face different challenges with each season, especially with Georgia’s weather. Before the rainy season hits, it’s a great time to inspect the flashing to make sure it’s secure and intact. In the spring and fall, check the sealant around the glass. If you notice it’s starting to look brittle or has gaps, it’s time to have it replaced before moisture can seep in. These simple seasonal checks help ensure your skylight is prepared for anything from a summer downpour to winter ice. If you find an issue with the flashing or seals, our team can provide expert skylight services to get it fixed right. Know When to Replace Your Skylight Sometimes, a skylight reaches the end of its functional life. If your skylight is old, constantly needs repairs, or has significant damage like deep cracks in the frame, it might be time for a replacement. Another tell-tale sign is persistent condensation between the glass panes, which indicates a broken seal and poor energy efficiency. While the upfront cost of a new skylight is higher than a simple repair, it can save you money in the long run by preventing chronic leaks and lowering your energy bills. A modern, properly installed skylight offers better insulation and peace of mind for years to come. How to Choose the Right Skylight Contractor When your DIY efforts don’t cut it, finding the right professional is the most important step you can take. A skylight is a unique feature that intersects with your roof, so it requires specialized knowledge to repair correctly. Choosing an experienced, trustworthy contractor ensures the job is done right the first time, protecting your home from future water damage and giving you peace of mind. A great contractor not only fixes the immediate problem but also helps you understand how to prevent it from happening again. What to Look for in a Contractor Not every roofer is a skylight specialist. You’ll want to find a contractor with proven experience in skylight installation and repair. Look for a company that is fully licensed and insured, which protects you from any liability during the repair process. A reputable contractor will also be familiar with local building codes to ensure your repair is compliant. Check for certifications and partnerships with leading manufacturers, as these often indicate a high level of training and commitment to quality. A contractor’s history and community involvement can also speak volumes about their reliability and dedication to their customers. Questions to Ask Before You Hire Before you commit, it’s smart to have a list of questions ready. This helps you vet potential contractors and compare their qualifications. Start by asking about their specific experience with skylights like yours. Request references from past clients so you can hear about their experiences firsthand. It’s also crucial to ask about warranties; find out what guarantees they offer on both their workmanship and the materials they use. A confident, professional contractor will be happy to answer all your questions and provide clear, straightforward information, leaving you feeling secure in your decision. Watch Out for These Red Flags Knowing what to avoid is just as important as knowing what to look for. Be cautious of any contractor who provides a vague estimate or a price that seems too good to be true, as this can signal inexperience or hidden fees down the line. A major red flag is a lack of proper licensing or insurance. If they can’t provide proof, walk away. Finally, be wary of anyone who is unwilling to answer your questions, provide references, or uses high-pressure sales tactics. A trustworthy partner will be transparent and patient, ensuring you feel comfortable every step of the way. Related Articles Installing skylights on your roof | Total Roof Solutions, GA What Are the Different Types of Skylights? Total Roof Solutions Understanding Atlanta Roof Costs for Homeowners CONTACT US Frequently Asked Questions How quickly do I need to fix a leaking skylight? You should act as soon as you notice it. Even a small drip can be a sign of a bigger problem. Water can travel behind your walls and ceiling, causing hidden damage to your home's structure and leading to mold growth. Addressing the leak immediately can save you from a much more complicated and expensive repair later on. Is it really worth hiring a professional for what looks like a tiny leak? Yes, it almost always is. What appears to be a small issue on the surface, like a minor drip, could be a symptom of a larger problem with your flashing or the roof deck itself. A professional can accurately diagnose the root cause, ensuring the fix is permanent. A quick DIY patch might stop the drip for now but could allow hidden damage to continue, which will cost you more in the long run. Will my homeowner's insurance help pay for the repair? It's possible, but it depends on the cause of the leak. Most insurance policies cover damage from sudden events, like a hailstorm or a fallen tree branch. However, they typically don't cover leaks resulting from a lack of maintenance or general wear and tear over time. Your best bet is to review your policy and document the damage thoroughly before filing a claim. Can regular roof maintenance actually prevent my skylight from leaking? Absolutely. Think of it like preventative care for your home. Regular inspections allow a professional to spot and address small issues, like degrading sealant or debris buildup, before they turn into active leaks. Keeping the area around your skylight clean and ensuring the seals and flashing are in good shape is one of the most effective ways to avoid water damage. How do I know if my skylight needs to be replaced instead of just repaired? A good rule of thumb is to consider replacement if the repair costs are approaching half the price of a new unit. Other clear signs include a large crack in the glass, persistent condensation between the panes (which means the seal has failed), or if the skylight is simply old and inefficient. If you find yourself calling for frequent repairs, a full replacement is often the more sensible long-term solution.
By Stephen Griswell February 20, 2026
When you think about failing windows, you might picture a cracked pane or a frame that’s visibly rotting. While those are certainly obvious signs, the most common reasons for a window replacement are often much more subtle. They show up as a gradual increase in your heating and cooling bills, a persistent chill in the air near the glass, or a window that has become a struggle to open and close. These small frustrations are actually your home’s way of telling you that its windows are no longer performing their job. Learning to recognize these early warnings can save you money and discomfort down the line. Here, we’ll explore all the signs, both big and small, that signal it’s time for an upgrade. CONTACT US Key Takeaways Identify the signs of window failure : If you feel drafts, see condensation between the glass panes, or struggle to open and close your windows, it's a clear indication that they are past their prime and need to be replaced. Understand the long-term benefits : New windows are a smart investment that pays you back by lowering your monthly energy bills, increasing your home's resale value, and creating a more comfortable and secure living space. Prioritize a quality installation : The performance of your new windows depends on the installer, so it's crucial to hire a licensed, insured, and reputable contractor who provides clear estimates and solid warranties. How to Know It's Time for New Windows Your windows do more than just let in the light; they protect your home from the elements, keep you comfortable, and play a big role in your energy bills. But they don't last forever. Over time, seals break, frames warp, and glass loses its insulating power. Ignoring the warning signs can lead to bigger issues like water damage, high utility costs, and even security risks. So, how can you tell when it's time for an upgrade? It’s not always as obvious as a cracked pane of glass. Often, the signs are subtle and appear gradually. Paying attention to drafts, condensation, and how your windows operate can tell you everything you need to know. If you're noticing any of the issues below, it’s a good signal that your windows are past their prime and a replacement might be your best next step. You Feel Drafts or See Air Leaks If you have to put on a sweater when you sit near a window, that’s a problem. Drafts are one of the most common signs that your windows are failing. Old windows often have worn-out seals or frames that have warped, creating small gaps that let outside air seep in. This makes it harder to keep your home comfortable and forces your HVAC system to work overtime. In fact, about 25% to 30% of the energy used for heating and cooling a home is lost through its windows. A simple test is to hold a lit candle or incense stick near the frame on a windy day; if the flame flickers, you’ve found a leak. There's Condensation Between the Glass A little fog on your windows isn't always a bad thing, but it matters where you see it. Condensation on the inside of your window can be a sign of high humidity in your home. However, if you see fog, frost, or moisture trapped between the panes of a double- or triple-pane window, the seal has failed. This means the insulating gas (usually argon or krypton) has escaped, and the window has lost its energy efficiency. This is often a clear sign of a seal failure , and unfortunately, it can't be repaired. The only solution is to replace the window to restore its insulating properties. They're Difficult to Open and Close A window you have to fight with is more than just an annoyance. Windows that stick, jam, or refuse to stay open are showing signs of a deeper problem. Years of exposure to Georgia’s heat and humidity can cause frames, especially wood ones, to warp, swell, or rot. In other cases, the house may have settled, or the window’s balance mechanism could be broken. Whatever the cause, a window that doesn’t operate correctly is not only frustrating but can also present serious security issues if it can't be locked properly or becomes a hazard in an emergency. You Can See Visible Damage or Wear Sometimes, your windows will give you obvious visual cues that they’re ready for retirement. Take a walk around your home and give your window frames and sashes a close look. Visible damage like cracks, rot, or warping is your window's way of telling you it's time for an upgrade. For wood frames, check for soft spots or chipping paint, which can indicate moisture damage. On vinyl or metal windows, look for deep scratches, dents, or warping. This kind of damage isn't just cosmetic; it compromises the window's structural integrity and its ability to keep your home sealed and secure. Your Energy Bills Are on the Rise If your heating and cooling bills seem to be climbing higher every year with no other explanation, your old windows are a likely culprit. Inefficient, single-pane, or poorly sealed windows make your HVAC system work much harder to maintain a consistent temperature inside your home. All those little drafts and the heat transfer through old glass add up quickly. Upgrading to modern, energy-efficient replacement windows is one of the most effective ways to lower your utility costs. You’ll feel the difference in comfort right away, and you’ll see it on your monthly energy statements. Why New Windows Are a Smart Investment Replacing your home's windows is one of those upgrades that delivers on multiple fronts. It’s not just about aesthetics, though the boost in curb appeal is undeniable. It’s a practical investment that can improve your home’s energy efficiency, increase its market value, and make your daily life more comfortable and secure. Think of it as a long-term improvement that starts paying you back from the moment of installation. From lower energy bills to less time spent on upkeep, new windows solve many of the common frustrations homeowners face with older homes. They seal up drafts, quiet outside noise, and provide an updated look that can transform your entire property. When you partner with a team that understands exterior renovations, you’re not just getting new glass; you’re getting a more efficient, valuable, and enjoyable home. Lower Your Utility Bills with Better Energy Efficiency If your energy bills seem to creep up every year, your windows could be a major culprit. The U.S. Department of Energy estimates that around 25% to 30% of residential heating and cooling energy use is lost through windows. Old, single-pane, or poorly sealed windows let your conditioned air slip outside, forcing your HVAC system to work overtime to keep you comfortable. Modern, energy-efficient windows are designed to stop this energy transfer. With features like double or triple-pane glass, low-emissivity (Low-E) coatings, and insulated frames, they create a powerful thermal barrier. This keeps your home warmer in the winter and cooler in the summer, which can lead to significant savings on your utility bills month after month. Increase Your Home's Value and Curb Appeal New windows are a fantastic way to refresh your home’s appearance and make a great first impression. They can instantly modernize your exterior, creating clean lines and a polished look that enhances curb appeal. This visual upgrade isn't just for you to enjoy; it also makes your property more attractive to potential buyers if you ever decide to sell. Beyond looks, window replacement is a project with a solid return on investment. According to industry reports, homeowners can often recoup a significant portion of the project cost at resale. Realtors agree that high-quality windows are a desirable feature that can increase a home's value . It’s an improvement that adds tangible worth to your biggest asset. Enjoy a More Comfortable and Secure Home Do you avoid sitting near certain windows because they’re always drafty? New, properly installed windows eliminate those uncomfortable hot and cold spots by creating a tight seal against the elements. This means a more consistent and pleasant temperature throughout your home, no matter the season. Plus, modern windows do a much better job of insulating against outside noise, creating a quieter, more peaceful indoor environment. New windows also offer an upgrade in security. Today’s windows come with advanced locking mechanisms and more durable frame materials that provide greater peace of mind. You can rest easier knowing your home is better protected, all while enjoying a more comfortable living space. Spend Less Time on Maintenance Older windows, especially wood-framed ones, can demand a lot of upkeep. Scraping, painting, and caulking can feel like a never-ending chore. If you’re tired of spending your weekends on window maintenance, you’ll appreciate the low-maintenance materials available today. Vinyl and fiberglass frames, for example, are built to withstand the elements without peeling, cracking, or warping, and they never need to be painted. Many modern windows also include features designed to make your life easier, like tilt-in sashes for simple cleaning. By choosing durable, high-quality windows installed by a trusted contractor, you can spend less time on maintenance and more time simply enjoying your home. Your Guide to Replacement Window Options Once you’ve decided to replace your windows, the fun part begins: choosing the new ones. Today’s windows offer an incredible range of materials, styles, and features designed to fit your home’s aesthetic and your family’s needs. Thinking through these options will help you find the perfect fit that not only looks great but also performs beautifully for years to come. Let's walk through the key decisions you'll be making. Choosing Your Frame Material: Vinyl, Wood, or Fiberglass The frame is the foundation of your window, and the material you choose impacts everything from appearance and maintenance to durability. Vinyl windows are a popular choice because they are budget-friendly, energy-efficient, and require very little upkeep. If you want a classic, high-end look with lots of custom design choices, wood windows are a beautiful option, offering natural insulation and timeless appeal. For homes in areas with big temperature swings, fiberglass windows are an excellent investment. They are incredibly strong, resist swelling and shrinking, and can be painted to match your home’s exterior perfectly. Finding the Right Style for Your Home Windows play a huge role in your home’s character, so it’s important to pick a style that complements its architecture. Whether you have a traditional craftsman or a modern ranch, there’s a window style for you. Double-hung windows are a classic choice, while casement windows offer a more contemporary feel and excellent ventilation. Picture windows are perfect for framing a beautiful view, and bay windows can create a cozy nook inside. Beyond the style, you can also customize colors, hardware finishes, and grille patterns to get a truly personalized look that enhances your home’s curb appeal. Understanding Energy-Efficient Glass and Other Features Modern windows do more than just let in light; they are a key part of your home's energy efficiency. When shopping, look for the ENERGY STAR label, which means the windows meet strict government standards for energy savings. You’ll also see a U-factor rating, which measures how well a window prevents heat from escaping. A lower U-factor is better, especially for keeping your home warm in the winter. Other features like low-E glass coatings and gas fills between the panes can further reduce heat transfer, keeping your home comfortable and your utility bills down. Exploring Modern Window Trends New windows can completely transform how your home feels. Beyond the energy savings, they can make your interior brighter, improve airflow, and significantly reduce outside noise. Many homeowners are opting for larger windows with slimmer frames to maximize natural light and create a stronger connection to the outdoors. Black window frames are another popular trend, offering a bold, modern contrast that works with many different home styles. Investing in quality exterior renovations like new windows is a great way to update your home’s look while adding lasting value and comfort. What to Expect from the Window Replacement Process Replacing your home's windows can feel like a huge undertaking, but it doesn’t have to be a stressful one. When you partner with an experienced team, the entire process is surprisingly straightforward and organized. Understanding the journey from start to finish helps you feel prepared and confident that you’re making a great investment in your home. A professional contractor will guide you through every phase, ensuring the project runs smoothly and with minimal disruption to your daily life. The process is designed to be transparent and efficient. From the first conversation where you share your vision to the final inspection of the finished work, you should feel informed and respected. At Total Roof Solutions, we manage all the details so you can simply look forward to how great your new windows will look and feel. Let's walk through the typical window replacement project, broken down into four simple steps. Step 1: The Initial Consultation and Measurement Everything starts with a simple conversation. The first step is an initial consultation with a window expert who is there to listen to your needs, not just sell you a product. During this meeting, you can discuss your goals, explore different window styles and materials, and get answers to all your questions. A technician will also take precise measurements of your existing window openings to guarantee a perfect, custom fit. This isn't a high-pressure sales pitch; it's a collaborative session to find the right solution for your home’s aesthetic and your budget. Afterward, you’ll receive a clear, detailed price estimate for your project. Step 2: Planning Your Project Timeline Once you’ve decided to move forward, the next step is getting your project on the calendar. Since most replacement windows are custom-built to fit your home’s unique openings, they will be ordered from the manufacturer. Your contractor will give you a clear timeline for when the windows are expected to arrive and when the installation can be scheduled. Working with a reputable contractor is essential here, as good communication prevents delays and surprises. We will coordinate with you to find an installation date that works best for your schedule and keep you informed along the way. Step 3: What Happens on Installation Day On installation day, you can expect a professional crew to arrive ready to work efficiently and respectfully in your home. The team will begin by prepping the work area, using drop cloths and other materials to protect your floors and furniture. Next, they will carefully remove your old windows and install the new ones, ensuring each unit is perfectly level, plumb, and secure. Proper installation is absolutely critical for performance. Even the highest-quality windows won't be energy-efficient if they aren't sealed correctly, so we use premium sealants and insulation to eliminate drafts and maximize your home's comfort. Step 4: Final Walk-Through and Care Tips After the last window is securely in place, the job isn't quite finished. The installation team will thoroughly clean the work area, both inside and outside your home, leaving your space just as tidy as they found it. Then, they will conduct a final walk-through with you to inspect the new windows and make sure you are completely happy with the results. This is the perfect time to ask any final questions. Your team will also show you how to operate your new windows and provide simple care tips to keep them looking and functioning beautifully for years to come. Breaking Down the Cost of New Windows Thinking about replacing your windows often comes with one big question: How much is this going to cost? The answer isn't a single number, because the final price tag depends on your specific home and choices. While the national average for a window replacement is around $477 per unit, this can shift based on materials, labor, and other factors. Understanding these variables will help you set a realistic budget and see why new windows are a valuable upgrade for your home. Let's break down the costs so you know exactly what to expect. How Materials and Style Affect the Price The two biggest factors influencing the price of your new windows are the frame material and the window style. Vinyl frames are typically the most budget-friendly option, offering great durability and energy efficiency without much maintenance. Wood frames provide a classic, high-end look but come with a higher price point and require more upkeep. Fiberglass falls somewhere in the middle, known for its strength and longevity. The style of the window matters, too. A standard single-hung or double-hung window will generally cost less than a large bay window or a custom-shaped architectural window. The average cost can range from about $395 to over $631 per window, so your personal design choices play a significant role in the total project cost. Factoring in Labor and Installation The price of the window unit itself is only part of the equation. Professional installation is key to ensuring your windows perform correctly, and labor costs will be a significant portion of your budget. The complexity of the job affects this cost. For example, replacing a window in a second-story bedroom will likely cost more than a ground-floor window. If the window opening needs to be resized or if there’s any damage to the surrounding wall that needs repair, that will also add to the labor time and expense. When you get an estimate, make sure it clearly separates the cost of the materials from the installation services . Planning for Other Potential Costs Beyond the window and the basic installation, a few other expenses can pop up. Think about things like the disposal of your old windows, any necessary permits for the project, or extra finishing work like painting or staining the interior trim. Some homeowners in the Atlanta area find their total cost per window, including professional installation, lands between $600 and $1,200. It’s always a good idea to have a small cushion in your budget for these potential add-ons. A detailed quote from your contractor should outline all expected costs, helping you avoid any surprises down the road. Common Misconceptions About Window Costs One of the biggest myths about window replacement is that it’s always too expensive to be worthwhile. While it is a significant investment, many homeowners are surprised by the range of available options. You don’t have to choose the most expensive models to see a huge improvement in your home’s comfort and energy efficiency. A quality, local contractor can work with you to find excellent energy-efficient windows that fit your budget. The key is to focus on the value and long-term benefits rather than just the initial price tag. Don’t let a fear of high costs prevent you from exploring your options. Exploring Financing and Your Return on Investment It’s true that new windows come with an upfront cost, but they also offer a high return on investment. Energy-efficient windows can significantly lower your monthly heating and cooling bills, putting money back in your pocket over time. They also increase your home's resale value and curb appeal. To make the initial investment more manageable, many contractors offer flexible financing options . This allows you to get the windows you need now and pay for them over time with predictable monthly payments. When you consider the long-term savings and the immediate improvement in your home’s comfort, new windows are one of the smartest upgrades you can make. How to Choose the Right Window Contractor The quality of your new windows means very little if they aren't installed correctly. Finding a trustworthy and skilled contractor is the key to a successful project that protects your investment and your home. It’s important to prequalify any contractor you consider to make sure the job gets done right the first time. This process doesn't have to be overwhelming. By focusing on a few key areas, you can confidently find a professional partner for your home renovation. Let's walk through the essential steps for vetting and selecting the best window contractor for your needs. Check for Licenses, Insurance, and Certifications Before you even discuss window styles, make sure your potential contractor has the right credentials. A reputable professional will always be properly licensed, insured, and bonded. Ask for proof of general liability insurance and workers' compensation, as this protects you from liability if an accident happens on your property. Also, look for manufacturer certifications. These credentials, like our status as an Owens Corning Platinum Preferred contractor , show a commitment to quality and ongoing training. Don't be tempted by a low bid from an unverified contractor; proper credentials are your first line of defense against shoddy work and future headaches. Look into Their Experience and Local Reputation Experience matters, especially local experience. You’ll want to select a company that has performed countless window installations and knows how to deal with the unexpected challenges that can arise. A contractor with deep roots in the Atlanta area will understand local building codes and how to install windows that stand up to Georgia's specific climate. Check their reputation by reading online reviews, asking for a portfolio of recent projects, and requesting local references. A contractor who is proud of their work will be happy to share it. Seeing their past residential projects can give you a clear idea of their craftsmanship and attention to detail. Compare Estimates, Warranties, and Contracts Once you have a shortlist of qualified contractors, it's time to look at the numbers. It's a good practice to get at least three written estimates. A detailed estimate should clearly break down the costs for materials, labor, and any potential add-ons. Be wary of vague or verbal quotes. Ask about warranties, too. You should receive a manufacturer's warranty on the windows themselves and a separate workmanship warranty from the installer. Make sure you understand what’s covered and for how long. Finally, review the contract carefully before signing. It is customary for a contractor to ask for a deposit to cover materials, but you should never pay for the entire job upfront. Know the Red Flags to Avoid While you compare your options, keep an eye out for warning signs. A bid that is dramatically lower than all the others can be a major red flag, often indicating subpar materials or inexperienced labor. Be cautious of high-pressure sales tactics that rush you into a decision. A true professional will give you the time and information you need. Other red flags include requests for large cash payments, a lack of a physical office address, or a contract with vague terms. Remember, don't base your decision on only the install time frame and price. Look at the total package of what the company has to offer, from their credentials to their reputation. Related Articles Choosing the best window replacements for your home | Total Roof Transform Your Home’s Energy Savings with Smart Roofing How Do Roof Shingles Make The House More Energy-Efficient The Role of Roofing Materials in Curb Appeal and Energy Efficiency CONTACT US Frequently Asked Questions Do I have to replace all my windows at the same time? Not at all. While replacing all your windows at once creates a uniform look and completes the project in one go, it's perfectly fine to approach it in phases. Many homeowners choose to replace windows in the rooms they use most often, like the living room or primary bedroom, or tackle the ones with the most obvious damage first. This allows you to work within your budget and schedule while still making a significant improvement to your home's comfort and efficiency. How long will the installation process actually take? The timeline for installation depends on the number of windows you're replacing, but it's often faster than people expect. A professional crew works very efficiently, typically completing the installation of 8 to 10 windows in a single day. For most homes, the entire project is finished in just one or two days. Your contractor will give you a clear and specific timeline before the work begins so you know exactly what to plan for. What kind of maintenance do new windows require? One of the best parts about modern windows is how little upkeep they need. Unlike old wood windows that require constant scraping and painting, materials like vinyl and fiberglass are built to last without all the extra work. Your main task will be simple cleaning. Wiping down the glass and keeping the tracks clear of debris is usually all it takes to keep your windows operating smoothly and looking great for years. Will new windows completely block out all outside noise? New windows make a huge difference in creating a quieter home, but they won't make your house completely soundproof. High-quality, well-sealed windows with double or triple-pane glass will significantly muffle common noises like traffic, lawnmowers, and barking dogs. You'll definitely notice a more peaceful indoor environment, but it's good to have realistic expectations that some sound may still filter through. Is it a bad idea to replace windows during the winter? This is a common concern, but you can absolutely replace your windows in the winter. Experienced installers are prepared for cold weather. They work on one window opening at a time, minimizing the amount of time your home is exposed to the elements. The old window is removed and the new one is put in place quickly, so the impact on your home's temperature is very brief. There's no need to wait for spring to start enjoying a more comfortable home.
By Stephen Griswell February 18, 2026
Get practical steps for handling emergency roof repair, from safety tips to minimizing damage, while you wait for a professional to arrive.
Roofer inspecting damaged shingles to estimate the leaky roof repair cost.
By Stephen Griswell February 18, 2026
Get a clear look at leaky roof repair cost, common causes of leaks, repair options, and tips to help you save money on your next roofing project.
Modern house with a professional exterior painting job, featuring white siding and dark trim.
By Stephen Griswell February 17, 2026
Get expert tips on exterior house painting, from choosing the right paint to avoiding common mistakes, for a finish that lasts and looks beautiful.
A modern home with a completed DIY metal roof installation.
By Stephen Griswell February 16, 2026
Get practical tips for metal roof installation, from choosing materials to safety steps, in this clear, step-by-step guide for homeowners and DIYers.
Metal mesh gutter guard installation on a shingled roof.
By Stephen Griswell February 13, 2026
Get clear, practical tips for gutter guard installation. Learn how to prep, install, and maintain gutter guards to protect your home from water damage.
Professional seamless gutter installation on a modern residential home.
By Stephen Griswell February 12, 2026
Get practical tips on seamless gutter installation, from choosing materials to maintenance, so you can protect your home from leaks and water damage.