Your Step-by-Step Vinyl Siding Installation Guide
Stephen Griswell • February 24, 2026
A new vinyl siding installation can completely transform your home’s appearance, but a few common mistakes can turn that dream into a costly headache. Issues like buckling, warping, and moisture leaks are almost always traced back to small errors made during the installation process. The good news is that these problems are entirely preventable when you know what to look for. This guide is designed to be your roadmap to a flawless finish. We’ll cover the critical details that separate a professional job from a DIY disaster, from proper nailing techniques to sealing windows and doors correctly for a truly weather-tight result.
Key Takeaways
- Let your siding breathe: Vinyl siding expands and contracts with temperature changes, so proper installation is key. Always leave a small gap between the nail head and the panel and where siding meets trim to allow for natural movement and prevent buckling.
- A great finish requires a solid start: Before installing new siding, it's crucial to prepare your home's exterior. This means removing the old material, inspecting the sheathing for damage, and installing a water-resistive barrier to protect your home from moisture.
- Master the details for a watertight seal: The areas around windows, doors, and corners are most vulnerable to leaks. Correctly installing flashing and trim pieces is essential for creating a complete protective system that directs water away from your home's structure.
Why Choose Vinyl Siding for Your Home?
Choosing the right siding for your home is a big deal. It defines your home’s curb appeal, protects it from the elements, and can even impact your energy bills. With so many options out there, it’s easy to feel overwhelmed. But there’s a reason vinyl siding remains one of the most popular choices for homeowners. It offers a fantastic blend of durability, low maintenance, and style, making it a smart investment for almost any home. Let’s look at what makes it such a great option.
It's Durable and Weather-Resistant
Here in Georgia, our homes face everything from intense summer sun and humidity to heavy rain and wind. You need a material that can handle it all without breaking a sweat. Vinyl siding is known for its durability and resistance to harsh weather. Unlike wood, it won’t rot, warp, or splinter when exposed to moisture, and it’s resistant to pests like termites. This means you can count on it to protect your home and look great for years to come, with far fewer worries about weather-related damage. It’s a long-lasting option that provides peace of mind through every season.
It's Easy to Maintain
Let’s be honest, most of us would rather spend our weekends doing anything other than exterior home maintenance. One of the biggest draws of vinyl siding is that it’s incredibly low-maintenance. Forget about the constant cycle of scraping, sanding, and repainting that comes with wood siding. To keep vinyl looking fresh, it just needs to be cleaned about once a year with mild soap and water. A simple wash with a soft cloth or sponge is usually all it takes to remove any dirt or grime. This saves you a significant amount of time, effort, and money over the life of your siding.
It Can Improve Energy Efficiency
Your home’s siding can play a surprising role in your energy consumption. When installed correctly, vinyl siding adds a layer of insulation to your home’s exterior. This helps your house stay warmer in the winter and cooler in the summer, taking some of the strain off your HVAC system. Proper installation is key to creating this protective thermal barrier, which can lead to more comfortable indoor temperatures and lower energy bills throughout the year. It’s a practical benefit that pays you back every month, making your home more efficient.
It Offers Versatile Style Options
Your home should reflect your personal style, and your siding is the perfect canvas. Vinyl siding comes in a huge variety of colors, styles, and textures, giving you the freedom to create the exact look you want. Whether your home’s architecture is traditional or modern, there’s a vinyl option to match. You can choose from classic horizontal panels, sleek vertical boards, or even styles that convincingly mimic the look of natural wood grain or stone. This versatility allows you to update your home’s appearance and significantly enhance its curb appeal without compromising on performance.
Gather Your Tools and Materials
Before you even think about hanging the first panel, it’s time to get organized. A successful siding project is all about preparation. Taking the time to gather every tool and piece of material you need will save you from frustrating mid-project runs to the hardware store. Think of it as setting up your workshop for success. When everything is within arm's reach, the entire installation process feels less like a chore and more like a satisfying home transformation. A little planning now will make the actual work go much more smoothly, ensuring you get the clean, professional results you’re looking for.
Essential Tools for the Job
You’ll need a few key tools to get this job done right. Start with the basics: sturdy ladders or scaffolding, a measuring tape, a level, and a chalk line for creating straight guidelines. For cutting and fitting the panels, you’ll want a fine-toothed saw and a utility knife. A hammer is essential for fastening, but use it correctly to avoid damaging the siding. You may also need specialty items like a snap-lock punch and a zip tool. Having the right equipment is the first step toward a beautiful, long-lasting siding installation.
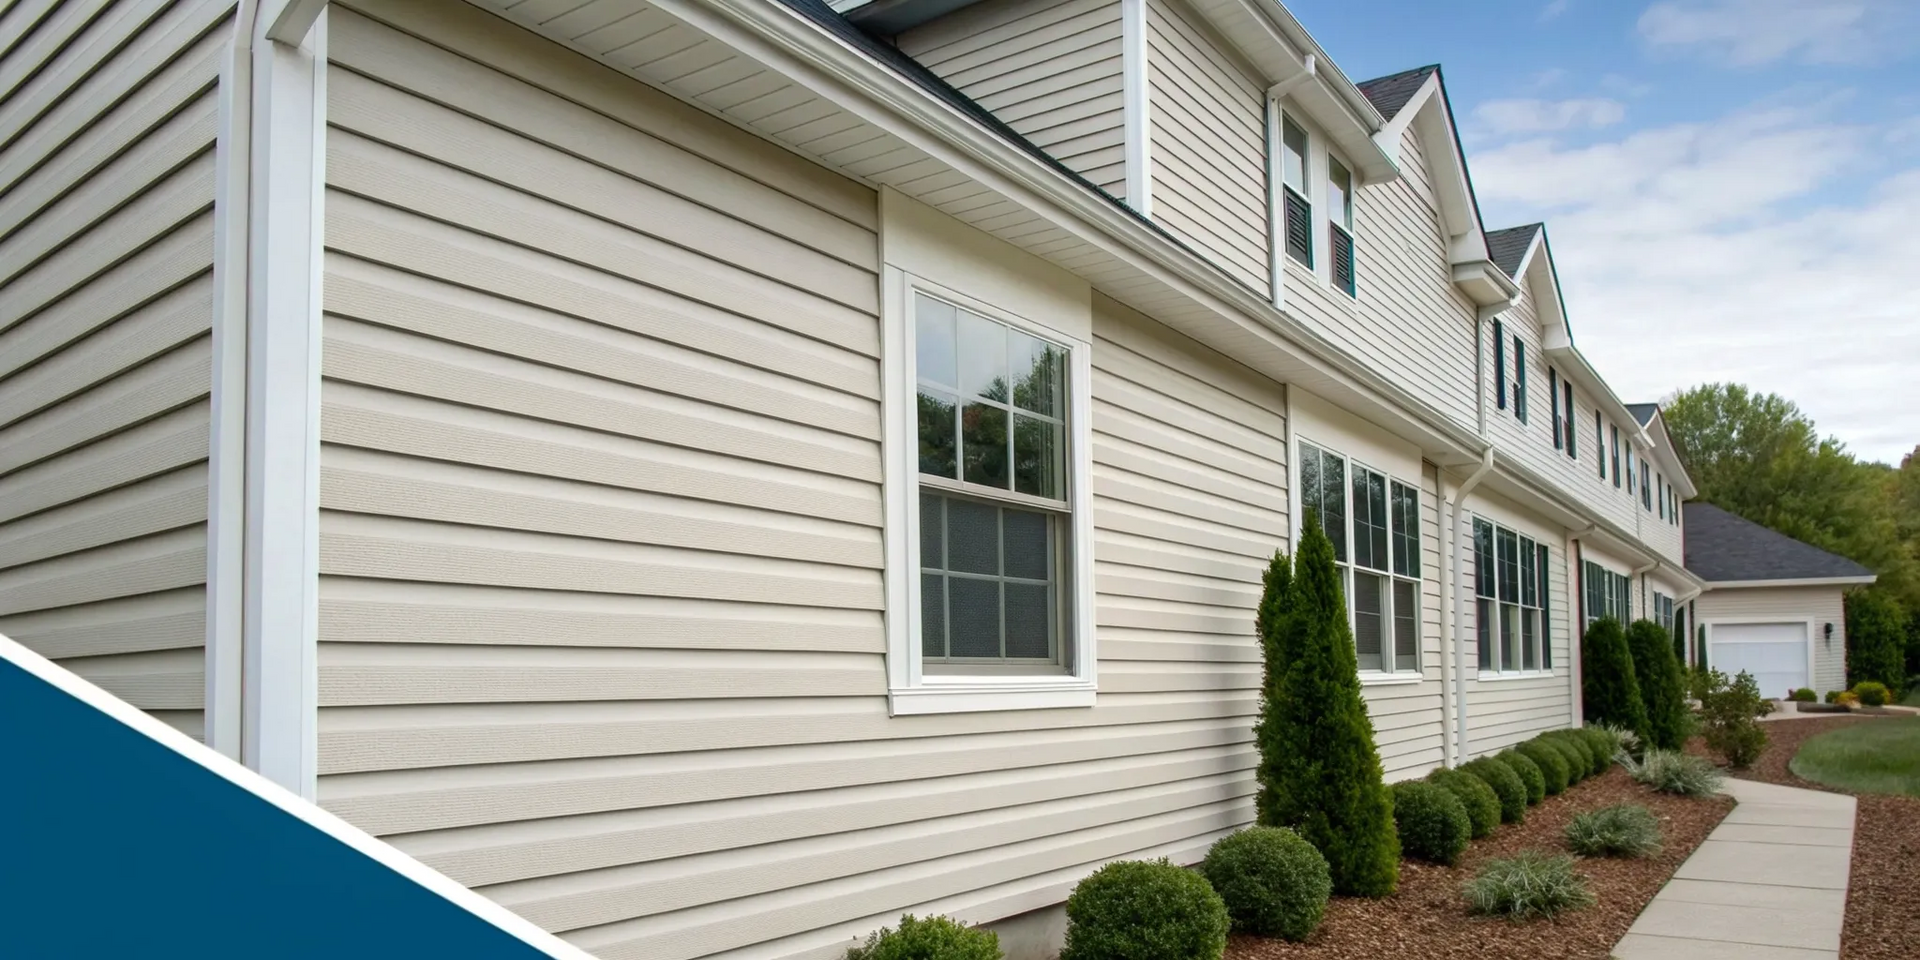
Siding Materials and Components
Vinyl siding is more than just the panels; it’s a complete system designed to protect your home. Your wall sheathing, typically plywood or OSB, provides the base. Never install siding directly onto wall studs. Over the sheathing, you must install a water-resistive barrier, or housewrap, to keep moisture out. The system starts with a starter strip at the bottom, followed by the siding panels, J-channels around windows and doors, and corner posts. Finally, flashing and caulk seal any remaining gaps. Understanding how these exterior components work together is crucial for a weatherproof finish.
Don't Forget Safety Gear
Working on your home’s exterior comes with risks, so don’t overlook safety. At a minimum, always wear safety goggles to protect your eyes from flying debris, dust, and stray nails. A good pair of work gloves will save your hands from sharp edges and splinters. Since you’ll be working on a ladder, wear sturdy, closed-toe shoes with good grip to prevent slips and falls. This project is about improving your home, and that includes staying safe while doing it. A commitment to safety is a hallmark of any trusted contractor, and it should be your top priority.
Prep Your Home for New Siding
Before you can get to the exciting part of seeing your new siding go up, there’s some important prep work to do. Think of it like painting a room; you wouldn’t just start rolling paint over dusty, cracked walls. The same principle applies here. A successful siding project depends on a solid, well-prepared foundation. Taking the time to get your home ready ensures your new siding will not only look fantastic but will also protect your home effectively for years to come. Let's walk through the essential steps to prep your home for its new look.
Assess Your Current Exterior
First, take a good, hard look at your home's exterior. Your goal is to create a smooth, solid canvas for the new siding. Walk around your house and check for any issues with the walls. Are there any loose boards or signs of rot that need to be replaced? The surface needs to be as flat and level as possible. You’ll also need to temporarily remove any obstructions. This includes things like gutters, downspouts, light fixtures, mailboxes, and house numbers. Getting these items out of the way now will make the installation process much smoother and lead to a cleaner, more professional finish.
Remove Old Siding and Debris
While it might seem easier to install new vinyl siding over your old siding, it’s almost always better to remove the existing material first. Taking off the old siding allows you to inspect the sheathing underneath for hidden damage or moisture issues that need to be addressed. It also ensures your new siding will fit snugly and securely, especially around windows and doors, creating a proper seal against the elements. This step is crucial for preventing future problems and is a standard part of professional exterior renovations. Clearing away the old material gives you a fresh start and a much more reliable result.
Install the Substrate and House Wrap
With the old siding gone, the next step is to protect your home’s structure with a water-resistive barrier, commonly known as a house wrap. This material is installed over the exterior sheathing, creating a protective layer that stops water from getting into your walls while still allowing moisture vapor to escape. Think of it as a raincoat for your house. This barrier is absolutely essential for preventing rot, mold, and water damage down the line. Proper installation of the house wrap is a critical part of a durable, long-lasting siding system that will keep your home safe and dry for decades.
Make Sure Your Walls Are Flat
Vinyl siding is flexible, which means it will conform to whatever surface it’s installed on. If your walls are wavy or uneven, your new siding will be too. That’s why ensuring a flat surface is so important for a clean, professional look. Siding should be installed over a continuous, solid substrate like plywood or oriented strand board (OSB), not directly onto the wall studs. If your home has uneven surfaces, your contractor may need to install furring strips to create a level plane. This step guarantees that your siding panels will hang straight and lock together properly, giving you that beautiful, seamless finish you’re looking for.
Your Step-by-Step Installation Guide
Once your home is prepped, it’s time to start the installation. Getting these first few steps right is crucial for a professional-looking finish that lasts. Think of it like building a foundation; every other piece relies on the proper placement of the first few. We’ll walk through the core process, from setting your first strip to nailing the last panel.
Install Starter Strips and Corner Posts
The starter strip is the most important piece of your entire siding project. It guides every panel that follows, so it has to be perfectly level. To get it right, find the lowest corner of the wall you’re working on and measure up. Attach a chalk line, pull it tight to the next corner, and use a level to ensure it’s straight before securing it. Before you install the corner posts, you’ll also want to flash the inside and outside corners with a water-resistive barrier. This extra layer of protection is a non-negotiable step for preventing moisture from getting behind your siding and causing problems down the road. It's a critical part of any professional residential exterior project.
Measure and Cut Your Panels
The old saying "measure twice, cut once" definitely applies here. To figure out how much siding you need, break down your walls into simple shapes like rectangles and triangles, measuring each one. Don't forget to account for the space around windows and doors to minimize waste. When it’s time to cut, here’s a pro tip: for a clean, smooth edge, use a fine-toothed plywood blade installed backward in your circular saw. This technique is especially helpful in colder weather when vinyl can be more brittle. Take your time and cut slowly for the best results. Precision and patience are what separate an amateur job from the detailed craftsmanship you should expect from an experienced team.
Use Proper Nailing Techniques
How you fasten the siding is just as important as how you cut it. Vinyl siding is designed to expand and contract with temperature changes, so you can’t nail it down tightly. Drive your nails into the center of the nailing slots, leaving a small gap—about the thickness of a dime—between the nail head and the siding. If you fasten it too tightly, the panels will buckle and warp when the weather changes. Make sure you’re using the right fasteners, too. Corrosion-resistant nails with a head at least 5/16-inch wide are best. This technique is fundamental to both residential and commercial siding jobs and ensures the final product is durable and looks great for years.
Work from the Bottom Up
Always start installing your siding panels at the bottom of the wall and work your way up. Each panel is designed to lock into the one below it and overlap slightly, creating a weather-tight seal. This system works just like the shingles on a roof, shedding water down and away from your home’s structure. If you were to install siding from the top down, water could easily get trapped behind the panels, leading to rot, mold, and serious structural damage. Proper installation ensures your home’s exterior works as a complete system, with siding and gutters working together to direct water safely away from your foundation.
Work Around Corners, Windows, and Trim
Once you get into a rhythm with the main walls, you’ll find that installing siding goes pretty quickly. The real test of a great installation, however, comes down to the details. Working around corners, windows, and doors requires precision and patience. These are the areas most vulnerable to water intrusion, so taking your time here is essential for a professional, weather-tight finish. Getting these trim pieces right not only makes your home look sharp but also protects the structure underneath from moisture damage for years to come.
Install Corner Trim and J-Channels
Corner posts and J-channels are the framework for your siding panels. Before you install any corner posts, make sure you flash both inside and outside corners with a water-resistive barrier that extends at least 10 inches on each side. When you place the corner post, leave a 1/4-inch gap at the top where it meets the soffit. Place your first nail at the very top of the upper nail slot on both sides, letting the post hang from these two nails. All other nails should go in the center of their slots, spaced about 8 to 12 inches apart. Remember to leave a tiny (1/32-inch) gap between the nail head and the vinyl to allow for movement.
Fit Siding Around Windows and Doors
Here’s a critical point to remember: your siding sheds water, but it isn’t the primary waterproofing layer. The real protection for your home comes from what’s underneath. Before a single panel goes up, you must ensure your house wrap is properly installed and that all windows and doors are sealed with flashing tape and caulk. This barrier is what truly keeps water out. If you’re unsure about the integrity of your existing seals, it’s worth addressing them first. Properly installed windows and doors are fundamental to a dry and secure home exterior, creating the perfect base for your new siding.
Add the Finishing Touches
As you work your way up a wall, the final piece of siding will need to be cut to fit and secured with a utility trim piece at the top. One common mistake is to seal the ends of the siding panels with caulk. You want to avoid this, as the siding needs to "breathe" and allow any moisture that gets behind it to escape. Also, be sure to use the right fasteners. Galvanized roofing nails or rust-proof screws will prevent unsightly rust streaks from running down your beautiful new siding. These final steps ensure your project looks clean and performs well, but if you run into any trouble, our expert siding installation services are always here to help.
Account for Expansion and Contraction
One of the most important things to understand about vinyl siding is that it’s a dynamic material. Unlike wood or brick, vinyl physically changes size with the temperature, expanding in the heat and contracting in the cold. This isn't a flaw; it's just the nature of the material. A successful installation is all about accounting for this movement. If you don't give the siding room to breathe, you’ll end up with wavy, buckled, or warped panels down the road.
Getting this part right is what separates a professional-looking job from a DIY disaster. It requires precision and an understanding of how the material behaves in different conditions. Every cut, every nail, and every overlap must be done with expansion and contraction in mind. This attention to detail ensures your siding not only looks great on day one but continues to perform beautifully for years, protecting your home through every season.
How Vinyl Responds to Temperature
Think of vinyl siding panels as living things that react to the weather. When the sun beats down on a hot summer day, the panels get slightly longer. On a frigid winter night, they shrink and become a bit shorter. This movement can be significant, with a single 12-foot panel changing in length by as much as half an inch or more throughout the year. Your installation strategy must accommodate this constant, subtle shifting to prevent stress on the panels and fasteners. This is a key part of the detailed craftsmanship that ensures a long-lasting exterior.
Overlap Panels Correctly
To manage the change in length, horizontal siding panels are designed to overlap. This creates a seamless look while allowing the panels to slide past each other as they expand and contract. The key is getting the amount of overlap just right. For standard panels, you’ll want to overlap the factory notches by about 1 to 1-1/4 inches. The exact measurement depends on the temperature during installation. Colder weather means the panels are contracted, so you’ll need a slightly larger overlap to accommodate for summer expansion. This detail is crucial for a smooth, uniform appearance that lasts.
Leave Room for Movement
Besides overlapping, you also need to leave a small gap wherever a panel meets a piece of trim, like a corner post or a J-channel around a window. This space gives the ends of the panel room to move. A good rule of thumb is to leave a 1/4-inch gap if you’re installing in temperatures above 40°F. If it’s colder, increase that gap to 3/8-inch. Finally, don’t nail the siding down tight. The fasteners should be centered in the nailing slots and left about 1/32-inch loose (roughly the thickness of a dime). This allows the panel to hang freely and move side-to-side without buckling.
Avoid These Common Installation Mistakes
Even with the best tools and materials, a few small mistakes can turn your beautiful new siding into a future headache. Getting the details right is what separates a professional-looking job from one that might cause problems down the road. Let’s walk through some of the most common installation slip-ups and, more importantly, how you can steer clear of them. Paying attention to these points will ensure your siding not only looks great but also protects your home effectively for years to come. These are the kinds of details that professional exterior renovations focus on to guarantee a lasting finish.
Nailing and Fastening Errors
One of the most frequent mistakes is improper nailing. Vinyl siding needs to move; it expands in the heat and contracts in the cold. If you hammer the nails in too tightly, you restrict this movement, which can cause the panels to buckle, warp, or crack. To avoid this, drive your nails into the center of the nailing slot, not at the ends. Leave a small gap, about the thickness of a dime, between the nail head and the siding panel. This gives the siding the room it needs to shift naturally with temperature changes, keeping it flat and secure against your wall without causing stress.
Poor Waterproofing and Sealing
Your siding is your home's first line of defense against the elements, but it isn't completely waterproof on its own. A critical mistake is failing to install a proper weather-resistive barrier, or house wrap, underneath. This barrier is your home's true raincoat, preventing any moisture that gets behind the siding from reaching the sheathing and causing rot or mold. You also need to install flashing correctly around all windows, doors, and other openings. Skipping this step can lead to serious water damage that is expensive to repair. Proper waterproofing is a core principle of protecting any home, whether it's siding or residential roofing.
Installing in the Wrong Direction
This might sound basic, but it happens. Always install siding from the bottom of the wall and work your way up. Think of it like the shingles on a roof; each new piece should overlap the one below it. This design uses gravity to its advantage, ensuring that rainwater runs down and away from your house. If you start from the top and work down, you create a series of ledges that can catch and trap water, funneling it behind the panels and against your home’s structure. Following the correct bottom-up process is a fundamental technique that experienced installers from our team never overlook.
Using the Wrong Caulk or Materials
Not all caulk is created equal, and using the wrong kind can lead to failed seals. A common error is using silicone-based caulk with vinyl siding. While great for bathrooms, most silicones don't adhere well to vinyl and will eventually peel away, leaving gaps for moisture and pests to enter. Instead, you should choose the right caulk for the job, which is typically a flexible, paintable sealant like a urethane or butyl-based product designed for exterior use with vinyl. Taking a moment to read the label and select the correct material is a small step that makes a huge difference in the longevity and effectiveness of your siding installation.
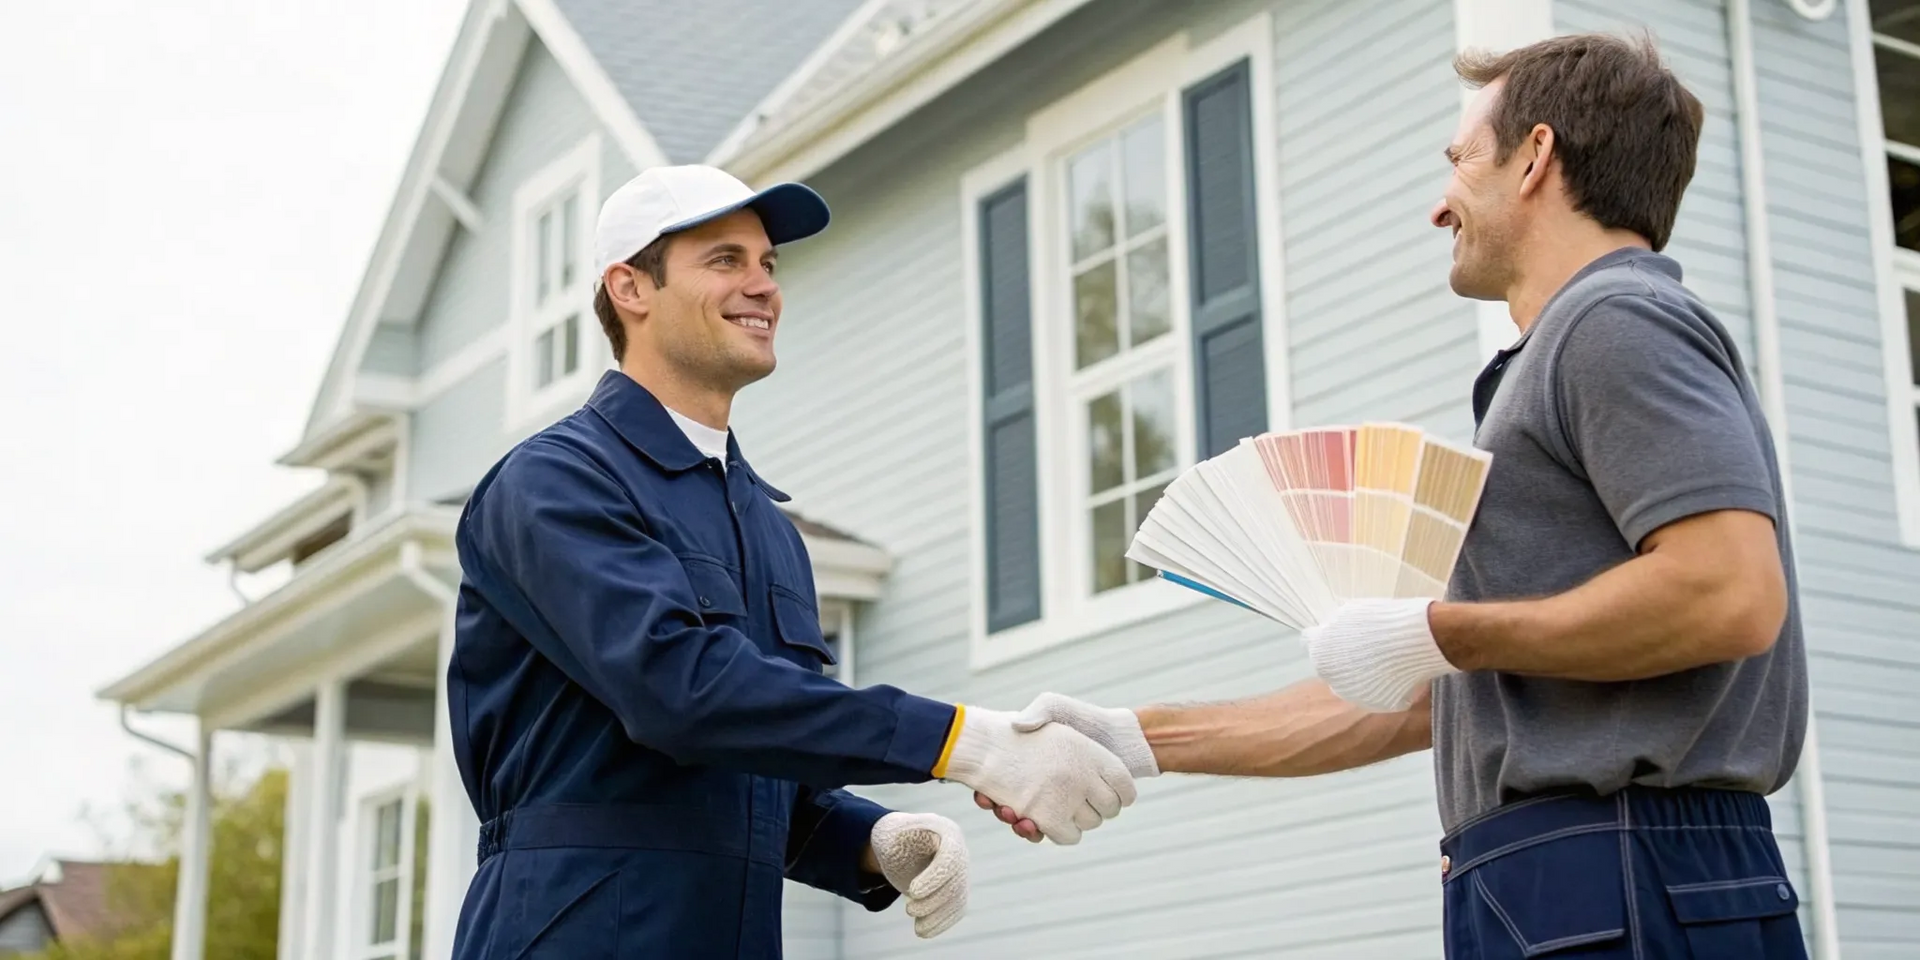
Know When to Call a Professional
Tackling a home improvement project yourself is incredibly rewarding, but there’s also wisdom in knowing when to tag in an expert. While many siding jobs are manageable, some situations can quickly become complicated. If you’re facing a particularly tricky installation or just want the peace of mind that comes with a professional touch, it might be time to make a call. Let’s look at a couple of scenarios where hiring a pro is the smartest move for your home and your sanity.
For Complex Installation Jobs
Putting new vinyl siding over old wood siding, for example, is a much bigger project than it sounds. It takes a lot of time and precision, and if you're new to this, it can be a real challenge. Many pros recommend removing the old siding first. This extra step makes it much easier to properly seal the house and get a clean, tight fit around windows and doors. Since the main job of siding is to protect your home from water damage, getting that seal right is non-negotiable. For these more involved exterior renovations, bringing in someone with experience can save you major headaches down the road.
The Benefits of Expertise and Warranties
Beyond just handling the tough stuff, a professional contractor brings a lot to the table. They have the right tools and can often get materials at a better price, but the real value is in their expertise. A certified installer knows the local building codes and understands exactly how to install siding to protect your home and keep your manufacturer’s warranty valid. A flawless installation isn't just about looks; it's about ensuring your home is protected for years to come. When you work with a team that has decades of experience, you’re not just getting new siding, you’re getting confidence that the job was done right.
Maintain Your New Vinyl Siding
Once your beautiful new vinyl siding is up, a little bit of care is all it takes to keep it looking fresh for years. One of the biggest draws of vinyl is how low-maintenance it is, but that doesn't mean you can forget about it completely. A simple annual routine will protect your investment, maintain your home's curb appeal, and stop small issues from turning into bigger, more expensive problems. Think of it as a quick check-up for your home's exterior. By staying on top of cleaning and inspections, you ensure your siding performs exactly as it should, protecting your home from the elements while looking fantastic. This proactive approach not only preserves the material's lifespan but also gives you peace of mind, knowing your home is well-protected and continues to be a source of pride in your neighborhood. It's a small effort that pays off big in the long run, preventing the buildup of grime that can dull the color and ensuring the structural integrity of the installation remains sound. Taking these simple steps helps you get the most value out of your home improvement project.
Clean and Inspect It Regularly
Giving your siding a good wash at least once a year is the easiest way to keep it looking brand new. Over time, dirt, pollen, and grime can build up, but a simple cleaning solution is usually all you need. Just mix some mild soap or a vinyl-safe cleaner with water and use a soft-bristle brush to gently scrub the surface. Start from the bottom and work your way up to avoid streaks, then rinse thoroughly with a garden hose. While you're cleaning, take the opportunity to give your exterior renovations a quick inspection. Look for any panels that seem loose, cracked, or warped so you can address them right away.
Handle Minor Repairs and Damage
Vinyl is incredibly tough, but it’s not indestructible. Stray baseballs, harsh weather, or even overgrown landscaping can sometimes cause damage. A great preventative step is to keep trees and shrubs trimmed back from your house. This prevents branches from scratching the panels during high winds and discourages pests from making a home behind your siding. If you do spot a small crack or a loose panel, it’s important to get it fixed promptly to keep moisture out. While some minor fixes can be a DIY project, calling a professional ensures the repair is seamless and properly sealed, protecting the integrity of your entire siding system.
Tips for Long-Term Care
A few simple habits will go a long way in preserving your vinyl siding. If you decide to use a pressure washer for cleaning, be very careful. Use a low-pressure setting and keep the nozzle pointed straight at the siding, not at an upward angle, to avoid forcing water behind the panels. It’s also smart to keep heat sources, like barbecue grills, a safe distance away from the siding to prevent melting or warping. By taking these small precautions, you can count on your siding to look great and perform well for decades. When you work with an experienced team like Total Roof Solutions, you get durable materials and craftsmanship you can trust.
Related Articles
- Which type of home siding do I need? | Total Roof Solutions ATL, GA
- What are seamless gutters for my home? | Total Roof Solutions
- How to choose the proper roof vents for your home | Total Roof Solutions
- PVC Roofing vs. TPO Roofing | Total Roof Solutions
Frequently Asked Questions
How long can I expect new vinyl siding to last? High-quality vinyl siding is built to be incredibly durable, often lasting for several decades. With proper installation and some simple, regular maintenance like annual cleaning, you can expect it to protect your home and look great for 20 to 40 years, and sometimes even longer. The key is starting with a quality product and ensuring it's installed correctly to handle Georgia's weather.
Can I paint my vinyl siding if I want a new color later on? Yes, you can paint vinyl siding, but it requires the right preparation and specific type of paint. You'll need to use a "vinyl-safe" acrylic paint that is formulated to accommodate the siding's expansion and contraction. It's also crucial that the siding is thoroughly cleaned before painting. Keep in mind that painting does add a maintenance step that unpainted vinyl doesn't require.
Is it a bad idea to install siding myself to save money? While a DIY installation can seem like a good way to cut costs, it comes with significant risks. The most common issues we see are improper nailing and poor waterproofing around windows and doors, which can lead to buckling panels and serious water damage. A professional installation not only ensures the job is done right but also protects your manufacturer's warranty, giving you peace of mind that your investment is secure.
What's the single most important thing to get right during installation? The most critical detail is accounting for expansion and contraction. Vinyl siding needs room to move with temperature changes. This means you must not nail the panels down tightly; instead, leave a small gap between the nail head and the vinyl. Forgetting this step is the number one cause of warped, wavy, and damaged siding.
How often should I clean my siding, and is pressure washing safe? A gentle cleaning once a year is usually enough to keep your siding looking its best. A soft brush with mild soap and water is all you need to remove most dirt and grime. You can use a pressure washer, but you have to be careful. Use a low-pressure setting, a wide-angle spray tip, and keep the stream level with the siding, never pointing it upward, to avoid forcing water behind the panels.