Installing Gutter Guards Under Shingles: A Safe Guide
Stephen Griswell • May 27, 2026
Gutter guards promise an end to the dreaded chore of cleaning out muck from a ladder. But that promise comes with a big condition: they have to be installed correctly. A poorly fitted guard can cause more problems than it solves, from creating water dams to damaging your roof. This is especially true when installing gutter guards under shingles, where a heavy-handed approach can lead to leaks and voided warranties. Before you commit, it’s crucial to understand the process. This guide will show you how to do it right, ensuring your investment actually protects your home and saves you work.
Key Takeaways
- Installation method protects your warranty: Gutter guards themselves won't void your roof warranty, but incorrect installation can. The biggest mistake is puncturing shingles with nails or screws; always attach guards to the fascia or the gutter itself to keep your warranty safe.
- A successful project starts with a clean slate: For gutter guards to work properly, they must be installed on clean, fully functional gutters. The correct technique involves sliding guards under shingles without force, securing them properly, and overlapping all sections to block debris.
- Know when to call a professional: A DIY installation is risky with steep roofs, multi-story homes, or shingles that are sealed down. Hiring a professional ensures the job is done safely and correctly, protecting your home from damage and preserving your roof warranty.
What Are Gutter Guards and Why Do You Need Them?
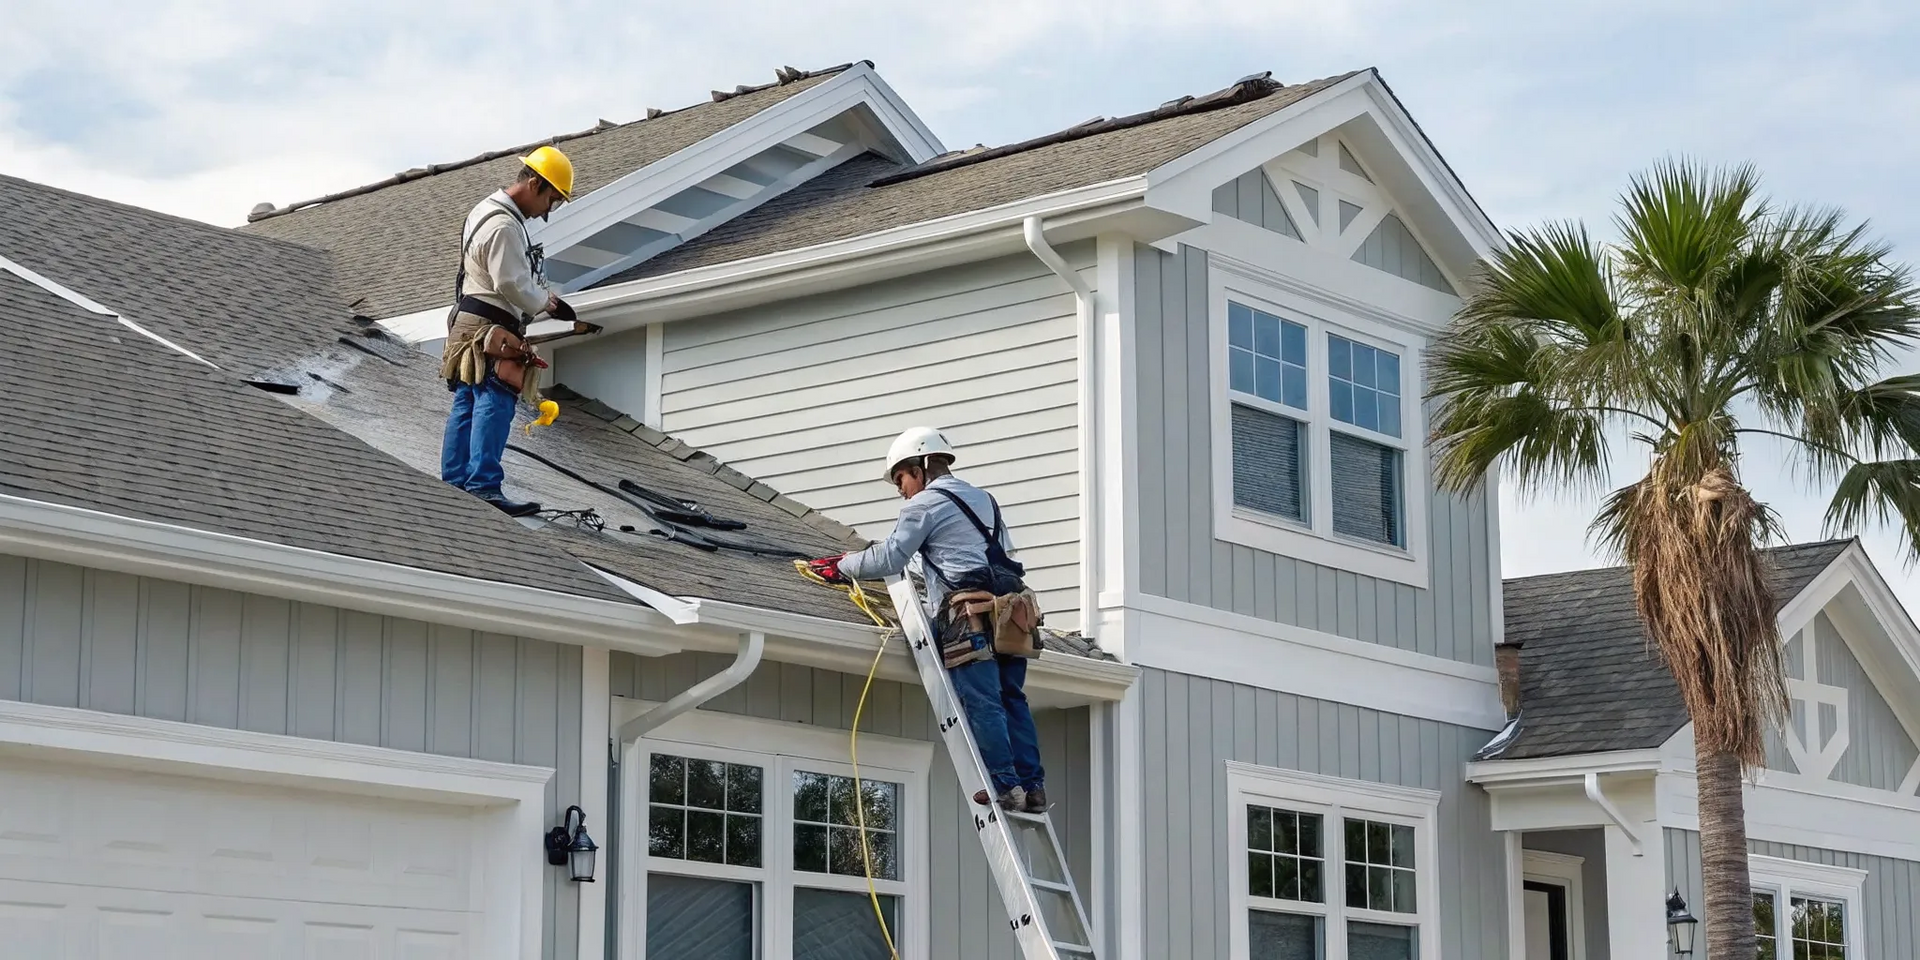
Think of gutter guards as a protective shield for your home’s drainage system. At their core, gutter guards are designed to keep leaves, twigs, and other debris out of your gutters, allowing water to flow freely. This simple function is a game-changer because it helps prevent clogs that can lead to water damage, mold growth, and other costly repairs. Instead of spending your weekends on a ladder cleaning out muck, you can let your gutters do their job without constant supervision.
A properly functioning gutter system is essential for protecting your entire home, from the foundation to your residential roofing. When water can’t drain correctly, it spills over the sides, pools around your foundation, and can even seep back under your shingles. Gutter guards are a proactive investment in your home’s health, ensuring that rainwater is channeled safely away from your property. They are the unsung heroes of home maintenance, quietly preventing a whole host of problems before they ever get a chance to start. By adding them, you’re not just covering your gutters; you’re safeguarding your home’s structural integrity.
How Gutter Guards Protect Your Home
So, how exactly does a simple screen protect your entire house? By preventing clogs, gutter guards help ensure that water flows properly through your gutters and downspouts. This is crucial for avoiding overflow, which can cause significant water damage to your home’s foundation, siding, and landscaping. Without guards, clogged gutters become heavy with water and debris, pulling away from your house and potentially causing fascia boards to rot.
But there’s a critical detail to remember: these benefits hinge on correct installation. An improper installation of gutter guards can lead to serious issues, including voiding your roof warranty , causing leaks, and resulting in expensive repairs. The goal is to solve a problem, not create a new one, which is why understanding how to install them safely is so important.
An Overview of Gutter Guard Types
Not all gutter guards are created equal, and the right one for your home depends on your specific needs. There are various types of gutter guards available, each suited for different conditions and tree types. For instance, simple foam inserts or plastic guards are inexpensive but may degrade quickly under the intense Georgia sun. Metal mesh options, on the other hand, are far more durable and can withstand harsh weather for years.
For homes surrounded by pine trees or those that experience heavy rainfall, micromesh guards are particularly effective at blocking even fine debris while handling a high volume of water. Other styles include brush guards, which look like giant pipe cleaners, and reverse-curve guards, which direct leaves to fall over the edge. Choosing the right type is the first step toward a successful installation.
Will Installing Gutter Guards Void My Roof Warranty?
It’s a question we hear all the time, and for good reason. You’ve invested in a quality roof to protect your home, and the last thing you want to do is jeopardize its warranty. The short answer is no, installing gutter guards does not automatically void your roof warranty. However, the long answer is a bit more nuanced: it all comes down to the quality of the installation. A poorly installed gutter guard can cause damage that your warranty won't cover, so it's crucial to understand the right way to do it.
A roof warranty is designed to cover manufacturing defects in the roofing materials and, in some cases, workmanship errors from the initial installation. It isn't a blanket policy that covers damage from other projects. If gutter guards are installed incorrectly, for example by puncturing shingles or trapping water, any resulting problems like leaks or rot won't be covered by the shingle manufacturer. The key is to ensure the guards are installed in a way that doesn't compromise your roofing system’s integrity. This is why choosing an experienced contractor who understands both roofing and gutter systems is so important for protecting your investment and giving you peace of mind.
Understanding the Fine Print in Your Warranty
Let's clear up a common myth: the idea that simply sliding a gutter guard under your shingles will void your warranty is usually not true. Major shingle manufacturers know that gutter protection is a normal part of home maintenance. The real issue isn't the presence of the guards, but the method of attachment. Your warranty can be voided if the installation process damages the shingles.
The biggest mistake is puncturing your shingles with nails or screws. This creates openings that allow water to seep underneath, leading to rot and leaks, which your shingle warranty won't cover. Think of your warranty as a promise that the shingles will perform as expected, not as insurance against improper work done by other contractors. That’s why working with a team that understands roofing systems is so important. As an Owens Corning Platinum Preferred contractor , we know exactly how to protect your roof and its warranty.
How to Safely Install Guards and Protect Your Warranty
Protecting your warranty during a gutter guard installation is all about technique. The number one rule is to never drive nails or screws through your shingles to secure the guards. This is a critical error that can instantly void your warranty for any damage that results from the new holes in your roof. A proper installation respects the integrity of your roofing system.
The safest methods involve attaching the gutter guards directly to the gutters or the fascia board, which is the board running along the lower edge of the roof. Many high-quality systems are designed to slide under the first row of shingles and clip onto the front edge of the gutter, requiring no fasteners on the roof itself. This approach keeps your shingles intact and your warranty safe. When you’re ready to add gutter protection , make sure the system you choose and the contractor you hire follow these best practices.
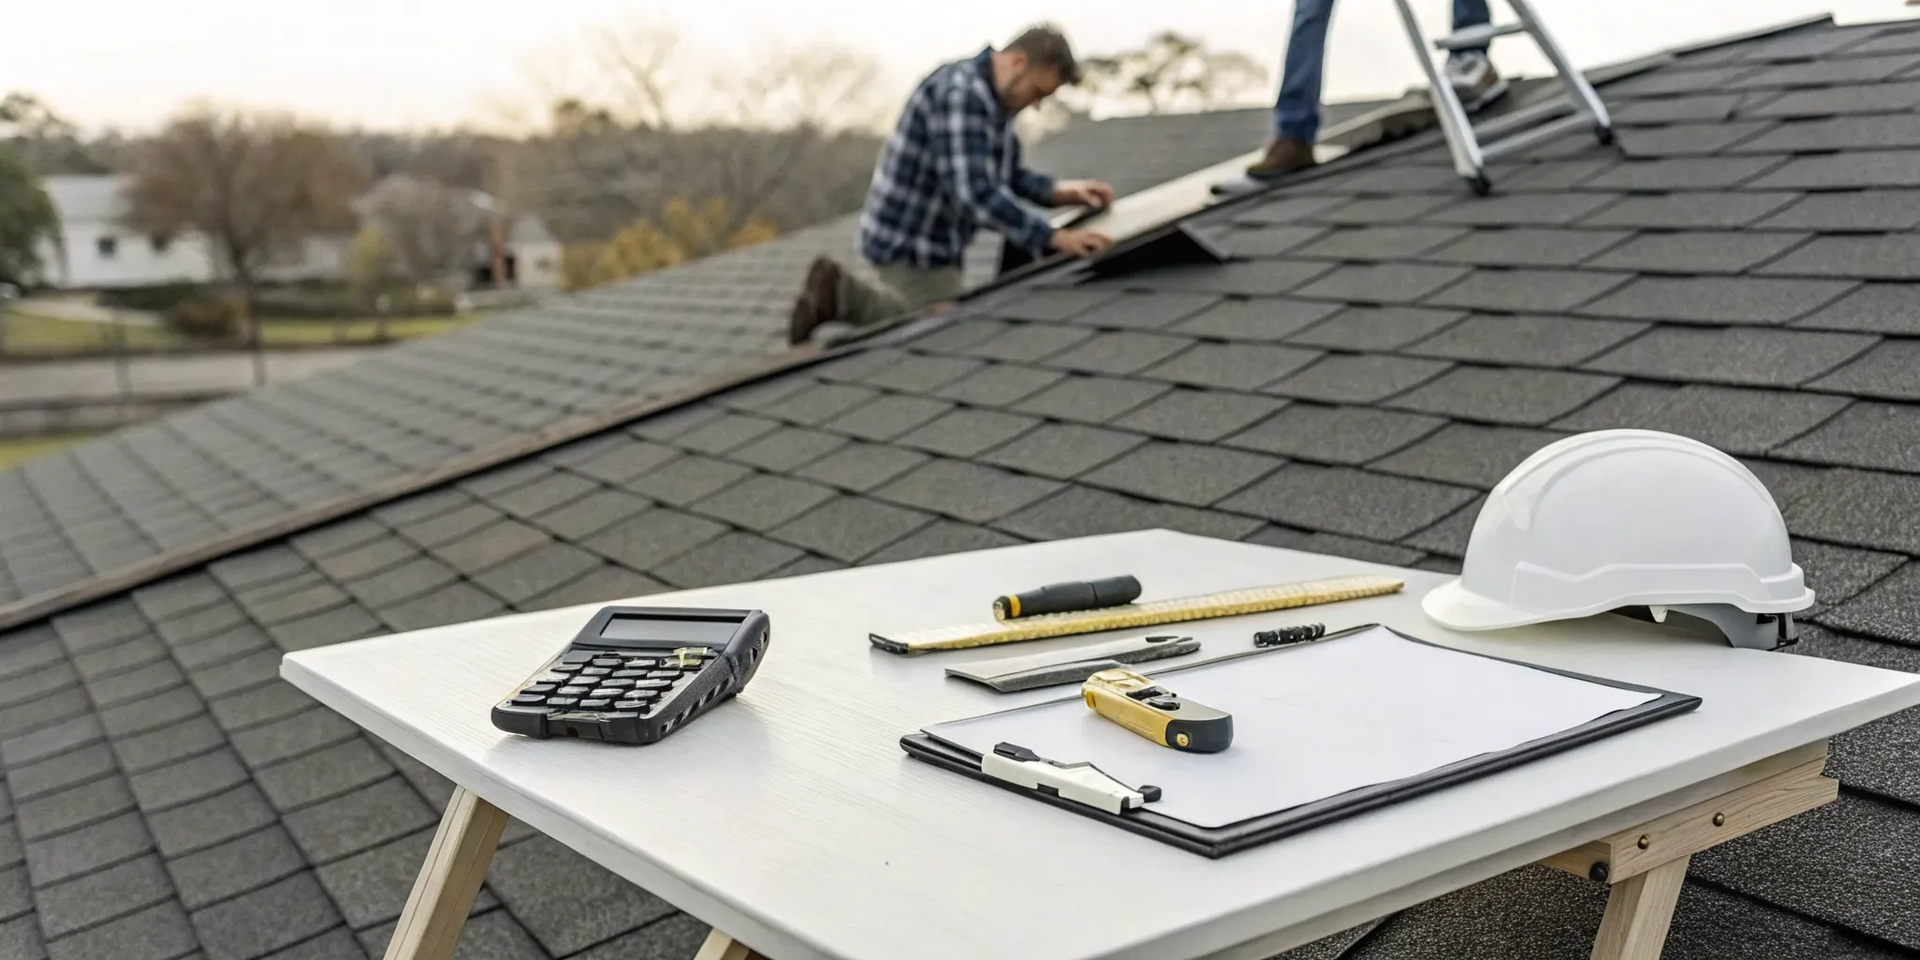
Gather Your Tools and Materials
Before you even think about climbing a ladder, let’s talk about preparation. Getting all your tools and materials in one place before you start is one of the best things you can do to make this project safer and more efficient. A little prep work on the ground saves you from making multiple trips up and down the ladder, which is always a good thing. Think of it as setting up your workstation. When everything is within arm's reach, you can focus on doing the job right without any frustrating interruptions.
This project doesn’t require a massive workshop full of equipment, but having the right tools is non-negotiable for a clean and secure installation. Let’s walk through exactly what you’ll need to get it done.
Essential Tools for the Job
Having the correct tools on hand makes all the difference. You’ll want to gather these items before you begin:
- A sturdy ladder: Safety first. Make sure your ladder is on stable, level ground and tall enough for you to work comfortably without overreaching.
- Work gloves: A good pair of gloves will protect your hands from sharp edges on the gutter guards and any rough spots on your shingles.
- Tin snips or heavy-duty scissors: You will likely need to cut the gutter guard sections to fit the specific lengths of your gutters, especially at the corners.
- Screw gun or drill: This is for fastening the guards to the front lip of the gutter, not the shingles.
- Putty knife (optional): If your shingles are lightly sealed together, a putty knife can sometimes help gently separate them without causing damage.
Gutter Guard Materials Checklist
With your tools ready, let's look at the materials. The main item is, of course, the gutter guards themselves. When you’re shopping, make sure you choose a product that is compatible with your roof and designed to slide under the shingles. There are many options available for different types of gutters and the kind of debris you get in your area.
Your checklist is simple: just the gutter guards. What’s more important is what’s not on this list: nails or long screws intended for your roof. A critical mistake is puncturing your shingles to hold a gutter guard in place. This can void your roof warranty and create an entry point for leaks. The guards should be secured to the gutter’s fascia, not your roof. Also, remember to overlap each section of the guard by about half an inch to an inch to prevent any gaps where debris could sneak in.
How to Install Gutter Guards: A Step-by-Step Guide
Alright, you’ve got your tools and materials, and you’re ready to get started. Installing gutter guards can be a very manageable weekend project, but the key is to work carefully and methodically. Before you even think about climbing a ladder, take a moment to review these steps. The goal isn’t just to get the guards on; it’s to do it in a way that protects your shingles, ensures your gutters function perfectly, and keeps you safe. Remember, you’ll be working at a height and handling your roof, so safety should always be your top priority.
This guide walks you through the process of installing gutter guards that slide under your shingles. It’s a common and effective method, but it requires a gentle touch to avoid damaging your roof. If at any point you feel unsure or find that your shingles are sealed down too tightly, don't force it. It’s always better to pause and call a professional than to risk an expensive roof repair. If you follow these instructions, you’ll be well on your way to a clean, low-maintenance gutter system that protects your home for years to come.
Step 1: Clean and Inspect Your Gutters
Before you can install anything, you need a clean slate. Start by thoroughly cleaning out your gutters to remove all leaves, twigs, and gunk. A gutter scoop and bucket work well for heavy debris, and a garden hose can flush out the rest. While you’re up there, this is the perfect time for a quick inspection. Look for any signs of damage, like cracks, rust spots, or sections that are pulling away from the fascia board. Also, check that your downspouts are completely clear. Installing guards on damaged or clogged gutters will only trap problems, so make sure everything is in top shape first.
Step 2: Gently Lift the First Row of Shingles
This is where you need to be extra careful, as improper technique can damage your shingles and potentially affect your roof’s integrity. You need to create just enough space to slide the back edge of the gutter guard underneath the first row of shingles. On a warm day, shingles are more flexible and easier to work with. If it’s cold, they can become brittle and crack. Use a flat pry bar to gently lift the edge of the shingles, but avoid applying too much force. If you meet a lot of resistance, especially on an older residential roof, it might be a sign to stop and reconsider a different installation method.
Step 3: Slide the Gutter Guard into Place
With the shingles slightly lifted, take your first section of gutter guard and slide its back edge into the space you created. The guard should slip in smoothly without you having to force it. Make sure it goes in far enough to be secure but not so far that it creates a steep, unnatural angle. The front edge of the gutter guard should rest securely on the front lip of the gutter. This positioning is key to ensuring water flows correctly into the gutter while leaves and debris slide right off the top. Take your time to get the placement just right before moving on.
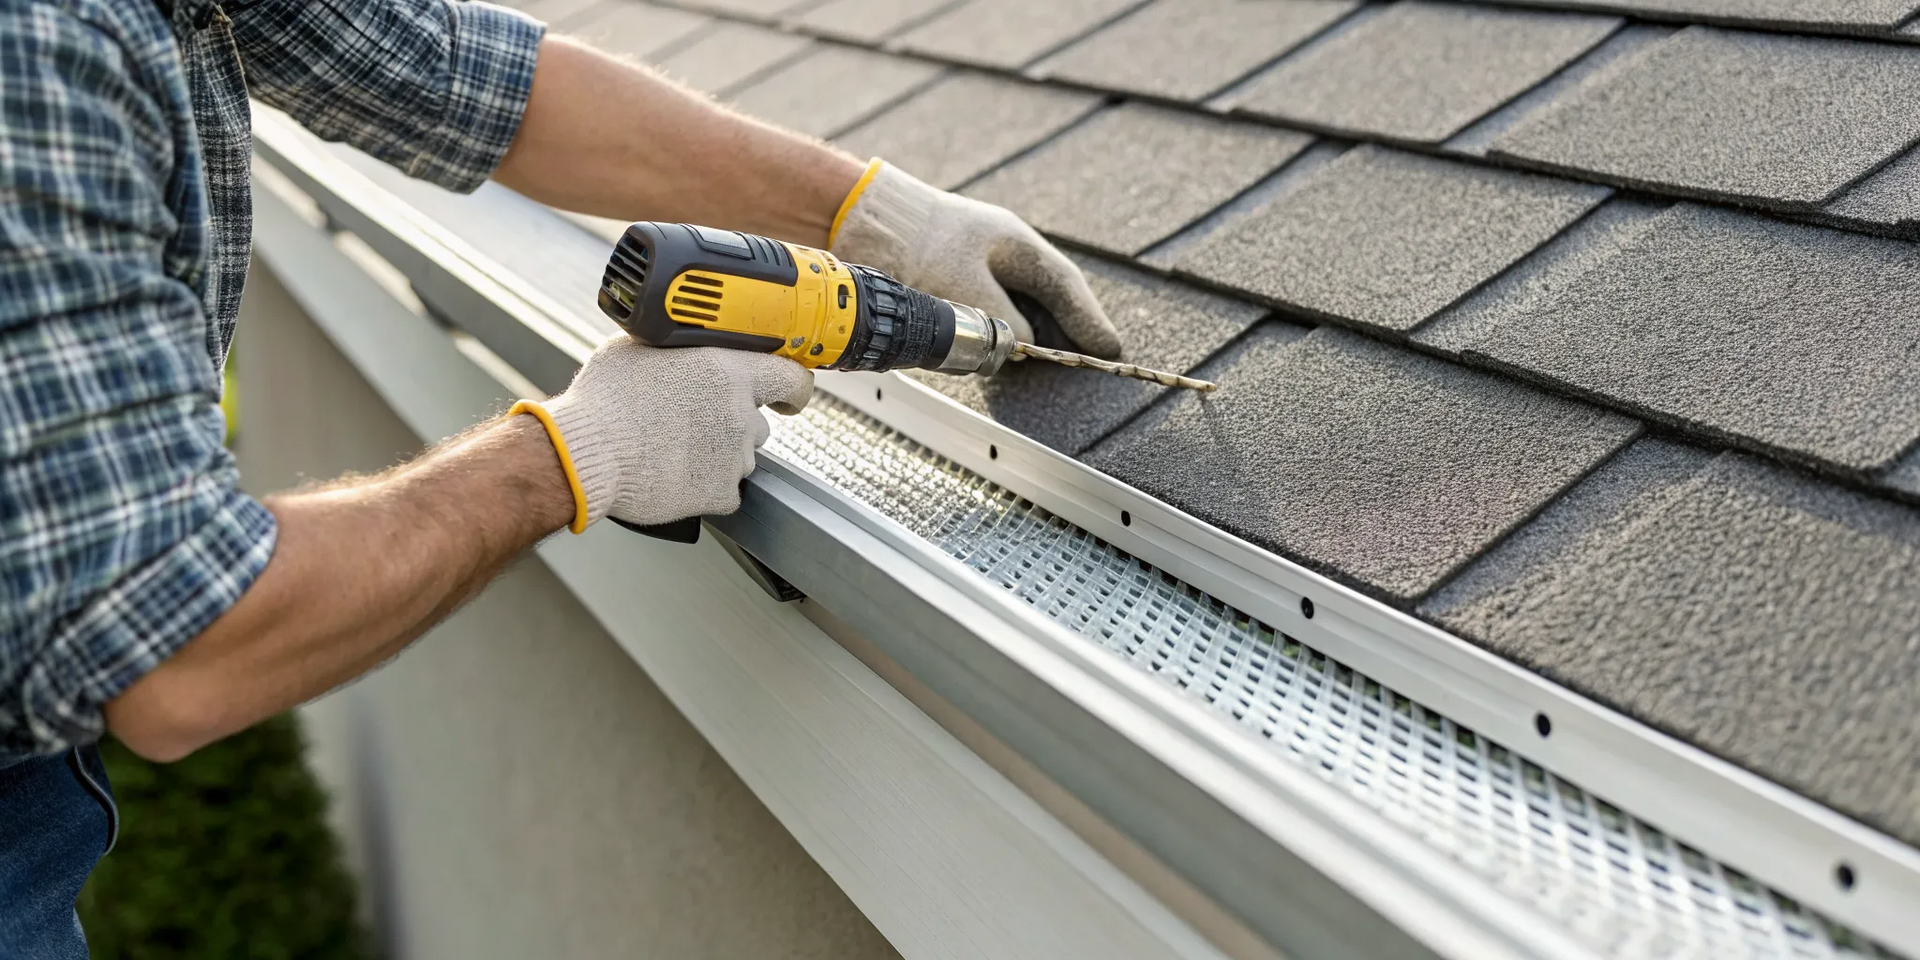
Step 4: Secure the Guard to the Fascia
Once the gutter guard is properly positioned, you need to fasten it so it stays put. Most gutter guard kits come with self-tapping screws for this purpose. You’ll be securing the front edge of the guard to the front lip of the gutter. Use a power drill to drive the screws in, but don’t overtighten them. You want the guard to be snug and secure, but cranking the screws down too hard can strip the hole or even crack the gutter’s edge. Place screws every 18 to 24 inches or according to the manufacturer’s instructions to ensure the guard is held firmly in place.
Step 5: Overlap Each Section Properly
As you work your way down the length of the gutter, you’ll need to connect multiple sections of gutter guards. To create a continuous, seamless barrier against debris, you must overlap the sections. A good rule of thumb is to overlap each piece by about a half-inch to an inch. This prevents any gaps from forming where small leaves or seeds could sneak through and cause clogs. Most gutter guards are designed with an overlapping feature, making this step straightforward. Just make sure each new section sits neatly on top of the previous one before you secure it.
Step 6: Seal All Seams and Corners
To make your installation truly watertight and effective, it’s a good idea to seal any seams or joints. Pay special attention to the overlaps between sections, the end caps, and any inside or outside corners. Use a high-quality, outdoor-grade waterproof sealant or caulk applied with a caulking gun. A small, clean bead of sealant is all you need to prevent water from seeping through small gaps, especially during heavy downpours. This extra step helps ensure that all the rainwater is directed exactly where it needs to go: into your gutters and down the spouts.
Step 7: Test Your Work with a Water Hose
You’re almost done! The final step is to test your handiwork. Grab a garden hose and run water over the roof and onto your newly installed gutter guards. Watch carefully to see how the water behaves. It should flow over the guards, through the mesh or perforations, and into the gutter channel before draining out the downspout. Check for any areas where water might be splashing over the side or leaking through seams you may have missed. This simple test gives you peace of mind that your installation is successful and ready to handle the next storm.
What If Your Shingles Are Sealed Down?
You’ve cleaned out your gutters and are all set to install your new guards, but then you hit a snag. The first row of shingles won’t lift because it feels like they’re glued down. This is actually a common roofing practice, especially in areas with high winds, where roofers use a strong adhesive to prevent wind damage. While this seal is excellent for your roof’s integrity, it creates a real challenge for installing gutter guards that are designed to slide underneath. Forcing the issue can cause significant damage, so it’s important to pause and consider your next move. Let’s walk through the problem and your safest options.
The Challenge with Sealed Shingles
Discovering your shingles are sealed can feel like a major roadblock, and for good reason. That adhesive bond creates a critical watertight barrier that protects your home from the elements. Attempting to install a gutter guard that tucks underneath puts you in a difficult position. If you try to pry or force the guard into place, you risk cracking the shingles and breaking that protective seal, which can lead to leaks and water damage over time. The risk is even greater on a hot day when asphalt shingles are softer and more susceptible to tearing. The very feature meant to protect your roof now stands in the way of your project.
Safe Alternatives When Shingles Won't Budge
If your shingles won't lift easily, the first rule is not to force them. You have a couple of much safer alternatives. You can try to gently break the adhesive bond using a simple putty knife, but only attempt this on a cool day when the shingles are firm and less likely to tear. Carefully work the knife between the shingles to separate them. If that feels too risky or just isn't working, your best option is to change your approach entirely. You can find different gutter guard systems that attach directly to the fascia board or the outer lip of the gutter, avoiding any contact with your shingles and roof.
When It's Best Not to Tuck Under Shingles
Frankly, sliding anything under your shingles should always be done with extreme caution. Breaking that factory seal can have serious consequences beyond just a few cracked shingles. It can create a direct path for water to get under your roofing material, leading to rot and costly repairs. More importantly, improper installation can void your roof’s warranty. Most shingle manufacturers will not cover damage caused by aftermarket products that are installed incorrectly. Screwing or nailing through your shingles is a huge mistake that compromises your roof. When in doubt, it is always better to choose a gutter guard that doesn't involve tucking or to protect your roof by calling a professional for the installation.
Common Installation Mistakes to Avoid
Installing gutter guards seems straightforward, but it’s a project where precision is everything. A few common missteps can lead to water damage, a voided roof warranty, or guards that simply don’t work. Getting it right from the start saves you from costly headaches down the road. Whether you’re tackling this yourself or hiring a contractor, knowing what pitfalls to look out for is the key to a successful installation.
Protecting your home means ensuring every component of your roofing system works together seamlessly. From the shingles on your roof to the gutters on its edge, each part has a job to do. These common mistakes can compromise that system, turning a well-intentioned upgrade into a source of future problems. Let’s walk through what can go wrong and how you can make sure it goes right.
Forcing Shingles and Breaking the Seal
One of the most critical mistakes is being too aggressive with your shingles. Most asphalt shingles have a tar strip that activates in the sun, sealing them to the row below. This seal is your roof’s primary defense against wind-driven rain. Forcing a gutter guard underneath can easily break this vital bond. When that seal is compromised, water can seep under the shingles, leading to wood rot on your roof deck and potential leaks inside your home. This kind of damage can also give your roofing manufacturer a reason to void your roof’s warranty , leaving you responsible for expensive repairs.
Puncturing Shingles with Nails or Screws
Your shingles are designed to form an unbroken, waterproof barrier. Driving nails or screws through them to secure a gutter guard is a major mistake. Each hole you create is a potential entry point for water, which can lead to rot and leaks over time. This installation method is a huge red flag and is almost always guaranteed to void your shingle warranty. Gutter guards should be fastened to the fascia board (the board your gutters are attached to) or clipped directly onto the gutter itself. A proper installation should never involve puncturing your residential roofing surface.
Misaligning the Guards
Proper alignment is crucial for gutter guards to function correctly. If they are positioned incorrectly, they can cause more harm than good. The guard should sit at the same angle as your roof’s pitch to allow debris to slide off while water flows into the gutter. If the guard is too flat, leaves and pine needles will collect on top, creating a dam. If it’s too steep or doesn't extend over the gutter lip, rainwater can overshoot the gutter entirely and pour down onto your foundation. The guard must be perfectly aligned with the roof's edge and the gutter to work as intended.
Choosing the Wrong Type of Guard
There is no one-size-fits-all solution when it comes to gutter guards. The best choice for your home depends on your specific environment. Do you have tall pine trees that drop needles year-round, or large oak trees that shed leaves every fall? Do you live in an area prone to heavy downpours? Different guards are designed to handle different types of debris and water flow. For example, a screen guard that works well for large leaves might clog instantly with pine needles. Choosing the wrong type can mean you’ll be cleaning your gutter guards just as often as you used to clean your gutters.
Ignoring the Weather Forecast
Weather plays a surprisingly important role in a successful gutter guard installation. Many systems require a sealant to secure corners or end caps, and these adhesives need specific conditions to cure properly. Installing them in the rain or in freezing temperatures can prevent the sealant from bonding, creating weak spots that will leak or fail. It’s also a matter of safety; working on a ladder or roof in high winds or wet conditions is extremely dangerous. For best results, plan your installation for a mild, dry day when temperatures are stable.
Skipping the Gutter Cleaning Step
Installing gutter guards over dirty, clogged gutters is like putting a cap on a full bottle of trash. It completely defeats the purpose of the guards and can trap moisture and debris, accelerating rust and rot. Before any guard goes on, your gutters must be thoroughly cleaned and inspected. This is the time to check for sagging sections, loose hangers, leaks, and any damage to the fascia board. Covering up existing problems will only make them worse and harder to fix later. A clean and fully functional gutter system is the essential first step for any gutter guard installation.
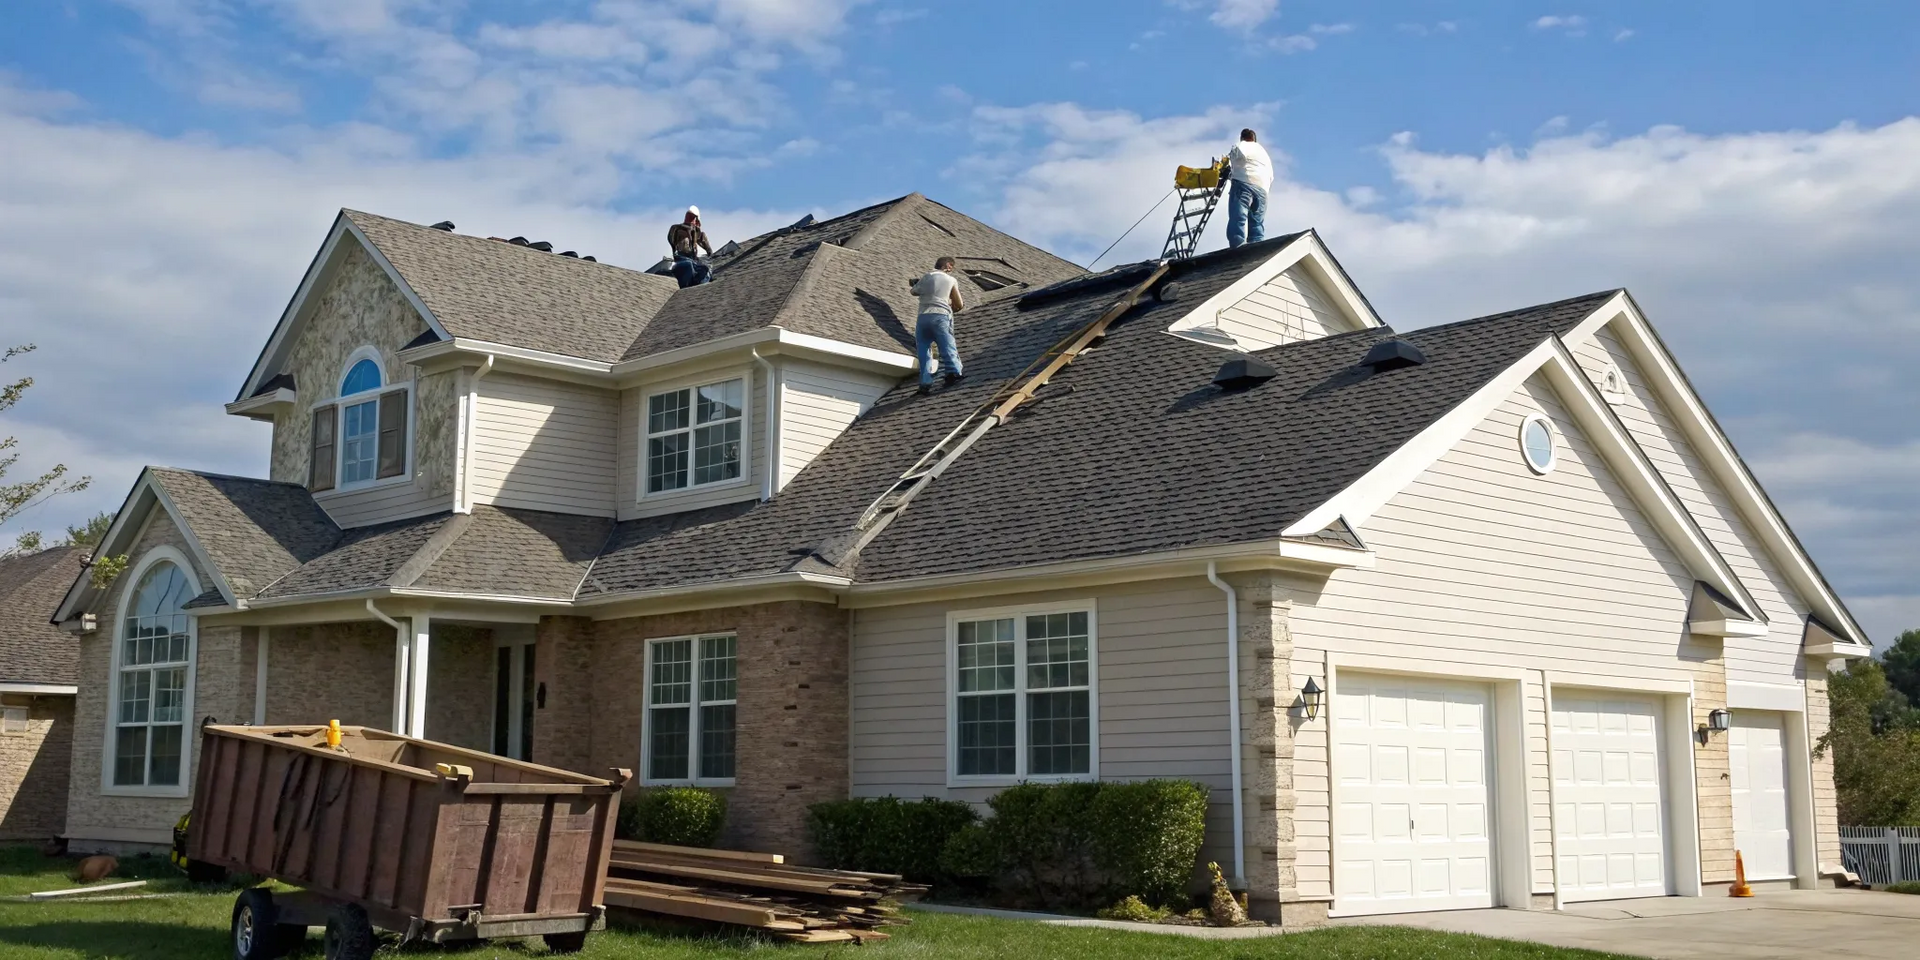
Should You DIY or Hire a Professional?
I get it, the satisfaction of completing a home project yourself is hard to beat. But when a project involves your roof, the stakes are significantly higher. Installing gutter guards seems straightforward, but one wrong move can lead to big problems, like leaks or even voiding your roof’s warranty. This isn’t just about saving a few hours of labor; it’s about protecting one of your home’s most critical and expensive components. The decision to DIY or hire a professional for gutter guard installation really comes down to weighing the risks against the rewards.
Before you pull out the ladder, it’s worth taking a moment to honestly assess the job and your comfort level with it. Unlike painting a room or assembling furniture, mistakes made on your roof aren't always easy or cheap to fix. A professional brings not just the right tools but also the experience to handle the project safely and correctly, ensuring your home stays protected and your warranties remain intact. Let’s walk through what to consider so you can make the best choice for your home.
Signs This Project Is Best Left to a Pro
If you find yourself nodding along to any of these points, it’s a strong signal to call in a professional. This project is likely best left to an expert if your house is more than one story tall, your roof has a steep pitch, or you’re simply not comfortable working on a ladder for an extended period. Safety should always be your top priority.
Beyond safety, consider the technical aspects. If you’re unsure how to install the guards without damaging your shingles or fascia, it’s time to pause. Incorrect installation can create leaks, cause water to back up onto your roof, and ultimately lead to costly repairs that far exceed the price of a professional job.
What a Professional Installation Includes
When you hire a professional, you’re paying for more than just a pair of hands. You’re investing in expertise and peace of mind. A professional installation begins with a thorough inspection of your existing gutters and roofline to identify any underlying issues that need attention. They will completely clean your gutters, ensuring there’s no debris left to cause future clogs.
Using specialized tools and industry knowledge, they will install the gutter guards according to the manufacturer’s exact specifications. This ensures the system functions effectively and integrates seamlessly with your existing residential roofing. A pro’s work is clean, efficient, and designed to provide long-lasting protection for your home without any guesswork.
How a Pro Protects Your Roof and Warranty
This is one of the biggest reasons to hire a professional. Many roof warranties have specific clauses about what can and cannot be done to the shingles. A common DIY mistake is nailing or screwing gutter guards directly through the shingles, which creates punctures. These small holes can allow water to seep underneath, leading to rot and leaks, and will almost certainly void your shingle warranty.
A certified contractor understands the fine print. We know the proper techniques for securing gutter guards without compromising the integrity of your roof. For example, we install guards by attaching them to the fascia board or sliding them carefully under the shingles without breaking their sealant. This preserves your roof’s protective layers and keeps your valuable warranty valid.
Keep Your Gutter Guards Working Like New
Gutter guards are fantastic for reducing your maintenance workload, but they aren’t a “set it and forget it” solution. Think of them as a low-maintenance upgrade, not a no-maintenance one. A little bit of seasonal attention will ensure they perform their best for years, protecting your home from water damage. Performing quick inspections and simple upkeep helps you catch small issues before they turn into costly repairs. It’s all about keeping your entire gutter system, from the hangers to the downspouts, in top working order so the guards can do their job effectively.
Your Quick Inspection Checklist
Before you even think about covering your gutters, and at least twice a year after your guards are installed, it’s smart to give the system a quick look. You want to make sure you aren’t trapping any existing problems under the new guards.
Here’s what to look for:
- Sagging or pulling away: Are the gutters hanging straight or dipping in the middle?
- Loose hangers: Check if the hardware securing the gutters to your home is tight.
- Leaks or holes: Look for drips, rust spots, or visible holes.
- Improper slope: Water should flow toward the downspouts, not stand still.
Fixing these issues first is critical. If you spot any of these problems, it’s best to get professional gutter services to ensure everything is repaired correctly before proceeding.
Simple Maintenance Tips for Year-Round Protection
Once your gutter guards are installed, a few simple habits will keep them functioning perfectly. At least once a season, use a garden hose to spray down the guards and wash away any fine debris like shingle grit, pollen, or dirt that might have settled on the surface. This quick rinse helps maintain maximum water flow.
If you ever need to do a repair, remember to use an outdoor-grade sealant at all seams, corners, and end caps to keep the system watertight. It’s also wise to work in mild weather, as sealants cure best in moderate temperatures. By staying on top of these small tasks, you ensure your guards and residential roofing work together as a complete system to protect your home.
Related Articles
- The Ultimate Guide to Gutter Guard Installation
- Are Gutter Guards Worth the Cost? A Homeowner's Guide
- Architectural Asphalt Shingles: A Homeowner's Guide
Frequently Asked Questions
Do I really never have to clean my gutters again if I have guards? That’s the dream, isn't it? While gutter guards drastically reduce how often you need to clean your gutters, they are low-maintenance, not no-maintenance. Depending on your surroundings, you might still get a fine layer of shingle grit, pollen, or dirt on top of the guards. A quick rinse with a garden hose once or twice a year is usually all it takes to keep water flowing freely. Think of it as trading a few hours of mucking out gutters for a few minutes of light rinsing.
Are gutter guards actually worth the cost? It’s helpful to think of gutter guards as an investment in prevention. The upfront cost is often small compared to the potential price of repairs from water damage. Clogged gutters can lead to water overflowing and pooling around your foundation, seeping into your basement, or rotting the wooden fascia boards along your roofline. By ensuring water is always channeled away from your home, you’re protecting its structural integrity and avoiding much larger, more expensive problems later on.
What's the best type of guard for homes with lots of pine trees? If your yard is full of pine trees, you know the struggle with needles. For this specific type of debris, micromesh gutter guards are typically the most effective option. Their fine screen is designed to block small particles like pine needles, which can easily slip through guards with larger openings. This design allows water to pass through while shedding the needles and other fine debris, preventing the clogs that are so common in wooded areas.
When should I absolutely call a pro instead of installing guards myself? You should definitely call a professional if your home is more than one story tall or if your roof has a steep pitch. Your safety is the top priority, and working at heights carries significant risk. It's also wise to call for help if you find your shingles are sealed down and won't lift easily. Forcing them can break the watertight seal and lead to leaks. A professional knows how to handle these situations without damaging your roof or voiding its warranty.
So, will installing gutter guards void my roof warranty or not? Simply having gutter guards will not void your roof warranty. The warranty is put at risk by an improper installation. The main issue is puncturing your shingles with nails or screws to hold the guards in place. This action creates holes for water to enter and will likely void your warranty for any resulting damage. A correctly installed system attaches to the gutter or fascia board, leaving your shingles and your warranty completely intact.