DIY Metal Roof Installation: A Complete Guide

Stephen Griswell • February 16, 2026

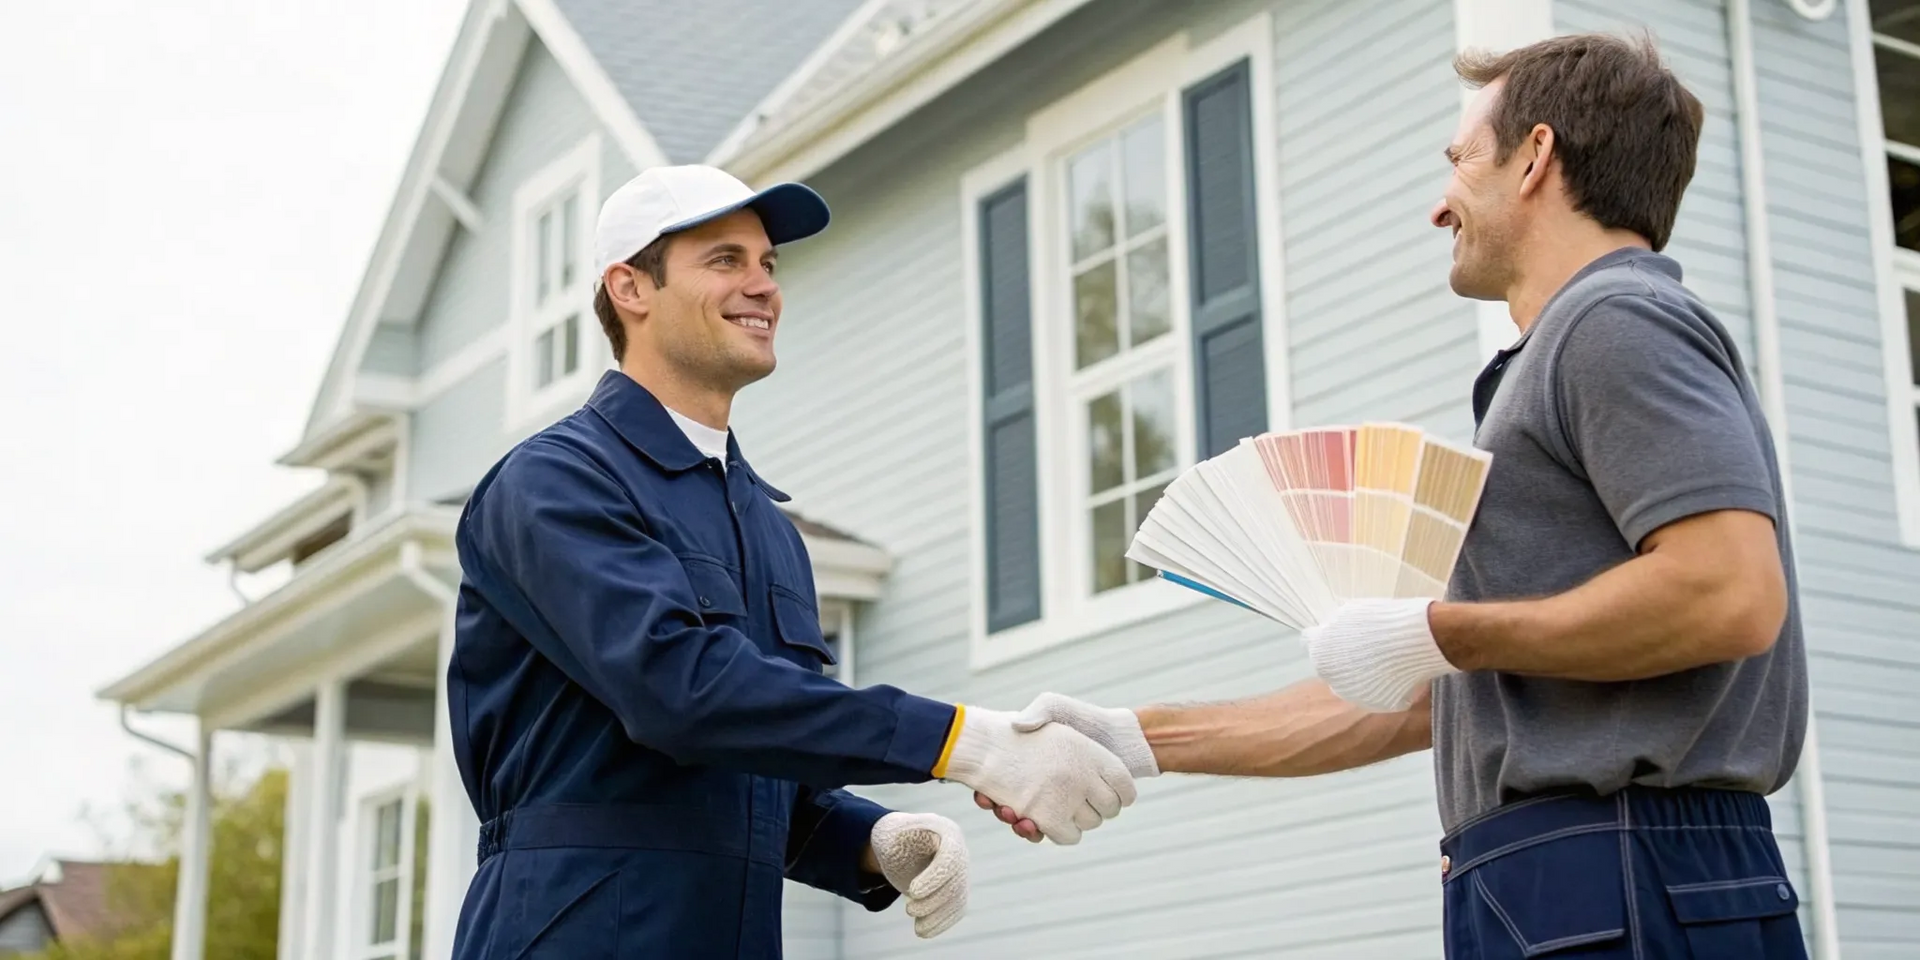
When it comes to a DIY metal roof installation, what you don't know can definitely hurt you. A misaligned first panel, an over-tightened screw, or a skipped underlayment can compromise the entire system, leading to leaks and costly repairs down the road. It’s the small details that make the difference between a roof that lasts 50 years and one that fails in five. Before you climb that ladder, it’s crucial to understand the common pitfalls. We’re here to guide you through the process, highlighting the critical steps and frequent mistakes so you can approach your project with confidence and get the professional-quality results your home deserves.


CONTACT US


Key Takeaways

  • Start with a solid base: Your new roof is only as good as the surface beneath it. Always repair the roof deck and install a quality underlayment to protect your home from moisture and condensation.
  • Focus on the small details: Proper installation is all about precision. Take your time aligning the first panel, use the correct fastening technique to allow for metal expansion, and carefully flash all roof penetrations.
  • Recognize when to hire an expert: While DIY is tempting, complex roofs with multiple valleys or skylights are best left to professionals. A pro handles permits, ensures the job is up to code, and protects your warranty.

Why Choose a Metal Roof?

When you’re thinking about a new roof, you’re making a major investment in your home’s safety and value. While asphalt shingles are a common sight, metal roofing has become an incredibly popular choice for good reason. It’s a durable, efficient, and stylish option that offers some fantastic long-term benefits. If you're looking for a material that stands the test of time, helps you save money on energy bills, and frees you from the cycle of constant upkeep, a metal roof might be the perfect fit for your home. It's a smart choice that pays you back over the years.

Choosing the right residential roofing material is a big decision, and metal offers a compelling case. It’s not just about function; modern metal roofs come in a wide array of colors and styles, from sleek standing seams to panels that mimic the look of traditional shingles, slate, or tiles. This versatility means you don’t have to sacrifice curb appeal for performance. In fact, a metal roof can significantly enhance your home's aesthetic while providing superior protection. Let’s walk through the top reasons why so many homeowners are making the switch to metal.

They Last for Decades

One of the most significant advantages of a metal roof is its incredible lifespan. While a typical asphalt shingle roof might need replacing every 15 to 30 years, metal roofs can last a very long time, usually 50 to 70 years. Think about that for a moment. A metal roof could easily be the last roof you ever need to install on your home. This longevity means you avoid the recurring cost and hassle of replacement that comes with other materials. It’s a true long-term solution that provides peace of mind for decades, protecting your home through countless seasons and storms.

Save on Energy Bills

Who doesn’t want to lower their monthly utility costs? A metal roof can make a real difference, especially during those hot Georgia summers. Unlike asphalt, which absorbs and holds heat, metal roofs reflect heat from the sun. This simple feature can help keep your house cooler and lower your air conditioning bills. By reducing the amount of heat that transfers into your attic and living spaces, your HVAC system doesn't have to work as hard to maintain a comfortable temperature. This energy efficiency is not only great for your wallet but also a more environmentally friendly choice for your home.

Enjoy Low-Maintenance Living

If you’d rather spend your weekends enjoying your home than working on it, a metal roof is an excellent choice. Metal roofs are chosen for their modern look, low need for upkeep, and long life. They are incredibly resilient and don’t require the regular maintenance that other roofing materials do. Metal is resistant to cracking, shrinking, and eroding. It can also stand up to high winds, and it won’t be damaged by pests like termites or rodents. Plus, it’s fire-resistant, which can add an extra layer of safety to your home. With a metal roof, you can spend less time worrying about repairs and more time living.

What You'll Need for the Job

Before you climb that ladder, a little prep work on the ground will set you up for success. Gathering the right materials and tools is half the battle in any DIY project, especially roofing. Getting everything organized ahead of time means you can work more efficiently and safely once you start the installation. Let’s walk through exactly what you’ll need.

Choosing Your Metal Panels

First things first: the panels. The type of metal panel you choose impacts both the installation and your roof's long-term performance. For a DIY project, I generally recommend looking at standing seam panels. Their design cleverly hides the fasteners, which minimizes potential leak points and gives your roof a clean, modern look. The alternative is exposed fastener panels. While often quicker to install, the screws are visible and can wear out over time, meaning you might be back on the roof replacing them down the road. Your choice depends on balancing upfront effort with future maintenance.

The Essentials: Underlayment, Fasteners, and Flashing

Don’t overlook what goes underneath your metal panels. A quality underlayment is your roof’s secret weapon against moisture, acting as a critical barrier to prevent leaks caused by condensation. You’ll want to use a solid material, like 3/8-inch plywood covered with tar paper or a modern synthetic underlayment. When securing the panels, precision is key. Place your screws no more than 24 inches apart on the panels. For the gable trim along the edges of the roof, place them closer together, about every 12 inches, to ensure a tight, secure fit that can stand up to the elements.

Must-Have Tools and Safety Gear

Working with metal requires a few specialized tools. You’ll definitely need a good set of metal snips for making left, right, and straight cuts, and an 18-inch hand brake will be invaluable for bending trim pieces. For making long, straight cuts on the panels, consider renting a nibbler or power shears from a local tool shop. Most importantly, prioritize your safety. Before you step onto the roof, make sure you have the proper fall protection gear, including a harness and safety ropes. It’s a non-negotiable part of staying safe while you work.

How to Install a Metal Roof: Step by Step

Installing a metal roof is a significant but rewarding project. While it's definitely an advanced DIY undertaking, breaking it down into clear, manageable steps can make the process much smoother. Careful planning and attention to detail are your best friends here. Let’s walk through the key stages of installing a durable, beautiful metal roof.

Step 1: Prep Your Roof Surface

A successful installation starts with a solid foundation. Before a single panel goes on, you need to ensure your roof deck is clean, dry, and structurally sound. This means removing the old roofing material, inspecting the underlying wood for any signs of rot or damage, and making necessary repairs. If you find any soft spots, now is the time to replace that sheathing. For some homeowners, a complete tear-off is the best route, but if you have a single, smooth layer of asphalt shingles, you might be able to install the metal roof over it. Always check your local building codes first to see what’s allowed. A thorough inspection is key to avoiding future problems with your residential roofing system.

Step 2: Lay the Underlayment

Don’t even think about skipping this step. The underlayment is a water-resistant barrier that provides a critical secondary layer of protection against moisture. If you skip it, you risk major leaks caused by condensation that can form on the underside of the metal panels. Always use a high-quality synthetic underlayment designed for metal roofing. Start by rolling it out along the bottom edge of the roof, working your way up. Make sure each new row overlaps the one below it by several inches. This lapping technique ensures that any water that gets underneath the panels will flow down and off the roof, keeping your home dry and protected.

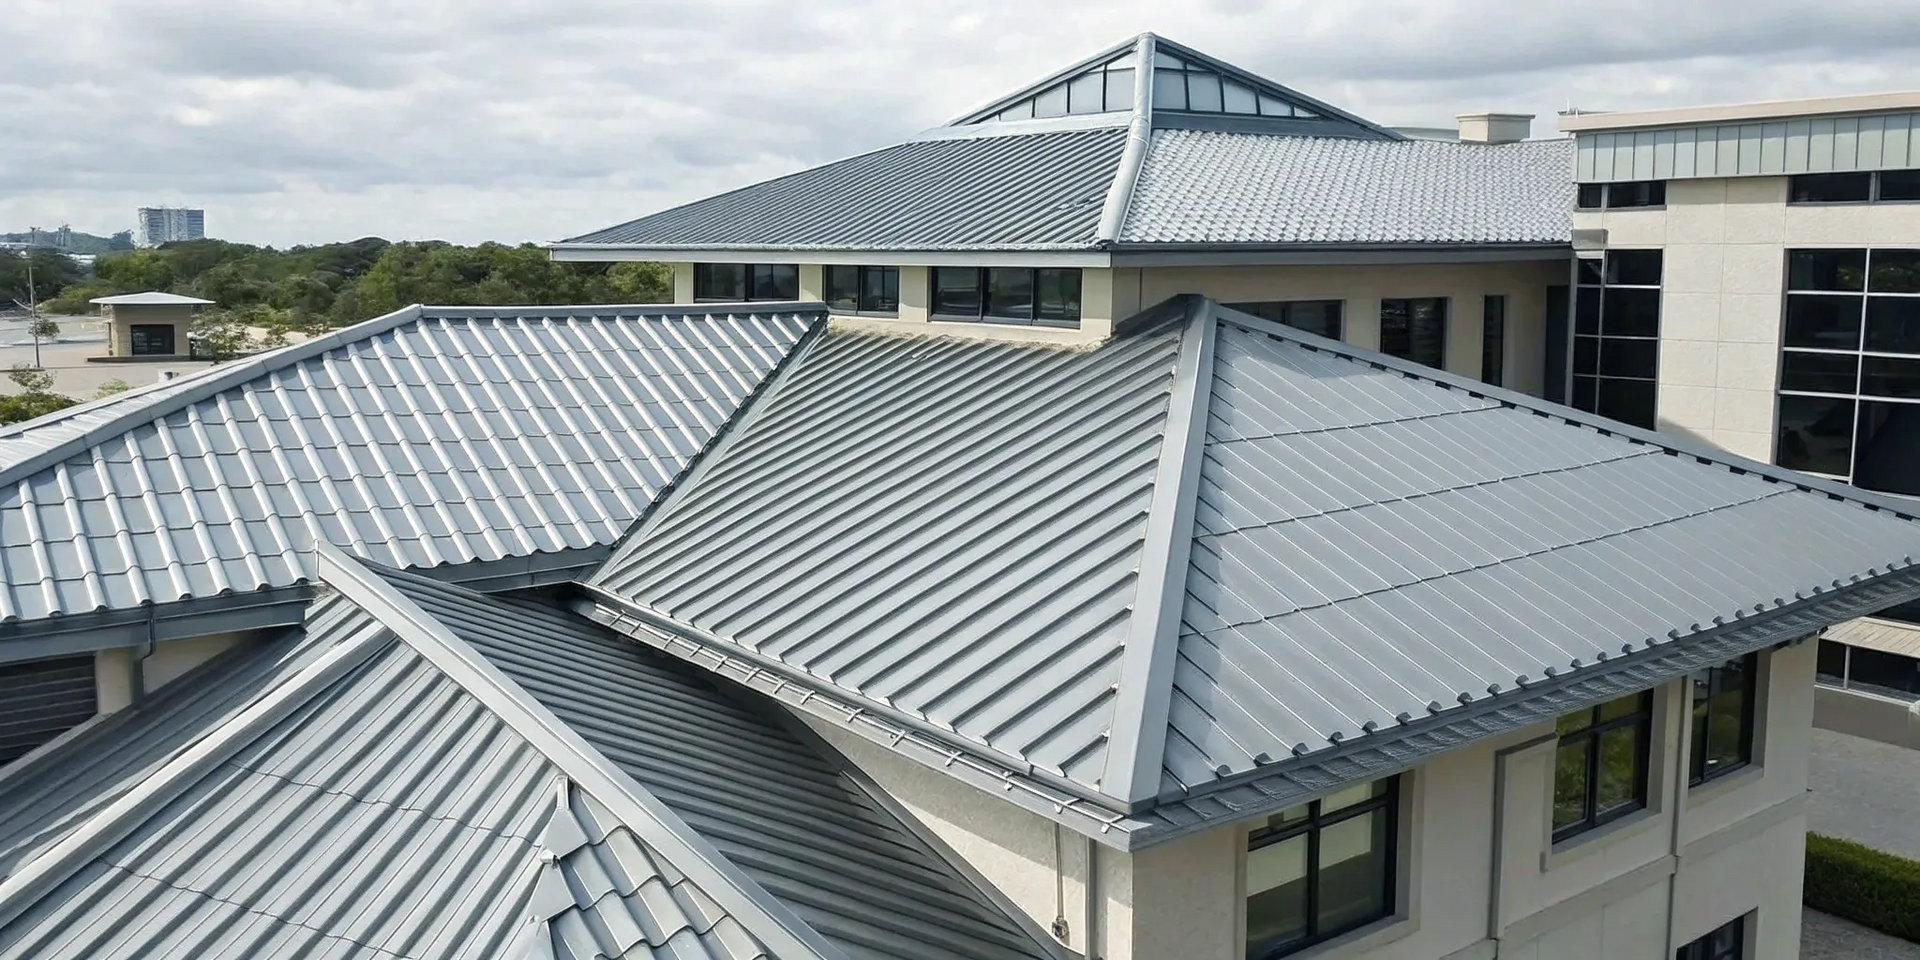
Step 3: Install and Secure the Panels

This is where your roof really starts to take shape. The most important part of this step is getting the very first panel perfectly straight and aligned with the edge of the roof. Every other panel will line up with this one, so take your time to get it right. As you lay each subsequent panel, it will overlap the previous one, creating an interlocking seam that sheds water effectively. When fastening the panels, use screws with rubber washers to create a watertight seal. Place your screws no more than 24 inches apart to ensure the panels are secure against wind and weather. This precision is just as important for large commercial roofing projects as it is for homes.

Step 4: Add the Finishing Touches

The final step is all about sealing the edges and openings to make your roof completely weatherproof. This involves installing flashing around chimneys, vents, and skylights, as well as adding trim and ridge caps. Every penetration in your roof is a potential spot for a leak, so proper sealing is essential. Once everything is installed, do a final sweep of the roof. Be sure to clean up any small metal shavings or filings left over from cutting the panels. If you leave them on the surface, they will rust and can cause unsightly stains on your brand-new roof. These finishing details are what separate a good roof from a great one.

Don't Make These Metal Roofing Mistakes

Installing a metal roof can be a rewarding project, but it demands precision. A few small mistakes during installation can lead to big problems like leaks, cosmetic issues, or even a shortened lifespan for your roof. Getting the details right is what separates a weekend project from a long-term, weatherproof investment. Let’s walk through some of the most common missteps and how you can avoid them to ensure your new roof performs beautifully for years to come.

Poor Fastening and Misaligned Panels

The way you fasten your metal panels is critical to the roof's strength and durability. Think of the first panel as the foundation for the entire roof; if it isn't perfectly straight, every subsequent panel will be slightly off, creating a domino effect of misalignment. Take the extra time to ensure that first piece is true. When it comes to securing the panels, follow a consistent pattern. Screws should be placed no more than 24 inches apart on the panels and every 12 inches on the gable trim. This level of detail ensures a secure, wind-resistant finish and is a hallmark of professional residential roofing installation.

Skipping Underlayment or Bad Sealing

Your metal panels are the primary barrier against rain and snow, but the underlayment is your essential backup. This layer, often a special synthetic film or tar paper over plywood, protects your roof deck from condensation that can form on the underside of the metal. Skipping this step is a recipe for slow leaks and water damage that you might not notice until it’s too late. A properly installed metal roof should shed water so effectively that the underlayment never gets wet, but having it there is non-negotiable for a truly weatherproof system.

Forgetting About Thermal Expansion

Metal naturally expands and contracts as the temperature changes throughout the day and across seasons. Your installation method needs to account for this movement. When driving screws, aim for the sweet spot: not too tight, not too loose. The screw should be just snug enough to lightly compress the rubber washer beneath the screw head, creating a watertight seal. If you overtighten the screws, you risk restricting the panel's movement, which can cause it to warp or buckle over time. This subtle detail makes a huge difference in the roof's long-term performance.

Ignoring the Weather Forecast

Planning your project around the weather is about more than just your personal comfort. Trying to install a roof in high winds or on a rainy day is not only dangerous but can also compromise the quality of your work. Metal panels can be difficult to handle in the wind, and sealants may not cure correctly in wet or cold conditions. Rushing to finish before a storm rolls in is a common cause of mistakes. Give yourself a clear weather window and don't try to take shortcuts. Patience and careful planning are your best tools for a successful installation.

Safety First: How to Stay Safe on the Roof

Working on a roof is no small task, and your safety should always be the top priority. Before you even think about stepping onto a ladder, it’s essential to have a solid plan for protecting yourself. Installing a metal roof is an advanced DIY project, and treating it with the respect it deserves means taking every precaution seriously. From the gear you wear to how you handle your tools, every step you take can make the difference between a successful project and a serious injury. Let’s walk through the non-negotiables for staying safe while you work.

Gear Up: Your PPE Checklist

Your first line of defense is your personal protective equipment, or PPE. This isn’t the place to cut corners. Start with high-traction, soft-soled work boots to give you a secure grip on the roof surface without scratching the metal panels. You’ll also need safety glasses to protect your eyes from metal shavings and work gloves to prevent cuts from sharp edges. Most importantly, you will need fall protection gear. This includes a safety harness, a lanyard, and a roof anchor. It might feel like a hassle to set up, but it’s a critical piece of equipment that can save your life.

Master Ladder Safety and Fall Protection

Getting on and off the roof safely is just as important as the work you do up there. Always inspect your ladder for damage before using it and place it on firm, level ground. A good rule of thumb is the 4-to-1 ratio: for every four feet of height, the base of the ladder should be one foot away from the wall. Make sure the ladder extends at least three feet above the roofline so you have something to hold onto. When climbing, always maintain three points of contact (two hands and a foot, or two feet and a hand). Once you’re on the roof, your safety harness should be securely attached to the anchor at all times.

Handle Your Tools Like a Pro

Metal roofing requires specific tools that can be dangerous if used improperly. You’ll be working with metal snips, power shears, and other sharp instruments designed to cut through steel. Before you start, read the instruction manual for every tool you use. Understand how each one works and follow all the recommended safety precautions. Keep your work area organized to avoid tripping hazards, and never leave tools lying where they could slide off the roof. When you handle your equipment with confidence and care, you not only get better results but also create a much safer environment for your residential roofing project.

Tackling Tricky Spots on Your Roof

Even the most straightforward roof has its challenges. Chimneys, vents, skylights, and valleys are where most DIY installations run into trouble. These features interrupt the clean lines of your roof panels and create opportunities for water to sneak in if they aren't handled with absolute precision. Getting these areas right is what separates a durable, weatherproof roof from one that causes headaches down the road. It requires patience, careful measurement, and a solid understanding of how to create a watertight seal. Let’s walk through how to approach these tricky spots.

How to Work Around Chimneys and Vents

Anything that pokes through your roof, like a vent pipe or a chimney, needs special attention. This is where proper flashing and sealing are non-negotiable. As one DIYer shared from experience, you have to "pay close attention to how you seal around anything that sticks out of the roof." This means carefully cutting your metal panels to fit snugly around the protrusion, then installing flashing in layers to direct water away from the opening. You’ll use a high-quality sealant designed for metal roofing, but remember that sealant isn't a substitute for correctly installed flashing. If you have any doubts, getting help with complex skylight services can prevent costly water damage.

Installing Panels Around Skylights

Skylights are fantastic for letting in natural light, but they can be a real puzzle during a metal roof installation. Just like with vents and chimneys, the goal is to create a completely waterproof barrier. The challenge is that "cutting around skylights and chimneys can be hard," requiring precise cuts on your panels to match the skylight's frame. You'll need to install a custom flashing kit specifically designed for your skylight and metal roofing profile. This involves fitting pieces around the base, sides, and top of the skylight in a specific order to ensure water sheds properly. Take your time, measure multiple times before you cut, and follow the manufacturer’s instructions to the letter.

Finishing Valleys and Ridge Caps

Valleys, where two roof planes meet, and ridge caps, which cover the peak of the roof, are critical finishing touches. These areas manage a large volume of water, so they must be installed perfectly. A professional guide notes, "The installation process needs careful layering, exact measurements, and proper ways of fastening everything together." For valleys, this means installing a special valley flashing or panel before you lay the main roof panels over it. For the ridge cap, you’ll need to ensure it’s vented correctly to allow your attic to breathe while keeping rain and pests out. This final step secures your entire residential roofing system and gives it a clean, professional look.

DIY vs. Pro: When to Call for Help

Tackling a big project yourself can be incredibly rewarding. But when it comes to something as critical as your roof, it’s important to know when to trade the tool belt for the telephone. A metal roof is a significant investment, and a flawless installation is key to its longevity. While a straightforward, low-pitch roof on a small structure might be a manageable DIY, most residential projects have complexities that are best handled by an experienced crew. Let’s walk through a few scenarios where calling a professional is the smartest move.

If Your Roof Design is Complex

Take a look at your roofline. Is it a simple, flat plane, or does it have multiple peaks, valleys, dormers, or skylights? Features like these make a roofing project exponentially more difficult. Every angle and intersection requires precise measurements, custom cuts, and specialized flashing to create a watertight seal. As many experienced builders will tell you, dealing with different slopes and valleys requires real-world experience. An improperly sealed valley can channel water directly into your home, turning your DIY dream into a costly nightmare. For these intricate jobs, a professional’s expertise in residential roofing is invaluable.

For Navigating Building Codes and Permits

Before you even order materials, you have to deal with local building codes and permits. These regulations vary by city and county and dictate everything from the type of underlayment you can use to the specific fastening patterns required for your area. A professional contractor handles this process every day. They know exactly what paperwork is needed, what local inspectors look for, and how to ensure your new roof is fully compliant. This inside knowledge prevents frustrating delays and potential fines, making the entire project run much more smoothly and saving you a major headache.

To Protect Your Warranty and Investment

A new metal roof comes with a hefty manufacturer’s warranty, which is a huge part of its value. However, most of these warranties come with a major condition: the roof must be installed according to the manufacturer's exact specifications. A single mistake, like using the wrong fasteners or improperly overlapping panels, can void the warranty completely. When installed correctly, water runs off without ever touching the underlayment, safeguarding your home. This level of precision is why manufacturers often require installation by certified professionals to honor their warranties. Choosing a contractor with top-tier certifications, like an Owens Corning Platinum Preferred contractor, ensures your roof is installed to the highest standard and your investment is fully protected.

Related Articles

CONTACT US


Frequently Asked Questions

Can I install a metal roof directly over my old asphalt shingles? This is a common question, and the answer is sometimes. It often depends on your local building codes and the condition of your current roof. If you only have one layer of shingles and your roof deck is in solid shape, it might be possible. However, a successful metal roof installation relies on a smooth, stable foundation. Any existing damage or soft spots in the underlying wood must be repaired first, which is why a complete tear-off is often the recommended approach.

Are metal roofs noisy when it rains? That's a popular myth, but it’s not the reality for modern metal roofing. The idea of a loud, tinny roof comes from old barns or sheds where the metal was installed without any decking underneath. When installed on a home with a solid roof deck, underlayment, and proper attic insulation, a metal roof is no louder during a rainstorm than a roof made of asphalt shingles or tile.

What is the single most important step to get right during installation? While every step is important, getting the very first panel perfectly straight and square to the roof edge is absolutely critical. Every other panel on the roof will align with that first one. If it’s even slightly off, the mistake will become more and more obvious as you move across the roof, resulting in a crooked and potentially leaky installation. Taking extra time to get this foundational step right sets the entire project up for success.

How exactly does a metal roof help lower my energy bills? A metal roof saves you money by reflecting the sun's heat away from your home. Asphalt shingles, on the other hand, tend to absorb and hold that heat, which then transfers into your attic and living spaces. By keeping your attic cooler, a metal roof reduces the workload on your air conditioning system, especially during hot summers. This means your A/C runs less often, leading to noticeable savings on your monthly utility bills.

Why is hiring a certified professional so important for my roof's warranty? Metal roofing materials come with excellent, long-term manufacturer warranties, but they have a catch. These warranties are only valid if the roof is installed exactly according to the manufacturer's strict specifications. A small mistake, like using the wrong type of screw or improperly sealing the flashing, can void your warranty entirely. Hiring a certified contractor ensures every detail is handled correctly, which protects your investment and guarantees your warranty remains intact for decades.


Roofer inspecting damaged shingles to estimate the leaky roof repair cost.
By Stephen Griswell February 18, 2026
Get a clear look at leaky roof repair cost, common causes of leaks, repair options, and tips to help you save money on your next roofing project.
Modern house with a professional exterior painting job, featuring white siding and dark trim.
By Stephen Griswell February 17, 2026
Get expert tips on exterior house painting, from choosing the right paint to avoiding common mistakes, for a finish that lasts and looks beautiful.
Metal mesh gutter guard installation on a shingled roof.
By Stephen Griswell February 13, 2026
Get clear, practical tips for gutter guard installation. Learn how to prep, install, and maintain gutter guards to protect your home from water damage.
Professional seamless gutter installation on a modern residential home.
By Stephen Griswell February 12, 2026
Get practical tips on seamless gutter installation, from choosing materials to maintenance, so you can protect your home from leaks and water damage.
metal over shingle roofs
By SEO Analysis January 27, 2026
Can you put a metal roof over shingles? Learn when it’s allowed, pros and cons, code rules, moisture risks, and when a tear-off is the better option.
By SEO Analysis January 12, 2026
Replacing a roof is a major decision for any homeowner. A roof protects the structure, controls moisture, and supports energy efficiency. When problems increase, many homeowners ask one clear question: should I replace my roof now, or should I continue with home roof repairs? This guide provides everything you need to know before proceeding with a roof replacement . The goal is to help you understand residential roof replacement so you can make the right decision for your home, your budget, and your long-term plans. What Roof Replacement Means A roof replacement means removing the existing roofing system and installing a new roof. Contractors remove old shingles, underlayment, and damaged materials. They inspect the roof deck and repair structural issues if needed. They then complete a new roof installation using approved materials. This process is different from repairs. Repairs fix limited damage. Replacement rebuilds the entire roofing system. Signs You May Need to Replace Your Roof Roof Age Roof age is a key factor. Asphalt shingle roofs often last 20 to 25 years. Metal roofs last longer. Tile and slate roofs can last several decades. If your roof is near or past its expected lifespan, replacement is often the right option. Frequent Home Roof Repairs If you schedule repairs every year, costs increase over time. Multiple leaks or repeated shingle damage often signal system failure. At that point, replacement may cost less than ongoing repairs. Widespread Damage Damage across large areas often requires replacement. Common signs include: Missing or cracked shingles across the roof Soft or rotted roof decking Sagging roof lines Water stains in multiple attic areas Localized damage may support repair. Widespread damage usually supports replacement. Storm and Weather Exposure Severe weather shortens roof life. If storms cause repeated damage, a residential roof replacement may provide better long-term protection. Roof Repair vs Roof Replacement Roof Repair Fixes isolated problems Lower upfront cost Shorter project timeline Limited lifespan extension Residential Roof Replacement Rebuilds the entire roofing system Higher upfront cost Longer project timeline Long-term durability and warranty When repairs no longer provide stability, replacement becomes the practical solution. Benefits of Residential Roof Replacement Long-Term Protection A new roof provides complete coverage. New underlayment and flashing reduce leak risk. Updated materials handle weather better. Increased Home Value A roof replacement improves curb appeal. Buyers prefer homes with a recently roof installed. Appraisers also consider roof age and condition. Improved Energy Efficiency Modern roofing materials reflect heat more effectively. Proper ventilation improves airflow and helps reduce energy costs. Warranty Coverage Most residential roofing replacement projects include manufacturer and workmanship warranties. These warranties reduce long-term risk. Types of Roofing Materials Asphalt Shingles Most common residential material Affordable and reliable Available in many colors and styles Architectural Shingles Thicker than standard shingles Longer lifespan Better wind resistance Metal Roofing Long lifespan Energy efficient Higher upfront cost Tile Roofing Durable and heavy Requires strong roof structure Long service life Slate Roofing Premium roofing material Very long lifespan Higher cost and weight Material choice affects cost, durability, and appearance. Understanding the Roof Replacement Process Step 1: Inspection A professional roofer inspects shingles, flashing, decking, and attic ventilation. This step confirms whether replacement is necessary. Step 2: Estimate and Planning You receive a detailed estimate that includes materials, labor, timeline, and disposal. Contractors also explain permits and inspections. Step 3: Material Selection You choose roofing materials, colors, and styles. The contractor confirms compatibility with your home. Step 4: Tear-Off Crews remove the old roof and dispose of debris safely. This exposes the roof deck for inspection. Step 5: Deck Repair If the deck shows damage, crews repair it. A solid deck is required for a proper new roof installation. Step 6: Installation Contractors install underlayment, flashing, and roofing materials. Everything is installed according to code and manufacturer requirements. Step 7: Final Inspection The contractor inspects the completed roof. Local inspectors may also review the work. How Long Roof Replacement Takes Most residential roof replacement projects take one to three days. Larger or more complex roofs may take longer. Weather conditions can also affect timing. Cost Factors to Consider Several factors affect roof replacement cost: Roof size and slope Roofing material type Structural repairs Labor rates Permit and disposal fees Understanding these factors helps you plan your budget. Budgeting for Roof Replacement Plan early when possible. Get multiple estimates. Ask for itemized pricing. Understand payment schedules. Some contractors offer financing options. Common Mistakes to Avoid Waiting too long to replace the roof Choosing price over quality Ignoring ventilation needs Skipping professional inspections Avoiding these mistakes protects your investment. Roof Replacement and Home Insurance Insurance may cover roof replacement after storm damage. Coverage depends on policy terms and roof age. Document damage and contact your provider promptly. Permits and Building Codes Most roof replacements require permits. Licensed contractors handle this process. Permits ensure the roof installed meets safety and code requirements. Preparing Your Home for Roof Replacement Before Installation Clear driveways and walkways Remove wall decorations Protect attic items Notify neighbors During Installation Expect noise and vibration. Crews manage debris and safety areas. After Installation Inspect the yard for nails. Review warranty documents. Schedule follow-up inspections if recommended. How Long a New Roof Lasts Roof lifespan depends on material and installation quality: Asphalt shingles: 20–25 years Architectural shingles: 25–30 years Metal roofing: 40–70 years Tile or slate roofing: 50+ years Proper maintenance extends roof life. Maintaining Your New Roof Schedule annual inspections Clean gutters regularly Trim overhanging branches Address small issues early Maintenance helps reduce future repair costs. When to Replace My Roof Instead of Repairing You should replace my roof when: Repairs occur frequently Damage affects large areas Roof age exceeds lifespan Structural problems exist Replacement offers stability and long-term savings. Residential Roofing Replacement and Resale Buyers value a new roof. Homes with recent residential roofing replacement often sell faster and face fewer inspection issues. Choosing the Right Roofing Contractor Look for: Proper licensing and insurance Clear written estimates Warranty coverage Local experience Strong customer reviews The right contractor ensures quality results. FAQ How do I know when to replace my roof? Check roof age, damage extent, and repair history. Widespread or frequent issues usually indicate replacement. Can I live in my home during roof replacement? Yes. Most homeowners stay in the home, though noise is expected during work hours. How much does residential roof replacement cost? Costs vary by roof size, material, and repairs needed. A professional inspection provides accurate pricing. Does a new roof increase home value? Yes. A new roof installation improves curb appeal and buyer confidence. Get a Free Roof Replacement Estimate with Total Roof Solutions Roof replacement is a major project, but it delivers long-term protection and value. When repairs no longer solve the problem, replacing the roof is the smart choice. If you are considering a roof replacement, Total Roof Solutions is ready to help. Our team provides professional inspections, clear estimates, and expert residential roof replacement services. Contact Total Roof Solutions today to schedule your roof evaluation and move forward with confidence.
By SEO Analysis January 5, 2026
Roof inspections are the basis for every roofing repair or replacement estimate. Skilled, experienced contractors go over every inch of your home's roof, looking for storm damage, minor issues, and things that may cause problems in the future. They discuss your roof's condition with you and recommend remedies to bring it up to speed. Depending on their advice, you could be looking at a quick repair job or a full roof replacement, which dictates the overall price. There’s no single price tag for roof repairs. Costs come from materials, labor, permits, site conditions, and local market forces. Knowing those drivers helps homeowners set realistic budgets and avoid surprises. This guide walks through the main cost factors for residential roof repair in 2026: material choice, damage type, roof size and pitch, accessibility, labor and permit fees, and local location effects. You’ll get simple rules of thumb for repair vs. replace, how permits and labor affect costs in the Atlanta/McDonough area, and practical financing or insurance options to lower out-of-pocket expenses. We use clear examples, compact tables that link factors to typical impacts, and actionable checklists so you can compare options and request an accurate local estimate. Relevant local terms like roof repair costs in Atlanta , asphalt shingle repair cost, roof pitch and repair pricing, and roof repair permits in Georgia appear where they help homeowners find local, helpful information. What Are the Main Factors Affecting Residential Roof Repair Costs? The biggest cost drivers change how much material, crew time, and admin work a job needs. They decide whether a visit is a quick patch or a multi-day project. Key factors include materials (shingles, flashing, underlayment), damage type and severity (minor leak versus structural rot), roof size and pitch, access, labor rates, permits, and local market conditions. Fixing minor problems early usually keeps costs down because it prevents interior damage and mold that can multiply the bill. The most reliable next step is a professional inspection that identifies the exact scope. Many local, licensed contractors in McDonough provide inspections and free estimates that translate these factors into a written cost breakdown. How Do Roofing Materials Influence Repair Prices? The roofing material sets both the cost of the parts and the skill required for the work, so material choice directly affects price and long‑term performance. Asphalt shingle repairs are usually the most affordable because materials are common and crews can work quickly; patching and replacing a few shingles is routine. Metal, tile, and slate call for specialty tools and tradespeople, which can raise costs and sometimes require extra time to match materials. Consider lifespan, too: cheaper materials may require more frequent repairs, while higher-cost options often reduce maintenance costs over time and shift the repair-vs-replace calculation. Common material differences: Asphalt shingles: lower material cost, faster repairs. Metal: higher parts cost and specialized fastening/detail work. Tile/slate: highest labor skill and matching/replacement costs. Specialty materials also increase the risk of hidden costs, as matching pieces and careful removal often require experienced crews. What Types of Roof Damage Affect Repair Expenses? Damage type tells you whether a fix is cosmetic, functional, or structural. Those tiers span very different price ranges and future risks. Minor problems like a few missing shingles or a leaking pipe boot usually need local repairs and limited labor. By contrast, flashing failures, extensive water intrusion, rot, or storm damage can require tear‑off, decking replacement, or interior maintenance. Hidden issues such as wet insulation, mold, or compromised decking can quickly expand the scope and bring in other trades, raising the combined cost. Finding severity early reduces the risk that a small repair will turn into a costly replacement and interior remediation. Typical repair categories: Minor leak patches and shingle replacement. Flashing or pipe boot repairs and replacements. Decking or underlayment replacement because of rot. These categories help homeowners set expectations and estimate likely price brackets before contractor bids arrive. How Do Roof Size, Pitch, and Accessibility Affect Repair Costs? Roof shape and site conditions translate directly into labor hours, equipment needs, and safety measures, the largest drivers of labor-based pricing. Roof area (measured in squares or square feet) scales materials and crew time, so larger roofs cost more. Pitch increases fall‑protection needs and slows crews; steep roofs often require harnesses, roof jacks, scaffolding, or staging that add rental fees and extra hours. Tight yards, trees, or limited parking require more manual carrying and landscaping protection, which increases labor and handling fees. Why Does Roof Pitch Increase Labor and Equipment Costs? Steeper roofs make the work harder and the safety requirements stricter, which lengthen jobs and increase gear requirements. Slopes slow crew speed and usually require harnesses, roof jacks, or scaffolding; those controls take extra setup time and sometimes rental fees. The slower pace and added protections expand labor hours. They may require a larger crew for safe material handling, so identical material repairs on different pitches can have notably different labor costs. Treat pitch as a predictable multiplier when comparing bids. Always compare quotes that break out fall protection, staging, and crew size, rather than relying on a flat per-square price with no detail. How Does Roof Accessibility Impact Labor Rates and Project Time? Accessibility determines how fast crews can set up and move materials, which changes hourly totals and potential add‑on fees. Tight yards, gates, or valuable landscaping require extra protection and more manual carry, which increases labor hours and slows progress. Limited parking or driveway access can force longer handling routes or off‑site staging, adding logistics time that contractors often include in estimates. These access issues can also extend timelines and affect seasonal pricing. When you request bids, note access constraints and ask contractors to list handling and protection charges so line items are transparent and comparable. What Role Do Labor Costs, Permits, and Location Play in Roof Repair Pricing? Labor, permits, and local market conditions are external variables that shift final pricing by region and season. Labor is a large portion of most repair estimates because it covers skilled crews, licensing, insurance, and warranties. Permits and inspections add fixed administrative fees and can create scheduling delays for permitted work; disposal costs for tear‑offs and waste hauling are another practical expense. Peak demand, after storms for example, pushes up labor rates and extends lead times, while slower seasons can produce more competitive pricing. Homeowners in McDonough and the greater Atlanta region should expect permit and disposal fees to appear as separate items on estimates. Local, licensed providers like Total Roof Solutions know the McDonough permit rules and typical labor rates, which help produce accurate, region‑aware bids. How Do Local Labor Rates and Contractor Expertise Affect Total Costs? Local labor rates reflect wages, demand, and crew experience; experienced contractors can charge more up front but often reduce rework and warranty claims. Labor usually accounts for a large share of the invoice, and the mix of hourly crews and fixed bids affects risk allocation. A seasoned team lowers hidden costs by spotting secondary damage early, using proven installation practices, and offering material and workmanship warranties that protect homeowners. Always verify licensing, insurance, and warranty terms so you can weigh higher upfront labor costs against long‑term value and fewer callbacks. When Are Permits and Inspections Required, and What Are Their Fees? Permits are generally required for full replacements, structural decking repairs, and some substantial reroofing projects; small, isolated repairs often don’t need one. Fee schedules and inspection timelines vary by municipality and scope. In McDonough and the surrounding Atlanta area, check local building department rules or hire a licensed contractor who handles permit management. Skipping required permits can lead to fines or problems at sale, so following the code protects your investment. When you get estimates, ask if the contractor will secure permits and handle inspections as part of the quoted price to avoid surprise administrative costs. When Should You Repair or Replace Your Roof to Manage Costs Effectively? The repair vs. replace decision depends on roof age, extent and frequency of problems, and the relative cost of repeated fixes versus a new roof. Repair is often appropriate for localized roof issues with useful life remaining. Replacement makes sense for repeated leaks, large areas of missing shingles, extensive rot, or a roof near the end of its expected life. A practical rule: if a single repair approaches a significant portion of a replacement estimate or problems return quickly, replacement is usually the smarter financial choice. Factor in long‑term value, energy savings, and resale impact when deciding. Repair : Localized damage, newer roof, minor leaks. Replace : Widespread damage, structural rot, and a roof near the end of its life. Rule of thumb : If a repair is about 30–50% of replacement cost, consider replacement. Homeowners often use financing to manage large projects; licensed contractors can assist with insurance claims and offer financing plans to spread payments. Those options can lower the upfront burden and make timely repairs or replacements possible, which often saves money compared to overreacting to emergency failures. What Signs Indicate That Roof Replacement Is More Cost-Effective Than Repair? Signs that replacement is likely the better option include repeated leaks, big patches of missing shingles, visible decking rot, sagging, or a roof near the end of its expected lifespan. Ongoing callbacks after repairs or numerous roof penetrations are also red flags that problems are systemic rather than isolated. If an inspection shows recurring or widespread issues, consolidating into a single replacement often saves money and hassle over the long term. Replacing at the right time also improves energy efficiency and curb appeal, making it a real homeowner benefit. Plan replacement when it stops being a temporary fix and becomes the long‑term, cost‑effective solution. How Can Financing Options Help Homeowners Afford Roof Repairs? Financing spreads the cost of extensive repairs or replacements and makes timely decisions more manageable, reducing the risk of interior damage and emergency expenses. Options include home‑improvement loans, home‑equity lines, contractor financing, and insurance payouts for storm damage. Each choice involves trade-offs in interest, terms, and approval speed, so compare total interest and fees with the cost of delayed repairs. Talk about payment options early with contractors. Many local providers can help with insurance documentation and connect you with financing options that fit your budget and timeline. Weigh total borrowing costs against the potential for higher repair bills or interior damage if work is postponed. For licensed, insured, and bonded residential roof and gutter services in McDonough and the greater Atlanta area, request a free inspection and estimate from Total Roof Solutions. We’ll provide a clear, written cost breakdown that reflects your material choices, permit needs, and available financing or insurance assistance. Frequently Asked Questions What are the common signs that indicate a roof needs repair? Look for missing or damaged shingles, water stains on ceilings or walls, visible sagging, and active leaks during rain. Finding shingle granules in gutters, mold growth, higher energy bills, or attic drafts are also warning signs. Regular inspections catch issues early and prevent minor problems from becoming costly repairs. How can I find a reliable roofing contractor? Start with recommendations from friends, family, or neighbors, and check online reviews. Confirm the contractor is licensed, insured, and has good references. Get multiple written estimates, compare scope and warranties, and ask to see past work. A reputable contractor will explain the process clearly and provide a detailed, written quote. What financing options are available for roof repairs? Financing choices include home‑improvement loans, personal loans, home‑equity lines of credit, and contractor financing plans. Insurance payouts may cover storm damage. Compare interest rates, terms, and fees to pick the option that fits your budget and urgency. Many contractors can help with financing applications and insurance paperwork. How often should I have my roof inspected? Have your roof inspected at least once a year, ideally in spring or fall, and after significant storms. Regular checks help catch minor issues before they grow and extend roof life. Homeowners should also conduct periodic visual checks for apparent damage. What should I expect during a roof inspection? A qualified inspector will evaluate shingles, flashing, gutters, and overall roof condition and may check the attic for moisture or insulation problems. After the inspection, you should receive a report with findings, recommended repairs, and an estimate. Use that report to compare contractor bids and plan next steps. Are there any warranties available for roof repairs? Yes. Many contractors offer workmanship warranties alongside manufacturer material warranties. Coverage and length vary, so ask what’s included and any conditions. Clear warranty terms give you protection and peace of mind after the job is finished. What are the environmental considerations for roofing materials? Consider durability, energy efficiency, and recyclability when choosing materials. Metal and some high‑quality shingles last longer and can be more energy‑efficient. Some manufacturers offer recycled or sustainably produced options. Choosing an energy‑efficient roof can lower heating and cooling costs and reduce your home’s environmental footprint. Get Solid Roof Assessments and Quotes from Total Roof To get a free estimate from a contractor who knows McDonough permitting and storm‑claim processes, contact Total Roof Solutions. We offer inspections, warranties on materials and workmanship, and financing options to help you move forward with confidence. Contact Total Roof today!
By SEO Analysis December 23, 2025
Torch down roofing is a proven solution for flat and low-slope roofs. Many property owners hear the term but do not fully understand how it works or when it makes sense. Others want to know if torch down roofing is better than other flat roof systems. This guide explains everything you need to know before choosing this roofing option. We will cover what torch down roofing is, how it works, the materials involved, installation details, repair options, and when roof replacement is the better choice. The goal is clarity. By the end of this article, you will understand if torch down roofing fits your property. What Is Torch Down Roofing Torch down roofing is a modified bitumen roofing system. It uses rolls of asphalt-based material that installers heat with an open flame. The heat melts the underside of the material, allowing it to bond directly to the roof surface. This system is most common on flat roofs or low-slope roofs. It is used on residential buildings, commercial properties, and multi-family structures. When people ask what is torch down roofing, the simplest answer is this: it is a heat-applied roofing system designed to create a sealed, waterproof surface. How Torch Down Roofing Works Torch down roofing installs in layers. Each layer serves a purpose. First, the installer prepares the roof deck. The surface must be clean, dry, and smooth. Next, a base sheet may be installed. This layer adds stability and protection. Then the installer applies the torch down roofing material. A propane torch heats the roll as it unrolls across the roof. The heat melts the asphalt backing. The material bonds to the surface as it cools. This process creates a strong seal. It reduces seams. It prevents water intrusion. Torch Down Roofing Material Explained Torch down roofing material consists of modified bitumen. Bitumen is asphalt. Manufacturers modify it with polymers to improve flexibility and durability. Common material components include: Asphalt compound Reinforcing fabric (polyester or fiberglass) Granulated top surface or smooth surface The top layer often includes mineral granules. These granules protect against UV damage and weather exposure. Torch down roofing material resists cracking. It handles temperature changes well. It performs reliably in harsh conditions. Torch Down Roll Roofing Torch down roll roofing comes in large rolls. Installers apply each roll in sections. They overlap seams to ensure full coverage. Each roll bonds to the roof using heat. This method reduces the need for fasteners. Fewer fasteners mean fewer penetration points. Torch down roll roofing works well on roofs with minimal slope. Water flows across the sealed surface without pooling in seams. Types of Torch Down Roofing Systems There are two main system types. Two-Layer Torch Down System This system includes: Base sheet Cap sheet The base sheet adds strength. The cap sheet provides weather protection. This system offers better durability and longer lifespan. Three-Layer Torch Down System This system includes: Base sheet Interply sheet Cap sheet The added layer increases thickness and strength. This option suits roofs with higher exposure or heavier use. Torch Down Roofing Details Torch down roofing details matter. Poor detailing leads to leaks. Professional installation is critical. Important detail areas include: Seams and overlaps Roof edges Flashing around vents and drains Wall transitions Parapet walls Installers must apply even heat. They must avoid overheating. Proper technique ensures strong adhesion without damaging the material. Benefits of Torch Down Roofing Strong Waterproofing Torch down roofing creates a continuous seal. Heat bonding reduces seam failure. This system handles standing water better than many alternatives. Durability The material resists tearing and cracking. It handles foot traffic better than single-ply systems. Cost Control Torch down roofing often costs less than premium flat roof systems. It balances performance and affordability. Proven Performance This system has decades of use. Contractors understand its behavior and maintenance needs. Limitations of Torch Down Roofing Fire Risk During Installation Open flames create risk. Only trained professionals should install this system. Not Ideal for All Roofs Torch down roofing works best on flat or low-slope roofs. Steep roofs require different systems. Skilled Labor Required Improper installation causes failure. Experience matters with this roofing type. Torch Down Roofing vs Other Flat Roofing Systems Torch Down Roofing vs TPO Torch down roofing offers thicker material. TPO offers lighter weight and reflective surfaces. Torch down handles foot traffic better. Torch Down Roofing vs EPDM EPDM uses rubber sheets and adhesives. Torch down uses heat bonding. Torch down offers better puncture resistance. Torch Down Roofing vs Built-Up Roofing Built-up roofing uses multiple asphalt layers. Torch down installs faster and uses fewer materials. When Torch Down Roofing Makes Sense Torch down roofing works best when: The roof has low slope or is flat The property needs strong waterproofing Budget matters The roof sees moderate foot traffic It suits residential flat roofs, garages, commercial buildings, and apartment complexes. Torch Down Roofing and Roof Repair Torch down roofing supports effective roof repair. Contractors can patch damaged areas without replacing the full roof. Common repair situations include: Small punctures Seam separation Flashing failure Surface wear Timely roof repair extends system life. Ignoring damage leads to moisture intrusion. When Roof Replacement Is Better Roof replacement becomes necessary when: Damage is widespread The roof deck shows rot The system reaches end of lifespan Repairs repeat frequently Torch down roofing typically lasts 15 to 20 years. Age, exposure, and maintenance affect lifespan. Signs Torch Down Roofing Needs Attention Watch for these warning signs: Blistering or bubbling Cracks in surface Loose seams Ponding water Interior leaks Early inspection prevents major failure. Torch Down Roofing Installation Process Step 1: Roof Inspection Contractors inspect the deck, drainage, and structure. They confirm suitability for torch down roofing. Step 2: Surface Preparation Crews clean the surface. They repair damaged decking. A smooth base is required. Step 3: Base Sheet Installation The base layer installs using adhesive or mechanical fasteners. Step 4: Torch Application Installers heat the torch down roll roofing as they apply it. They control flame and pressure. Step 5: Detail Work Crews seal seams, edges, and penetrations. Flashing receives extra attention. Step 6: Final Inspection The contractor checks adhesion and drainage. They confirm system integrity. Safety Considerations Torch down roofing requires strict safety protocols: Fire extinguishers on site Trained installers only Controlled flame use Protective equipment Safety planning protects property and workers. Maintenance for Torch Down Roofing Maintenance extends lifespan. Recommended practices: Annual inspections Clear debris and drains Repair small issues early Monitor seams and flashing Routine care reduces roof replacement risk. Torch Down Roofing Lifespan Most torch down systems last 15 to 20 years. Proper installation and maintenance can extend service life. Environmental exposure affects durability. High heat, standing water, and heavy use shorten lifespan. Cost Factors for Torch Down Roofing Pricing depends on: Roof size System type Number of layers Deck condition Labor access Torch down roofing often costs less than premium flat roof systems but more than basic repairs. Torch Down Roofing for Residential Properties Torch down roofing works well for: Flat residential roofs Attached garages Additions Multi-unit housing Homeowners choose this system for durability and cost control. Common Mistakes to Avoid Avoid these issues: Hiring untrained installers Ignoring drainage design Skipping inspections Delaying roof repair Mistakes shorten roof life and increase costs. FAQs What is torch down roofing best used for? Torch down roofing works best on flat or low-slope roofs where waterproofing matters most. Is torch down roofing safe? Yes, when installed by trained professionals using proper safety procedures. Can torch down roofing be repaired? Yes. Contractors can perform roof repair on damaged sections without full replacement. How long does torch down roofing last? Most systems last 15 to 20 years with proper maintenance. Get a Free Roof Estimate Today Torch down roofing remains a reliable solution for flat and low-slope roofs. It offers strong waterproofing, durability, and cost efficiency. Understanding torch down roofing details helps property owners make informed decisions. When installed correctly, this system delivers consistent performance. When damage grows or age increases, roof replacement becomes the right move. If you are considering torch down roofing, Total Roof Solutions can help. Our team provides expert inspections, professional installation, and reliable roof repair and roof replacement services. Contact Total Roof Solutions today to schedule an evaluation and get clear answers for your roofing needs.
By SEO Analysis December 16, 2025
When your home roof starts showing signs of wear, you ask yourself: should I arrange a roof repair or go for a full roof replacement? At Total Roof Solutions we deal with this question often. Let’s talk like two neighbors having coffee: your roof has issues, you want solutions. You want facts. You want direct answers. You don’t want jargon. In this article we will cover both sides— roof repair and replacement roof —so you can decide with confidence. We will use clear language. We will define terms. We will show when home roof repairs make sense, and when roof replacements are the smarter move. We also include a detailed FAQ at the end and a strong call to action. Let’s dive in. What is a Roof Repair? A roof repair refers to fixing specific, isolated issues on your roof. Rather than replacing the entire surface, the work addresses trouble spots. Examples: Replacing a few missing shingles. Repairing flashing around a chimney or vent. Fixing a small leak in the roof deck. Repair is generally less expensive up front. It usually takes less time. It serves to extend the life of the roof without replacing the full system. Many times home roof repairs make sense when the damage is limited. What is a Roof Replacement? A replacement roof means removing the existing roofing materials (shingles, underlayment, sometimes decking) and installing a new roofing system. This is more than a patch. It gives a clean slate. Key features often include: New underlayment, new shingles or other materials. Possibly updated flashing and ventilation. A warranty on the full roof system. A full roof replacement costs more initially but can save money in the long run if your current roof is old or heavily damaged. When Roof Repair Makes Sense You should lean toward home roof repairs when: The damage is isolated (for example: a few missing shingles, a minor leak). The roof is relatively new (e.g., less than 10-15 years old for asphalt shingle). You plan to sell soon and want to control cost rather than invest heavily. You have the budget flexibility to monitor and maintain the roof rather than invest now in a full replacement. Here are clear signs repair is appropriate: Visual cues show missing or damaged shingles in one area only. There is no sagging or widespread structural damage. The rest of the roof shows good condition: minimal wear, no repeated leaks. You expect to stay in the home for only a short time, so maximizing near-term value is key. Repair approach gives you a quicker, lower-cost path to keep your home protected while you plan for long-term decision. When Roof Replacement Is the Better Choice You should consider a full roof replacement when: The roof is old, nearing or past its expected lifespan. For example, asphalt shingle roofs often last between 20-25 years. There is widespread damage: many missing shingles, multiple leaks, visible rot, or structural concerns. You have had many home roof repairs in recent years and the costs add up. You want to increase your home’s resale value, improve energy efficiency, or minimize future roof service calls. The underlying decking or structure is compromised, which means patching won’t solve the root problem. Replacement gives you peace of mind. It means fewer surprises. You reduce long-term risk. How to Evaluate Your Roof: Step-by-Step Here is a clear process you can follow: Check the roof age Ask when the current roof was installed. If it’s over 15-20 years old (for asphalt shingles) replacement likely makes sense. Inspect for damage Look for missing or curled shingles, dark streaks, moss growth, sagging roof deck, visible leaks in the attic. Assess the extent Is the damage localized (one area) or spread across the roof? Localized damage tends toward repair. Widespread calls for replacement. Check past repair history Have you needed multiple repairs recently? If yes, replacement likely is smarter. Consider long-term plans How long do you plan to stay in the home? If you plan long-term, replacement becomes more cost-effective. Review available budget Weigh immediate cost (repair vs replacement) and long-term value. Use multiple quotes. Consult a professional roofing contractor A qualified roofer can inspect hidden issues like underlayment damage, decking rot, ventilation problems, and provide a realistic estimate. Cost Considerations: Repair vs Replacement Let’s look at typical cost profiles (these vary by region, material, size). Roof repair: Costs vary widely, from a few hundred dollars to several thousand depending on issue. Roof replacement: Higher cost upfront but fewer ongoing costs. For example, some data suggest full replacement may cost multiple thousands of dollars. Here are factors that affect cost: Roof size and pitch (steep roofs cost more). Roofing material selected (asphalt shingles cost less than metal, tile, or slate). Accessibility and structural work needed (decking, underlayment, flashing). Labor rates in your region. Disposal of old roof materials (for replacement). Additional services: ventilation upgrade, insulation, gutter replacement. Benefits and Drawbacks of Each Option Roof Repair Benefits: Lower initial cost. Quicker to complete. Less disruption to home life. Drawbacks: May only delay the inevitable if the roof is near the end of its life. Patches may not match the rest of the roof, impacting aesthetics. Hidden damage may remain and cause future leaks or failures. Roof Replacement Benefits: Grants a full, fresh roof system with warranty. Less chance of repeated repair calls. Potential for improved energy efficiency and higher home value. Drawbacks: Higher upfront cost. More disruption (noise, cleanup, longer timeframe). If done prematurely when the existing roof still had life, might feel like unnecessary expense. Common Myths and Mistakes Myth: “A small leak always means full replacement.” Not true. If damage is limited and the roof is relatively young, repair may suffice. Myth: “Replacement always improves value more than any repair.” Not always; the value gain depends on the home market, roof material, and condition. Mistake: Ignoring minor issues. Small issues left unchecked can mushroom into big problems. Mistake: Choosing repair simply because it costs less now without reviewing long-term implications. How Total Roof Solutions Can Help You We perform comprehensive roof inspections to assess damage, age, and overall condition. We provide clear quotes for both roof repair and replacement options. We work with high-quality materials and certified installers to ensure your home receives lasting protection. We offer guidance tailored to your home’s needs, budget, and your plans for the future. FAQ Section 1. How do I know if my roof needs repair or replacement? Check the roof’s age, inspect for damage (missing shingles, leaks, sagging), review how many repairs you’ve had. If damage is broad or the roof is old, replacement likely is better. 2. Can I repair part of the roof instead of replacing the whole thing? Yes. If the damage is isolated to a section, you can opt for spot repair or partial replacement. But matching the new portion to the old can be tricky. 3. Will repairing the roof save money compared to replacing it? Often yes in the short term. But if you need frequent residential roof repairs , the cumulative cost may exceed that of one replacement. 4. What if I plan to sell my home soon—should I replace the roof or just repair it? If you plan to sell very soon (within 1-2 years) and your roof is still in decent condition, a repair may suffice. If the roof is old or shows major issues, replacement may yield better buyer appeal. 5. Does roof replacement improve energy efficiency? Yes. Newer roofing materials, improved underlayment, better ventilation and insulation can reduce heat gain/loss. Many roof-service providers note that replacement boosts efficiency. Ready for a Free Roof Estimate? Choosing between roof repair vs roof replacement is a major decision. You need clear facts, tailored options, and no surprises. At Total Roof Solutions we help you weigh your current condition, long-term plans, and budget. If you’re ready to explore your options—whether you aim for a targeted roof repair or are considering a full replacement roof— contact us today for a free inspection and quote . Protect your home now and make the choice that serves you best in the long run.
By SEO Analysis December 2, 2025
When homeowners begin to notice wear and tear on their roof, storm damage, or leaks, they cringe. Paying for roof repairs can be a hard blow to any household budget. Additionally, finding a reputable local company in Atlanta that delivers high-quality work can be challenging. The solution is finding a highly-rated team with a solid reputation that gives honest quotes, so homeowners know how to budget and avoid unnecessary add-ons. Feeling unsure about the cost of residential roof repairs can lead to unexpected expenses or put off necessary maintenance. This guide provides clear cost ranges, explains the key factors that influence pricing, outlines financing strategies, and shows you how to get accurate estimates. You’ll learn about average repair expenses, the elements that affect pricing, from the materials you choose to how severe the damage is, detailed breakdowns for leaks, shingles, metal, and flat roofs, plus tips on handling insurance claims and deciding whether to repair or replace your roof. Along the way, discover why Total Roof’s certified crews in Atlanta deliver top-notch workmanship at straightforward prices. What's the Average Price Tag for Residential Roof Repair? The average cost to repair a residential roof typically falls between $400 and $1,650, depending on the type of damage, the roofing material, and labor rates. Residential roof repair is designed to fix issues like leaks, missing shingles, and storm damage with minimal disruption, restoring your roof’s structural integrity. For many homeowners, understanding these benchmarks helps prevent overpaying and makes budgeting much easier. Getting familiar with common repair services helps establish baseline expenses before diving into specific price variations. What Are the Typical Price Ranges for Common Roof Repairs? Common residential roof repairs include fixing leaks, replacing shingles, repairing flashing, and restoring storm damage. Leak repair services generally cost between $150 and $600, depending on the severity of the leak. Replacing damaged shingles typically ranges from $400 to $1,200. Flashing repair costs usually range from $300 to $800, while storm damage repairs can cost between $800 and $1,650. These price brackets align with national averages and reflect local conditions in Atlanta. Understanding these price ranges helps you prepare your budget before requesting estimates. How Do Roof Repair Costs Differ by Location, Especially in Atlanta? Roof repair costs can vary significantly from one region to another due to differences in labor rates, the availability of materials, and local weather patterns. In Atlanta, average labor rates are $45–$75 per hour, and the frequent occurrence of storms tends to increase repair costs. Areas along the coast or in northern states might see higher rates for repairs needed due to snow loads, while rural areas often benefit from lower overhead costs. These geographic variations can shift the price of a $750 shingle repair by more than 15%. Being aware of local cost drivers helps you create a realistic budget and choose the right contractor. What Are National vs. Local Cost Comparisons for Roof Repairs? Across the nation, homeowners typically spend between $370 and $1,649 on roof repairs, with a median cost of $999. Here in Atlanta, repair prices tend to be 5–10% higher than the national median, primarily due to the region's higher frequency of storms and labor costs. In contrast, some markets in the Midwest report repair costs up to 20% lower than the national average. Comparing these figures helps you determine whether a local quote aligns with broader industry benchmarks. Analyzing both national and local data prepares you to evaluate quotes with a solid understanding of the market. What Factors Influence Residential Roof Repair Prices? The price of residential roof repair is shaped by several interconnected factors that determine the overall expense. These include the extent of the damage, the type of material used, the size and complexity of the roof, labor rates, accessibility, and how urgently the repair is needed. A thorough understanding of each element will help you project costs more accurately and avoid unexpected expenses. Exploring these factors in detail reveals how each aspect contributes to the final repair estimate. How Does the Extent and Type of Roof Damage Affect the Cost? The scope of the damage directly impacts the repair cost by determining the materials required, the labor time needed, and the safety measures necessary. A minor leak under a single shingle might take 1–2 hours and require minimal parts, whereas widespread storm damage across multiple roof sections could take days and necessitate advanced repair techniques. Minor punctures typically cost between $150–$400, while large membrane tears can exceed $1,200. The severity of the damage thus influences both material costs and the time the crew needs to be on-site. How Do Roofing Materials Impact Repair Pricing? Different roofing materials require unique repair methods and parts, leading to varied pricing. Repairing asphalt shingles is generally the most affordable option, while metal roofing repairs involve specialized tools and sealants. Flat roof membranes (like EPDM or TPO) require specific adhesive applications and seam welding, which increases labor costs. The choice of material can change a basic repair from $375 to over $1,000. Choosing durable materials not only affects immediate repair costs but also contributes to long-term savings on maintenance. How Do Roof Size, Pitch, and Complexity Affect Labor Costs? Larger roofs mean more square footage to cover, which increases the amount of material needed and the labor hours required. Steeper roof pitches necessitate additional safety equipment and specialized harnesses, potentially increasing labor rates by 10–20%. Complicated roof designs with multiple valleys and dormers require precise cutting and fitting, which can extend project duration by up to 30%. A larger and more unique roof typically results in higher labor costs and overall repair expenses. What Role Do Labor Rates and Geographic Location Play? Labor rates are influenced by local wage standards, insurance costs, and contractor overhead. In urban areas like Atlanta, rates typically range from $45–$75 per hour, while in rural communities, they might be closer to $30–$50. During peak seasons, high demand can push labor rates up by 15% due to scheduling constraints. Regional economic conditions directly impact the wage component of repair pricing. Understanding these labor variations helps you benchmark quotes and negotiate fair hourly rates. How Do Accessibility and Urgency Affect Repair Costs? Roofs that are difficult to access, such as those with steep angles or limited ground clearance, may require specialized equipment, including scaffolding or boom lifts, which can add $200–$800 to the total cost. Emergency repairs scheduled outside of normal business hours often come with premium fees, potentially up to 25% higher than standard rates. Responding urgently to active leaks frequently involves expedited crew deployment, increasing labor and logistics charges. Factors like accessibility and timing can quickly escalate repair pricing when extra resources are needed. What Does It Cost to Repair Specific Residential Roof Issues? Repair costs vary depending on the specific issue, reflecting the materials required, the complexity of the labor involved, and the level of expertise needed. From simple leak patches to extensive storm damage restoration, each problem comes with its own price profile. This section breaks down common scenarios so you can match your roof’s needs with realistic cost estimates. What Is the Cost to Fix a Roof Leak? Fixing a roof leak typically costs between $150 and $600, depending on the location of the leak and the type of roofing material used. Small shingle leaks usually average $150–$300, while leaks originating under flashing or in valleys might require $350–$600. Catching and repairing leaks quickly prevents secondary damage, making this an essential investment to protect your home’s structural integrity. Addressing leaks promptly minimizes both immediate repair costs and potential interior water damage. How Much Does Asphalt Shingle Repair Cost? Repairing asphalt shingles typically involves replacing damaged shingles, underlayment, and sealant. The average cost runs from $100 to $400 per square (100 sq ft), with minor section replacements starting around $250. Complete replacement of larger asphalt shingle sections can cost up to $1,200, especially for steep or intricate roof areas. Getting accurate estimates depends on the quality of the shingles, the roof’s pitch, and the extent of the section needing replacement. How Can Homeowners Finance Residential Roof Repairs? Financing residential roof repairs can help bridge budget gaps and allow for critical maintenance to be completed without delay. Available options include loans, lines of credit, payment plans, and insurance claims. Each of these solutions comes with its own set of terms, interest rates, and approval processes. Exploring these avenues helps homeowners move forward with necessary repairs without putting them off. What Are the Available Financing Options for Roof Repairs? Secured Home Equity Loans offer attractive low interest rates but require your home as collateral. Unsecured Personal Loans can provide quicker approval but typically come with higher interest rates. Credit Cards are useful for smaller repairs but involve variable interest rates. Contractor Payment Plans allow you to split costs into manageable monthly installments. Choosing the right option involves balancing the overall cost, repayment period, and the speed of approval. How Do Homeowners File Insurance Claims for Roof Repair? Document the damage immediately by taking photos and making detailed notes. Carefully review your policy coverage for wind, hail, or accidental damage. Contact your insurance provider to initiate the claim and get a claim number. Schedule a professional inspection for an official assessment of the damage. Submit repair estimates and the adjuster's report for approval. Following these steps can streamline the claims process and help you maximize your reimbursement. What Should You Know About Roof Repair Warranties? Roof repair warranties generally fall into three main categories: Manufacturer Warranties cover defects in materials for periods ranging from 20 to 50 years. Workmanship Warranties guarantee the quality of the installation for 1 to 10 years. Extended Service Plans offer ongoing inspections and minor maintenance services. Understanding the scope and exclusions of each warranty helps secure long-term protection for your investment. How to Get an Accurate Roof Repair Estimate Accurate estimates provide a clear outline of the project's full scope, including the quality of materials, labor involved, and expected timeframes. Detailed proposals guide homeowners in making informed decisions and help prevent hidden costs. Knowing what to expect in an estimate results in fair pricing and clear communication throughout the process. Why Is It Important to Get Multiple Roof Repair Quotes? Obtaining at least three quotes allows you to: Compare the quality of materials and labor rates offered by different contractors. Identify any outlier pricing that might indicate hidden fees or unnecessary charges. Assess the responsiveness and professionalism of each contractor. Negotiate better terms by leveraging competitive offers. Getting multiple quotes helps you choose the best combination of value and quality for your project. What Should a Detailed Roof Repair Estimate Include? A comprehensive estimate should list: The scope of work, with itemized tasks clearly defined. Specific material details, including brand names. Estimated labor hours, hourly rates, and the size of the crew. The projected timeline for completion, along with key milestones. The payment schedule and terms. Having all these details in writing establishes clear expectations and accountability from both parties. How Can You Get Transparent and Fair Pricing? You can get fair pricing by: Requesting itemized breakdowns for both materials and labor. Verifying that the contractor is properly licensed and insured. Asking for references and recent project photos. Comparing the warranty coverage offered by different providers. Transparency in every estimate helps prevent surprises and builds a foundation of trust. When Should You Repair vs. Replace Your Residential Roof? Deciding between repairing and replacing your roof involves weighing the current repair costs against the overall long-term health of your roof. Minor, isolated issues often make repair the sensible choice, while extensive deterioration typically justifies a full replacement. This comparison helps clarify when investing in a new roof offers better long-term value.  What Factors Indicate If Repair Is a Worthwhile Investment? Repairing your roof is often cost-effective when: The roof is less than 10 years old. The damage is confined to specific, isolated areas. The underlying structure and decking are still in good condition. The material warranties are still active. Carefully assessing these factors can help you avoid unnecessary replacement expenses. How Can Timely Repairs Extend Your Roof’s Lifespan? Addressing issues promptly helps prevent moisture intrusion and rot, thereby preserving the integrity of your roof’s decking and underlayment. Stopping small leaks before they spread can add 5–10 years to your roof’s overall lifespan, ultimately saving you money on future full-replacement costs. Proactive maintenance keeps your roof performing optimally and provides homeowners with peace of mind. Why Choose Total Roof for Your Residential Roof Repair Needs in Atlanta? Total Roof combines local expertise, industry certifications, and a steadfast commitment to delivering lasting results. As a licensed residential roofing contractor serving the Atlanta metro area, Total Roof is dedicated to providing transparent pricing and exceptional workmanship on every project we undertake. What Expertise and Certifications Does Total Roof Offer? Total Roof holds key industry certifications and qualifications: Master Elite certification from leading shingle manufacturers. Advanced training in specialized metal and flat roof repair techniques. Active membership in professional roofing associations. Continuous safety and quality training for all our crews. These credentials guarantee that your repairs are performed by skilled professionals who adhere to all building codes. How Does Total Roof Provide Quality Workmanship and Customer Satisfaction? Total Roof implements rigorous quality control protocols: Detailed pre-repair inspections are conducted to identify all underlying issues. Our licensed and insured crews strictly follow the manufacturer's best practices. Comprehensive warranties cover both materials and labor for your peace of mind. Follow-up inspections are performed to confirm the effectiveness of the repairs. This unwavering dedication to excellence builds trust and long-term customer satisfaction. How Can You Contact Total Roof for a Residential Roof Repair Estimate? To schedule a no-obligation roof repair estimate, please contact Total Roof by phone or email. Our team is ready to respond promptly, assess your needs, discuss financing options, and provide transparent pricing tailored to your home’s specific requirements. Respecting your time and budget, Total Roof makes professional roof repair a straightforward and reliable experience. Get Quality Repair at Total Roof Understanding residential roof repair costs helps you protect your home and make wise budget decisions. By comparing average costs, analyzing the factors that influence pricing, exploring financing options, and choosing an expert contractor like Total Roof, you can approach every repair decision with confidence and keep your home protected by a durable, watertight roof.