5 Best Vinyl Siding for House Brands Compared

Stephen Griswell • April 8, 2026

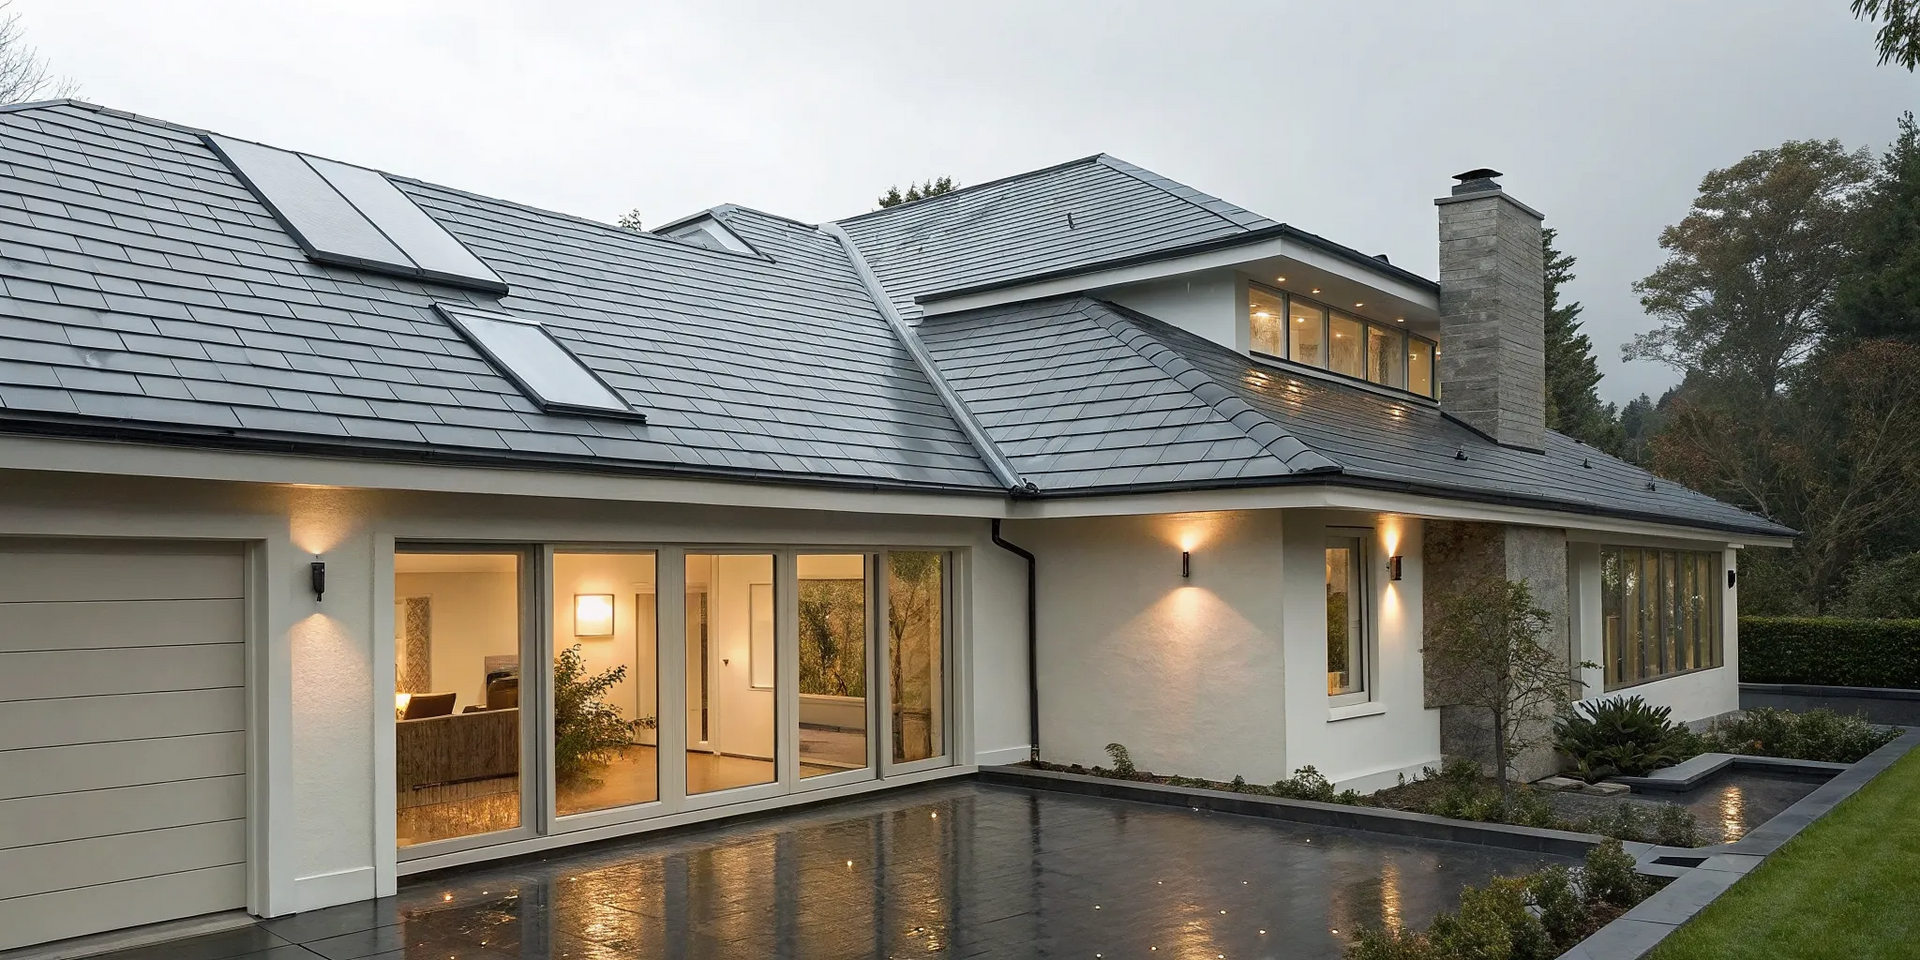
Giving your home a new look is one of the most exciting parts of any exterior renovation. New siding offers a fantastic opportunity to redefine your home’s character, whether you’re aiming for a classic, timeless feel or a bold, modern statement. Today’s vinyl siding comes in a huge spectrum of colors and textures, from rustic board-and-batten to classic clapboard, giving you the creative freedom to design a look that’s uniquely yours. To help you bring your vision to life, we’ll cover how to match siding to your home’s architecture and choose colors that won’t fade, ensuring you find the best vinyl siding for your house.

Key Takeaways

  • Look beyond color and focus on thickness: For siding that lasts, choose a panel that is at least .044 inches thick. This small detail makes a huge difference in resisting dents, warping, and weather damage, ensuring your home looks great for years.
  • Your siding is only as good as its installation: Even the best materials can fail if not installed correctly. Hiring a licensed, certified professional is crucial to prevent costly issues like water damage and to ensure your manufacturer's warranty remains valid.
  • Invest in features that pay you back: Options like insulated siding and fade-resistant color technology may cost more initially, but they provide long-term savings. You'll benefit from lower energy bills, a quieter home, and lasting curb appeal.

Why Choose Vinyl Siding for Your Home?

Choosing new siding is a big decision. It completely changes your home's appearance and protects it from the elements, so you want to get it right. If you're picturing the faded, brittle siding from decades ago, it's time for a fresh look. Today’s vinyl is a whole different ballgame.

Let's be honest, budget is a big factor in any home project. That’s one of the first places vinyl siding really shines. It’s one of the most affordable siding options on the market, both in terms of materials and installation. But the savings don't stop there. Vinyl requires very little maintenance. You can forget about spending your weekends scraping and painting. A simple wash with soap and water once a year is usually all it takes to keep it looking fresh and clean.

Beyond the cost savings, modern vinyl siding is built to last. When installed correctly, high-quality vinyl can protect your home for 20 to 40 years or even longer. It’s a durable material that resists pests like termites and stands up to moisture without rotting or warping. This longevity makes new siding a smart investment in your home's value , improving curb appeal instantly. It’s one of the most versatile materials we work with in our exterior renovation projects. With a huge range of colors, textures, and styles available, you can get the look of wood or other high-end materials without the demanding upkeep.

Comparing the Best Vinyl Siding Brands

Choosing the right vinyl siding brand can feel like a big decision, but it doesn’t have to be complicated. Each manufacturer brings something unique to the table, whether it’s superior durability, vibrant color technology, or energy-saving insulation. Think of it like picking the perfect paint color, but for your home's entire exterior. To help you find the best fit for your home and budget, I’ve broken down five of the top brands in the industry. We’ll look at what makes each one stand out so you can make a choice you’ll be happy with for years to come.

CertainTeed

CertainTeed often comes up in conversations about the best vinyl siding, and for good reason. The company positions its product as a top-tier option, known for exceptional durability that holds up over time. If you’re looking for a specific shade to match your home’s personality, CertainTeed offers a huge variety of colors designed to resist fading from the sun. This means the color you fall in love with is the color you’ll have for the long haul. Plus, their products come with a Lifetime Limited Warranty, giving you extra confidence in your investment. It’s a solid, all-around choice for homeowners who prioritize both aesthetics and performance for their home's exterior.

Royal Building Products

If your top concern is how your siding will handle rough weather, Royal Building Products is a brand you’ll want to know. They are recognized for producing strong, rigid panels engineered for excellent wind and impact resistance. For homeowners in areas prone to storms, this added toughness provides invaluable peace of mind. When looking at their products, aim for panels that are .044 inches or thicker to get that superior strength. Choosing a durable brand like Royal ensures your home’s exterior is not just beautiful but also a protective shield against the elements. This commitment to strength aligns with our promise to use only high-quality, durable materials in every project.

Ply Gem

For those living in older homes, improving energy efficiency is often a major goal. Ply Gem is an excellent choice for this, particularly its Mastic Structure® Home Insulation System®. This insulated siding essentially wraps your home in a cozy blanket, helping to reduce heat loss in the winter and keep your home cooler in the summer. The direct benefit for you is lower energy bills month after month. By adding insulation to the outside of your home, you can address drafts and inconsistencies without needing to tear down interior walls. It’s a smart, practical upgrade that improves your home’s comfort and performance.

Alside

There’s nothing more disappointing than picking a beautiful, rich siding color only to see it fade after a few years of sun exposure. Alside tackles this problem head-on with its ChromaTrue® technology, which is specifically designed to prevent fading and warping. This makes it a fantastic option if you’re drawn to darker, more dramatic colors that are typically more susceptible to sun damage. With Alside, you can choose a bold color with confidence, knowing it will maintain its vibrancy and fresh look for years. It’s the perfect brand for homeowners who refuse to compromise on color when planning their residential siding project.

Mastic

Mastic, a brand under the Ply Gem umbrella, is a leader in eco-friendly and insulated siding options. Its Structure line is particularly popular among homeowners looking to make a green choice without sacrificing quality. This insulated siding not only helps lower your energy consumption but is also designed with sustainability in mind. By choosing an insulated option like Mastic, you’re making a smart investment in your home’s long-term efficiency and comfort. It’s an ideal solution for anyone who wants to combine modern performance with environmentally conscious design, reflecting a commitment to both quality and responsible building practices.

What to Look for in Vinyl Siding

When you start shopping for vinyl siding, you’ll quickly realize there are a lot of options out there. It’s more than just picking a color you like. The best siding for your home will stand up to the elements, look great for years, and even help with your energy bills. Paying attention to a few key features will help you make a choice you’ll be happy with for the long haul. From the thickness of the panels to their ability to resist fading, these details make all the difference in protecting and beautifying your home.

As you explore different exterior renovation options, keep these factors in mind to find the perfect fit for your property’s needs and your personal style.

Durability and Thickness

When it comes to vinyl siding, thickness is a great indicator of quality and durability. You want panels that are at least .044 inches thick. Anything thinner can be more susceptible to cracking or denting from everyday impacts, like a stray baseball or hail. Thicker siding, with premium options reaching up to .055 inches, offers more rigidity. This not only provides better protection but also helps the siding lay flatter against your house, creating a smoother, more appealing finish. Investing in a thicker, more durable panel means your home will be better protected and look its best for years to come.

Color That Lasts

Nobody wants to choose a beautiful, rich siding color only to watch it fade after a few years of sun exposure. That’s why color retention is so important. Top brands have developed technologies that provide excellent UV protection, keeping your siding’s color vibrant. This is especially crucial if you’re drawn to darker or bolder shades, which have traditionally been more prone to fading. Modern advancements mean you can confidently pick a deep blue or a rich gray without worrying about it looking washed out over time. Look for brands that specifically highlight their color-safe or fade-resistant technologies.

Weather and Impact Resistance

Here in Georgia, our weather can be unpredictable. Your siding is your home’s first line of defense against wind, rain, and hail, so it needs to be tough. Thicker siding panels (again, aim for at least .044 inches) offer superior resistance to wind and impact. Some siding is even rated to withstand winds up to 150 mph, ensuring it stays securely attached to your house during a severe storm. Choosing a product with strong weather resistance gives you peace of mind, knowing your home is well-protected no matter what the forecast holds.

Energy Efficiency and Insulation

Did you know your siding can help lower your energy bills? Insulated vinyl siding is a fantastic option for improving your home's energy efficiency. This type of siding has a layer of rigid foam insulation fused to the back of each panel. This adds to your wall’s R-value, which is a measure of its ability to resist heat flow. The result is a home that stays cooler in the summer and warmer in the winter, putting less strain on your HVAC system. As a bonus, the insulation also helps dampen outside noise, making your home a quieter, more comfortable space.

Is Insulated Vinyl Siding Worth It?

When you’re looking at siding options, you’ll quickly notice that insulated vinyl siding comes with a higher price tag. It’s natural to wonder if the extra cost is really justified. Think of it less as an expense and more as an investment in your home’s comfort, efficiency, and durability. The foam insulation fused to the back of each panel does more than just cover your walls; it actively improves your home’s performance from the moment it’s installed. Let’s break down exactly what you get for your money.

Better Insulation for Lower Energy Bills

One of the biggest perks of insulated siding is its impact on your energy bills. The rigid foam backing adds a continuous layer of insulation to your home’s exterior, acting like a cozy blanket. This significantly reduces thermal bridging, which is when heat escapes through the studs in your walls. By adding an extra R-value of R-2.0 to R-5.0, this siding helps keep your home warmer in the winter and cooler during those hot Georgia summers. Over time, the monthly savings on your heating and cooling costs can really add up, helping the siding pay for itself. It’s a practical upgrade that makes your home’s entire exterior envelope more efficient.

A Quieter, More Comfortable Home

Beyond energy savings, insulated siding creates a more peaceful and pleasant living environment. The foam backing is excellent at dampening outside noise, so you’ll notice less sound from traffic, neighbors, or lawnmowers. Inside, you’ll feel a difference, too. The insulation helps maintain a more consistent temperature throughout your home, reducing drafts and eliminating those chilly spots near the walls. This creates a stable, comfortable atmosphere year-round. It’s a small change that makes a huge difference in how your home feels every single day, turning it into a quieter, more serene retreat from the outside world.

Comparing Cost and Performance

While the upfront cost is higher, insulated siding delivers incredible long-term value. High-quality vinyl siding is already known for its longevity, often lasting 20 to 40 years with proper care. The foam backing on insulated panels adds another layer of durability, making the siding more rigid and resistant to dents and impact from hail or stray baseballs. When you combine the energy savings, enhanced comfort, and superior durability, the initial investment becomes much more attractive. Choosing a contractor who values quality ensures your siding performs for decades, making it a smart financial decision for your property. As a company, we stand by our commitment to using durable, high-performance materials.

How to Choose the Right Siding Thickness

When you’re picking out vinyl siding, it’s easy to get caught up in colors and styles. But one of the most important factors for long-term performance is something you can’t always see at first glance: its thickness. Siding thickness is measured in inches, and even a tiny fraction of an inch can make a huge difference in how your siding holds up over the years. Thicker siding is more rigid, more durable, and better at resisting damage from weather and everyday life.

Choosing the right thickness ensures your home not only looks great but is also well-protected. It’s a key decision that impacts the strength and lifespan of your home’s exterior. Let’s break down what you need to know to make the best choice for your property.

Standard vs. Premium Thickness

Vinyl siding thickness typically ranges from standard to premium. Standard-grade siding is usually around .040 inches thick. It’s a budget-friendly option that can work for some homes, but it’s also the most flexible and prone to damage. Premium siding, on the other hand, can be anywhere from .044 to .055 inches thick. While the difference sounds small, that extra material makes the panels significantly stronger and more rigid. This added strength helps the siding lay flatter against your home, creating a smoother, more appealing finish and reducing the chances of warping or buckling over time.

Factoring in Your Local Climate

Here in Georgia, our homes face a mix of intense summer sun, high humidity, and the occasional severe thunderstorm with hail. These weather conditions are tough on a home’s exterior, which is why siding thickness is so important. Thinner siding can become brittle under constant UV exposure and may crack more easily from the impact of hail or wind-blown debris. A thicker, premium panel offers better resistance to these elements. It’s designed to withstand temperature swings without warping and provides a more durable shield for your home, making it a smart investment for our local climate.

How Thickness Affects Durability

The thickness of your siding panel is directly tied to its overall durability. Thicker panels are simply more rigid, which helps them better resist dents from stray baseballs, hail, or leaning a ladder against the house. This rigidity also means the siding is less likely to sag or pull away from the wall, maintaining your home’s clean, straight lines for years. For a great balance of performance and cost, a thickness of .044 inches is a solid choice. If you want an extra layer of durability for peace of mind, stepping up to .046 inches provides even more strength and impact resistance for your exterior renovations.

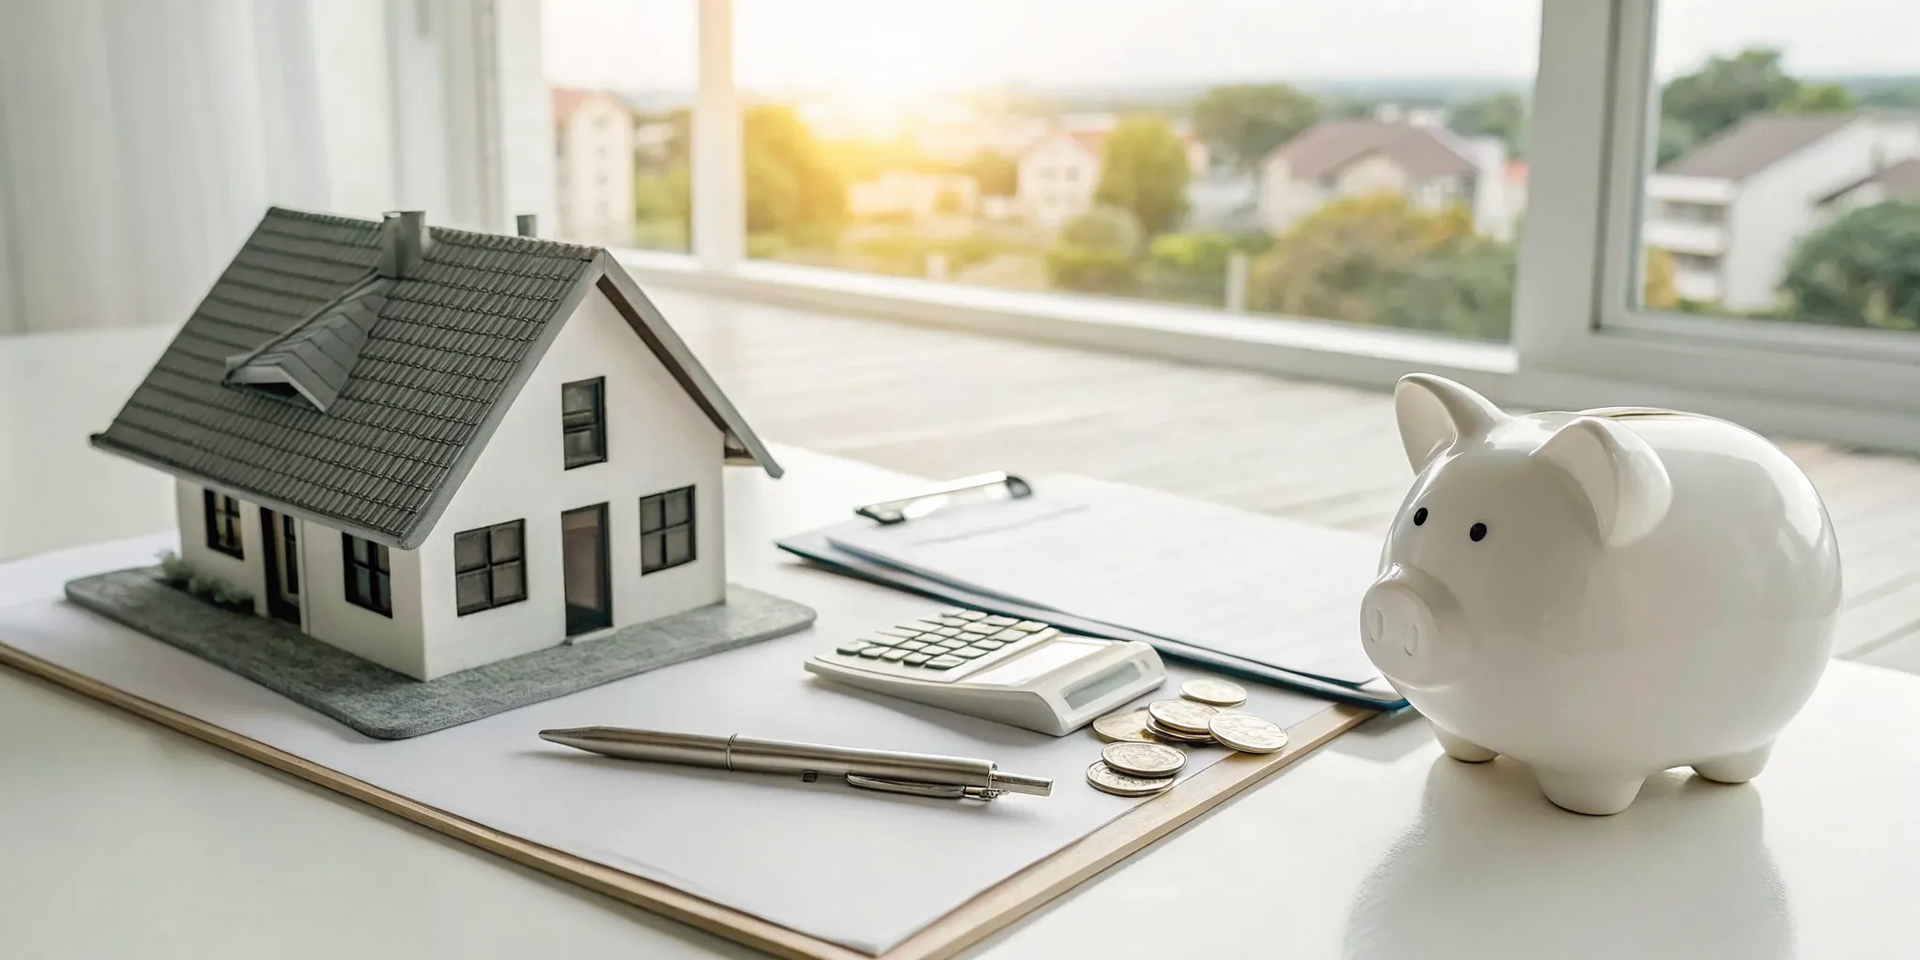
Understanding Vinyl Siding Costs

Figuring out the budget for new siding can feel like a big puzzle, but it’s much simpler when you know what pieces to look for. The total price tag for your project is mainly split between two key areas: the siding material itself and the cost of professional installation. While it's tempting to focus only on the price per square foot of the material, the labor to install it correctly is just as critical. Getting a handle on both of these components will help you plan your project with confidence and ensure you’re making a smart investment in your home’s future. Let’s break down what goes into the cost so you can see the full picture and move forward without any surprises.

Material Costs

The siding you choose plays the biggest role in your project's material cost. Standard vinyl siding is a durable and popular choice, typically measuring around .040 inches thick. However, if you’re looking for something with more strength and a longer lifespan, premium options from top brands can range from .044 to .055 inches thick. While these thicker panels come at a higher price point, they offer superior resistance to impacts from stray baseballs or hail and are less likely to sag over time. Think of it as an investment in your home’s protection and curb appeal for years to come, ensuring it stands strong against Georgia's varied climate.

Professional Installation Costs

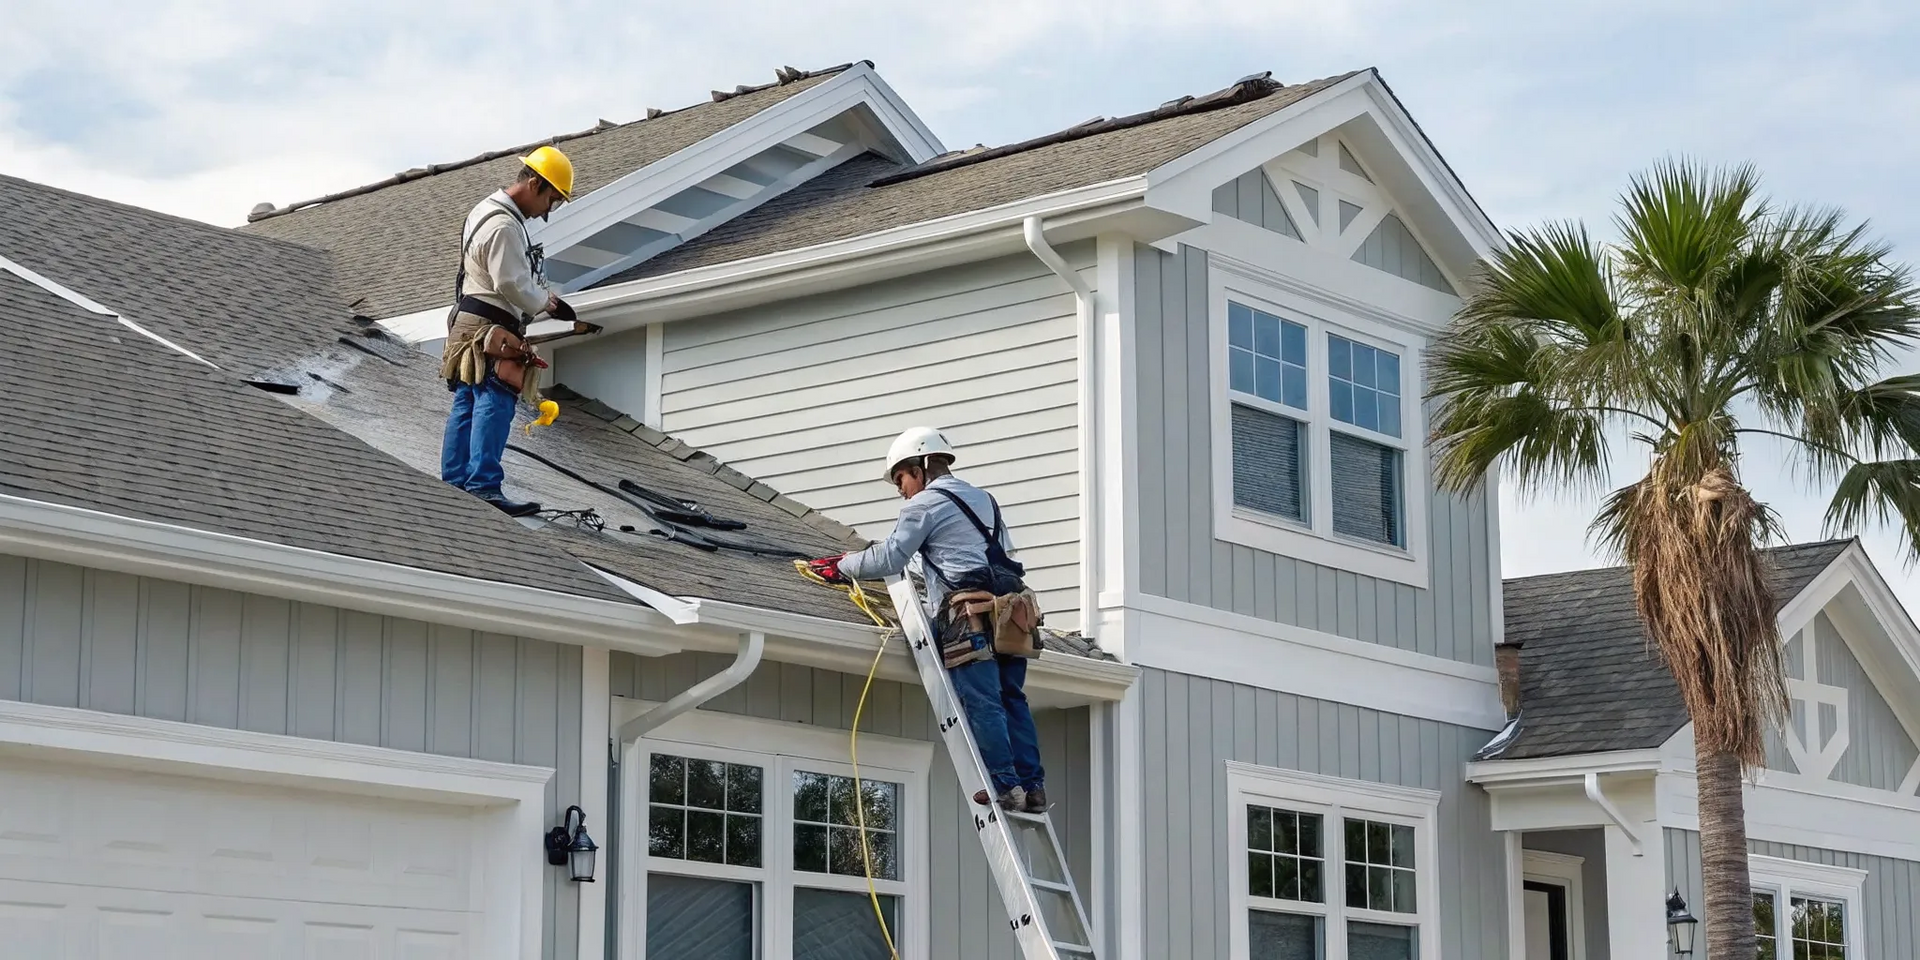
Even the highest-quality siding will fail if it isn’t installed correctly. That’s why professional installation is a non-negotiable part of your budget. Siding needs to be hung, not nailed tight, to allow for expansion and contraction with temperature changes. Hiring experienced and certified installers ensures your siding is properly fitted, secured, and sealed to prevent issues like warping, buckling, or water damage down the road. Cutting corners here can lead to much more expensive repairs later. A quality installation is what turns great materials into a beautiful, long-lasting exterior that protects your home effectively and gives you peace of mind.

Budgeting for Your Siding Project

When you’re planning your budget, remember that new siding is a valuable home improvement. In fact, homeowners often recoup a large portion of the cost when they sell their homes, making it one of the smartest exterior upgrades you can make. A trustworthy contractor will provide a comprehensive quote that details everything, including the specific brand and product line, labor costs, additional materials like house wrap, and a clear project timeline. This transparency helps you avoid surprises. We also understand that a siding project is a significant investment, which is why we offer flexible financing options to help make it more manageable for your family.

Finding the Perfect Color and Style

Choosing new siding is one of the most exciting parts of an exterior renovation. It’s your chance to completely redefine your home’s character and curb appeal. Gone are the days of limited, uninspired vinyl options. Today’s siding comes in a huge spectrum of colors, textures, and profiles, giving you the creative freedom to design a look that’s uniquely yours. Whether you want to restore a classic home to its original glory or give a traditional house a modern twist, the right combination of color and style can make all the difference.

The key is to find a balance between your personal taste and what complements your home’s architecture. Think about the fixed elements of your exterior, like your roof, brick or stone accents, and window trim. Your new siding should harmonize with these features to create a cohesive and polished look. From rich, dark hues that make a bold statement to soft, classic neutrals that feel timeless, the possibilities are endless. We can help you explore different combinations to find the perfect match for your home and neighborhood.

Choosing Colors That Won't Fade

One of the biggest concerns homeowners have is whether their beautiful new siding color will last. Sunlight can be harsh, and you want to choose a product that will look just as vibrant in ten years as it does on day one. That’s why it’s so important to select siding with excellent UV protection. Brands like Alside have developed advanced color-retention technology, which is especially crucial for darker and richer shades that are naturally more prone to fading. By investing in a high-quality product, you ensure your home’s exterior remains beautiful and your investment is protected for the long haul.

Matching Siding to Your Home's Style

To achieve a truly stunning result, your siding should feel like a natural extension of your home’s architectural style. A modern farmhouse will look best with a different profile than a historic Victorian. This is where having a wide selection comes in handy. CertainTeed is well-known for its extensive vinyl siding portfolio , offering an incredible variety of colors and textures. This allows you to mix and match different styles, like using horizontal lap siding on the main body of the house with shake accents in the gables. This kind of flexibility lets you create a custom look that perfectly suits your home’s design.

Exploring Textures and Profiles

Modern vinyl siding has come a long way from the smooth, plastic-looking panels of the past. Today, you can find a wide array of textures and profiles that convincingly mimic the appearance of natural wood and other materials. You can choose from classic clapboard, rustic board and batten, charming beaded designs, or the timeless look of shakes and shingles. These options allow you to add depth, dimension, and character to your home’s exterior without the constant maintenance of real wood. When you work with us on your exterior renovations , we can show you samples to help you find the perfect texture to bring your vision to life.

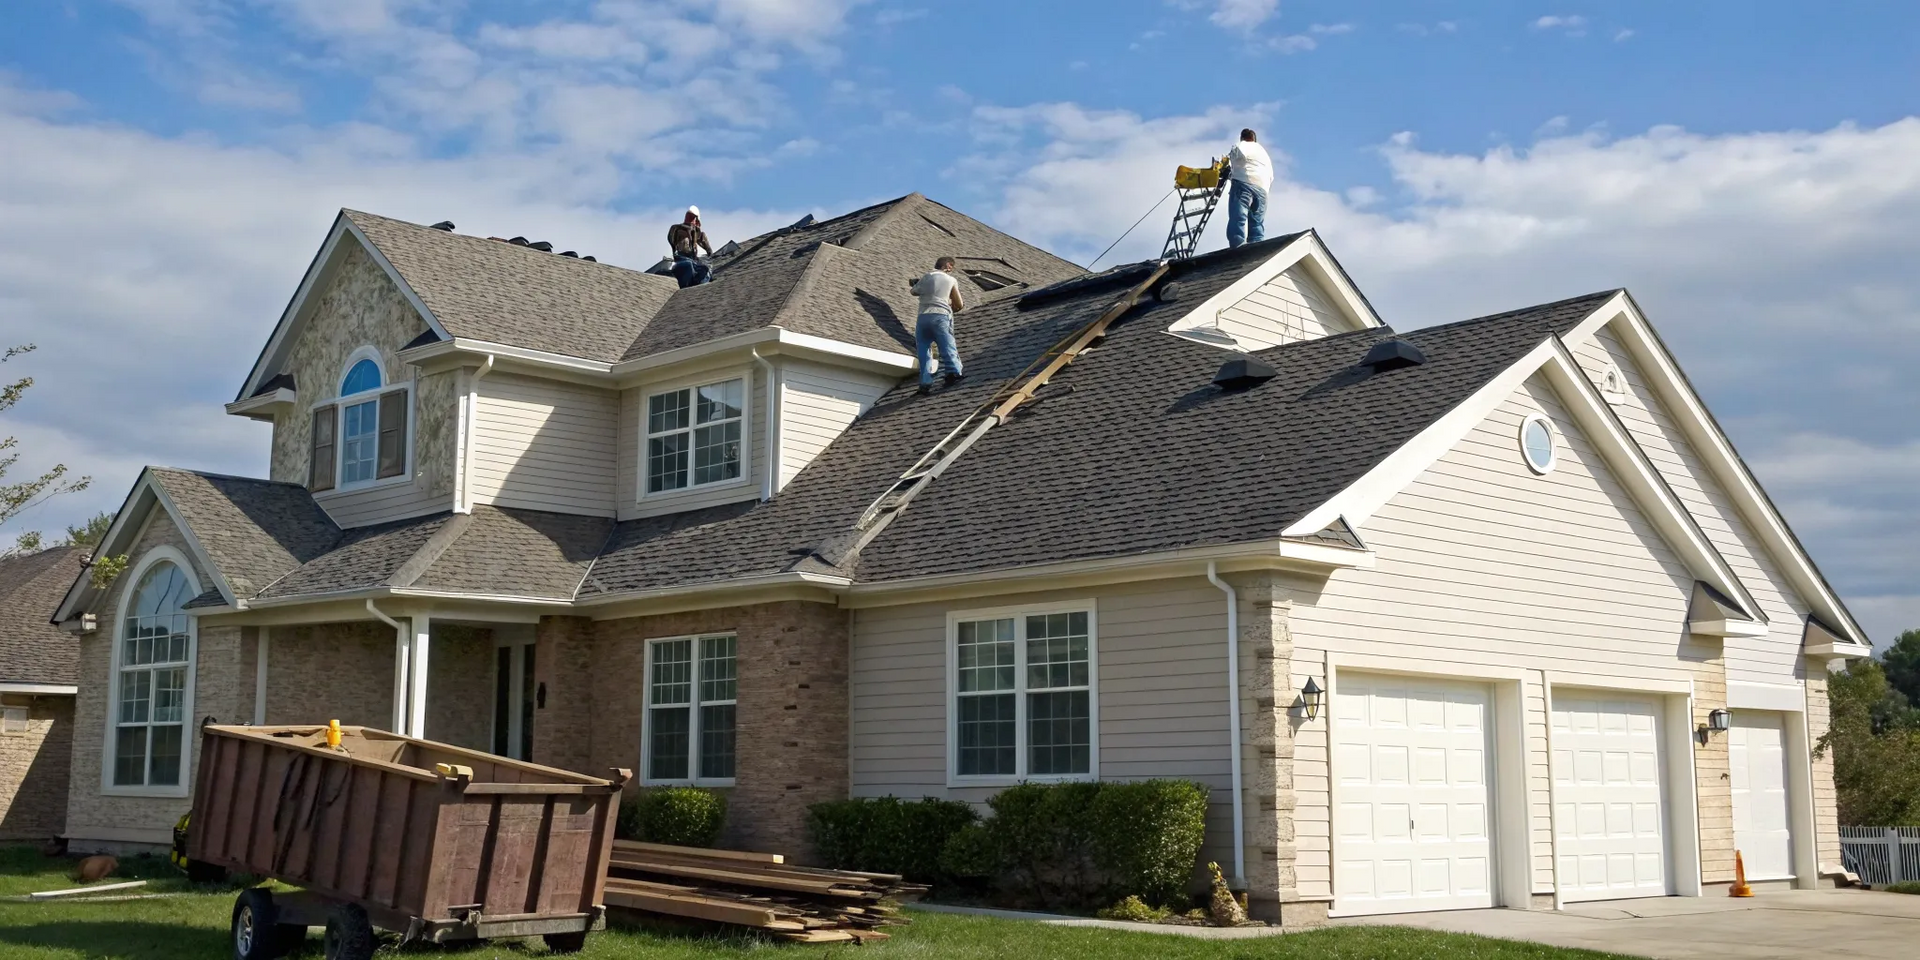
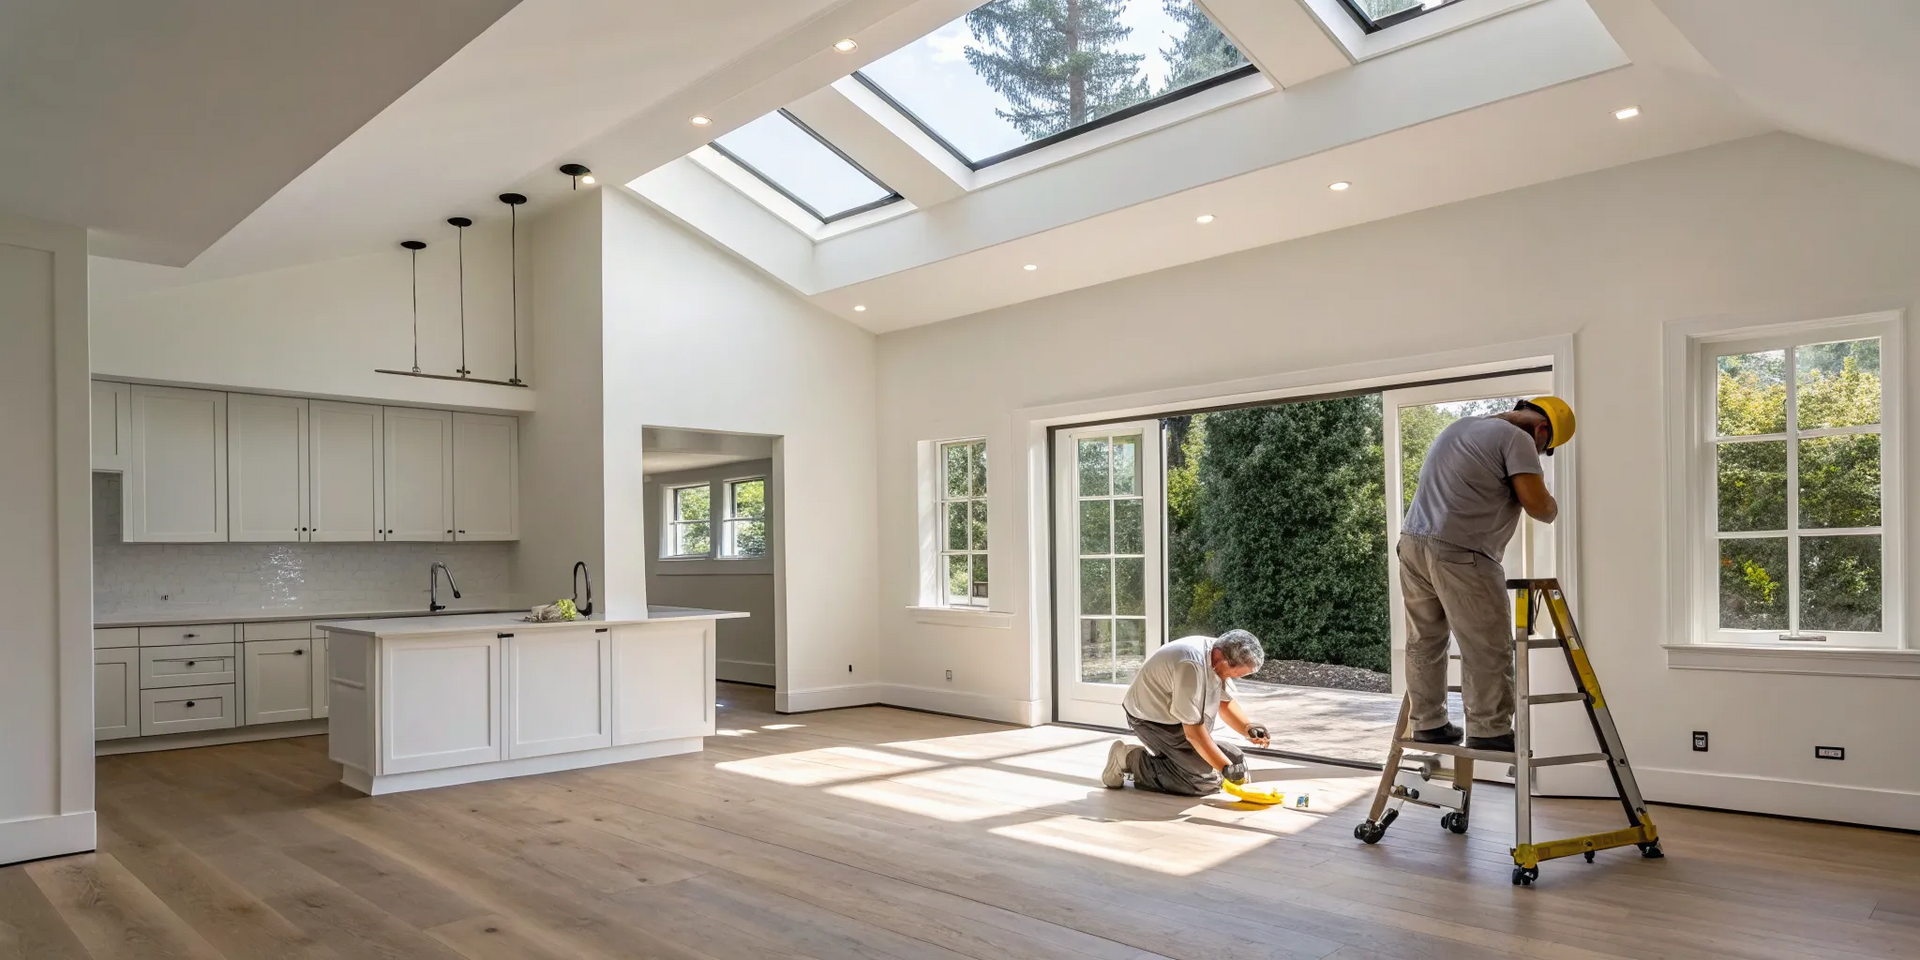
Why Professional Installation and Warranties Matter

You can spend weeks picking the perfect siding brand and color, but if it’s not installed correctly, you won’t get the performance or longevity you paid for. The quality of the installation is just as important as the quality of the material itself. This is where a professional contractor and a solid warranty become your biggest assets, protecting your investment and giving you peace of mind for years to come.

Choosing the right team ensures your siding not only looks great but also stands up to Georgia’s weather, from humid summers to the occasional winter chill. A professional installer handles the details that prevent future headaches like warping, buckling, and water damage. Plus, a clear, comprehensive warranty guarantees that the manufacturer and your contractor stand behind their work. Let’s break down why these two elements are so crucial.

The Importance of a Licensed Contractor

Even the best siding won't perform well if it's not installed correctly. That’s why your choice of contractor is a critical decision. A licensed, insured, and bonded company protects you from liability and ensures the team working on your home is accountable for their work. These credentials mean they meet state requirements, carry the right insurance in case of accidents, and are financially secured to honor their commitments. When you work with a proven team, you’re not just hiring installers; you’re partnering with experienced professionals who understand local building codes and manufacturer specifications. This expertise is what makes the difference between a siding job that lasts a decade and one that lasts a lifetime.

Understanding Your Warranty

A strong warranty is a sign that a manufacturer stands behind its product. However, not all warranties are created equal, so it’s important to read the fine print. Look for key details to understand what your coverage includes. Is the warranty prorated, meaning the coverage decreases over time? Is it transferable to a new owner if you sell your home? What specific fade coverage does it offer? A reputable contractor will walk you through the warranty details for the products they recommend and explain the separate workmanship warranty that covers the installation itself. This ensures you have a clear understanding of your protection from day one.

What Quality Installation Looks Like

Professional installation is more than just nailing panels to a wall. It’s a detailed process that prevents common issues like warping, buckling, and water damage. Experienced installers know how to properly prepare the surface, manage moisture barriers, and fasten panels to allow for natural expansion and contraction with temperature changes. You can identify top-tier professionals by looking for certifications, like those from the Vinyl Siding Institute (VSI). Our team at Total Roof Solutions holds industry-leading certifications, which means we’re trained in the proper techniques to deliver a lasting, weather-tight finish for all our exterior renovation projects.

Common Mistakes to Avoid When Choosing Siding

Choosing new siding is a big decision, and it's easy to get overwhelmed by the options. A little bit of know-how can help you sidestep common issues that lead to buyer's remorse. Focusing on the right details from the start ensures you get siding that not only looks great but also protects your home for years to come. Here are the key mistakes to avoid.

Missteps with Brands and Thickness

It’s easy to get caught up in brand names, but when it comes to vinyl siding, thickness is a more reliable indicator of quality. Thicker siding panels are more rigid, which helps them resist dents, cracks, and sagging over time. They also tend to lie flatter against your home, giving you a cleaner, more polished look. For a great balance of cost and performance, look for a thickness of at least .044 inches. If you want a bit more durability, especially in areas prone to harsh weather, opting for .046-inch siding is a smart move. Premium siding can go up to .055 inches, offering maximum strength for your home's exterior renovations.

Pitfalls in Color and Installation

The perfect color won't stay perfect if it fades under the sun. While many top brands use special technologies to protect against fading, the biggest threat to your siding's appearance and function is improper installation. Vinyl naturally expands and contracts with temperature changes, and if a contractor doesn't account for this movement, you could end up with warped or buckled panels. Poor installation can also create gaps that let water seep in, leading to serious damage. That's why it's crucial to work with an experienced contractor who understands the specific requirements for installing vinyl siding correctly.

Overlooking Warranties and Maintenance

A siding warranty can seem straightforward, but the details matter. Before you commit, take a close look at the fine print. Is the warranty prorated, meaning its value decreases over time? Can it be transferred to a new owner if you sell your home? How much color fade is considered acceptable? Answering these questions upfront can save you from major headaches later. Siding is a significant investment, so doing your research is essential. Choosing a company that offers strong warranties and stands by their work gives you peace of mind that your home is protected.

How to Maintain Your Vinyl Siding

One of the biggest draws of vinyl siding is that it’s incredibly low-maintenance. Unlike wood that needs constant painting or staining, vinyl is designed to hold its color and protect your home for years with very little effort on your part. But while it’s true that you won’t be spending your weekends scraping and painting, "low-maintenance" doesn’t mean "no-maintenance." A little bit of seasonal care can go a long way in keeping your siding looking brand new and catching small issues before they become big problems.

Think of it as a quick, simple check-up for your home’s protective layer. Taking just an hour or two each year to clean and inspect your siding does more than just preserve your home's curb appeal; it protects your investment. This simple routine helps you spot potential issues like loose panels, mildew growth, or failing caulk before they can allow moisture to seep behind the siding and cause more significant damage to your home's structure. It’s one of the easiest ways to ensure your siding lasts as long as it should and your home stays beautiful and secure. Here’s a straightforward guide to what you can do to keep your siding in top shape.

Simple Cleaning and Inspection Tips

To keep your vinyl siding looking its best, you don’t need any fancy equipment. A yearly cleaning with a soft brush or cloth and a simple solution of soap and water is usually all it takes. This gentle approach removes dirt, grime, and mildew without damaging the siding’s surface. While it might be tempting to use a pressure washer, be careful. Spraying directly into gaps or seams can force water behind the panels, leading to trapped moisture and potential problems down the road. As you clean, take the opportunity to give your exterior siding a quick visual inspection for any cracks, chips, or loose panels.

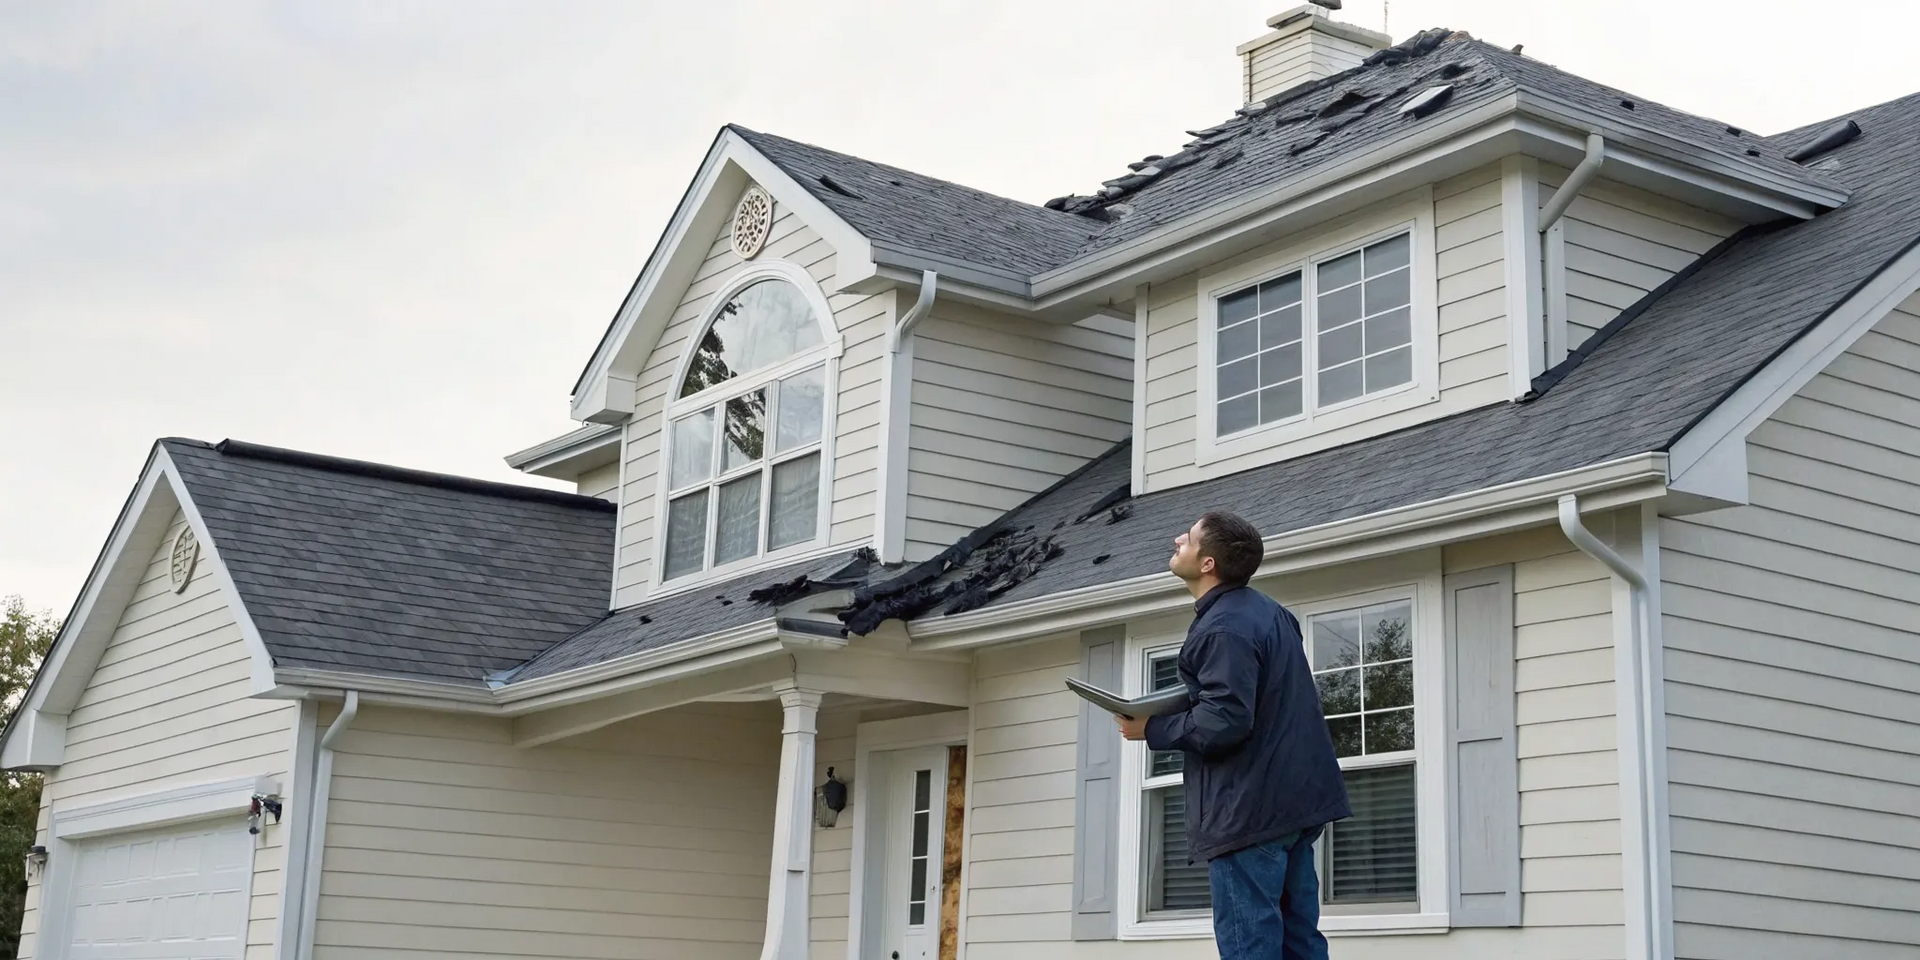
How to Prevent and Spot Damage

Prevention is always easier than repair. A great way to start is by regularly inspecting your siding for any signs of trouble. Look for warping, buckling, or panels that have pulled away from the house. It’s also smart to check the seals around your windows and doors. Over time, caulk can shrink or crack, creating small gaps where water can get in. As Consumer Reports notes, you can "use caulk to seal leaks around windows, doors, and joints... to prevent moisture intrusion." If you notice any gaps, applying a fresh line of caulk is a simple fix that can save you from future water damage.

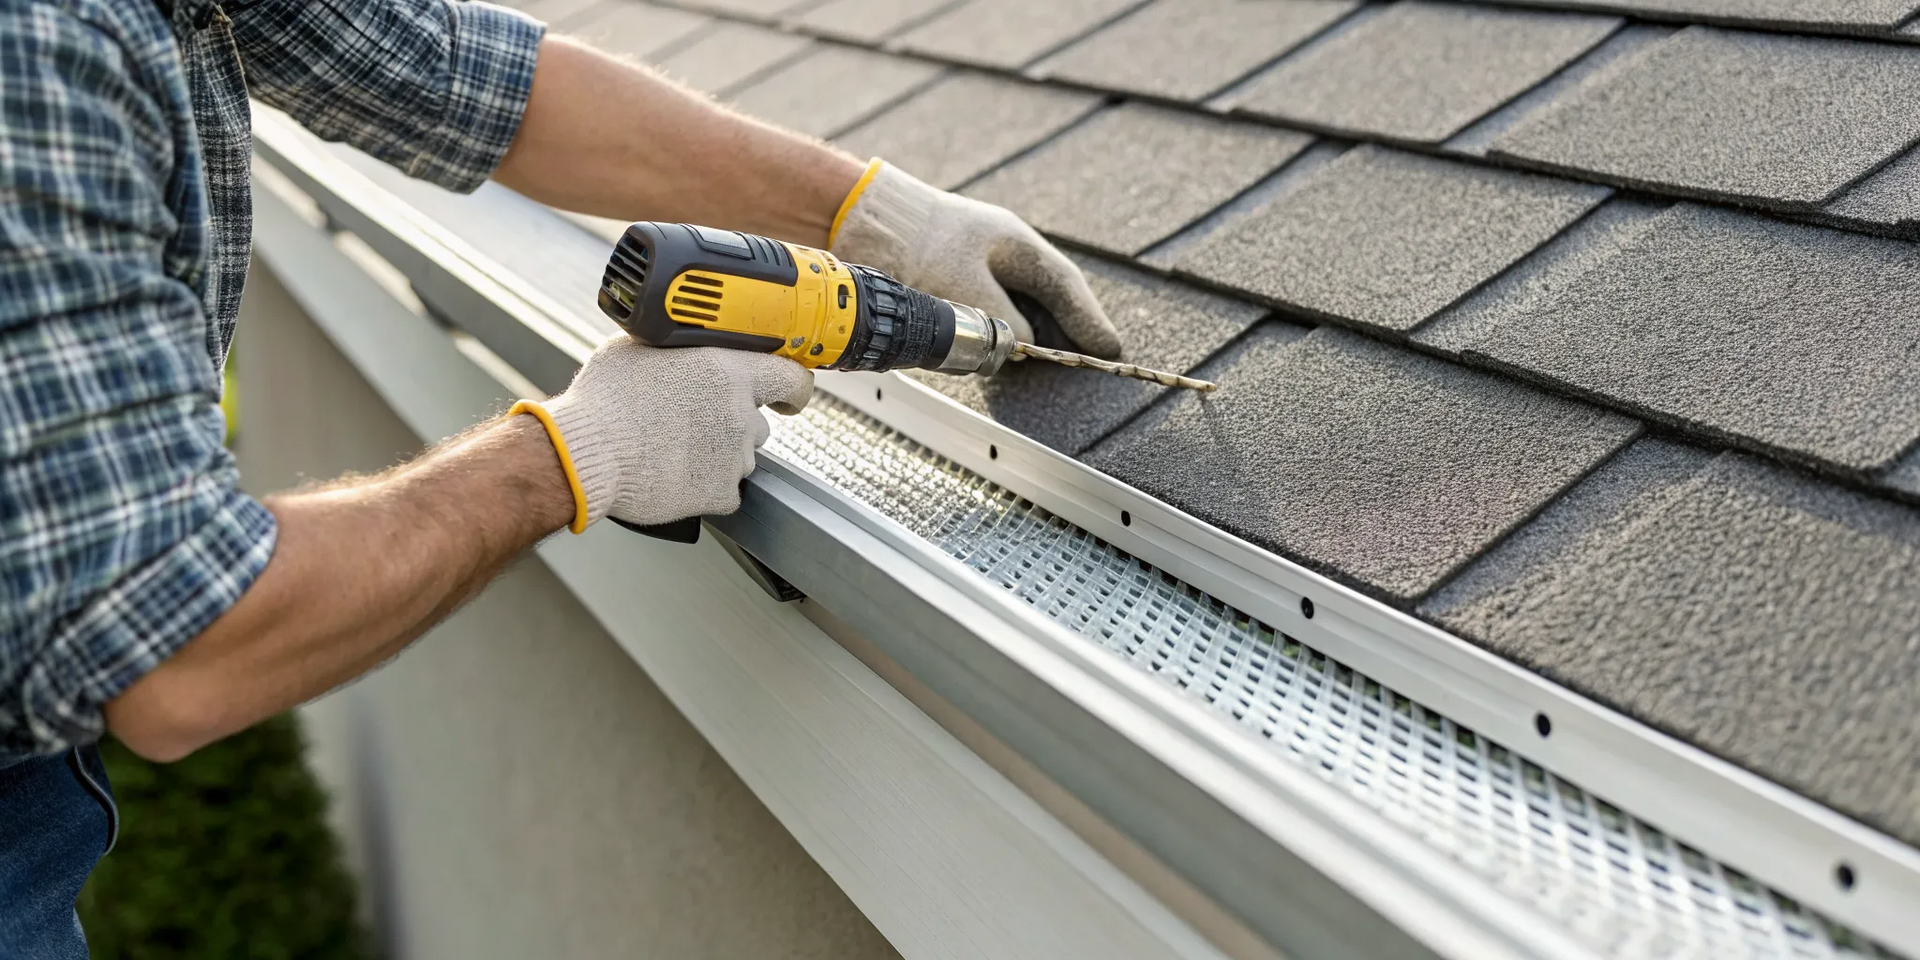
Your Seasonal Maintenance Checklist

A simple seasonal checklist can help you stay on top of siding maintenance. In the spring, give your siding its annual wash and check for any damage that winter storms may have left behind. In the fall, make sure your gutters are clean and free of debris to prevent clogs and overflows that can stain your siding. During the winter, keep an eye out for water stains under the eaves, which could be a sign of ice damming. Adding more insulation to your attic can often solve this problem. And remember, quality work from the start prevents most issues. Poor installation can lead to warping and water damage, which is why working with a trusted contractor is so important.

Related Articles

Frequently Asked Questions

How long can I expect new vinyl siding to last? When installed correctly by a professional, high-quality vinyl siding is a long-term investment for your home. You can generally expect it to last anywhere from 20 to 40 years, and sometimes even longer. Its lifespan depends on the quality of the material you choose, the local climate, and how well it's maintained with simple, annual cleanings.

Is thicker siding really that much better? Yes, thickness makes a significant difference in performance and durability. We recommend siding that is at least .044 inches thick because these panels are more rigid. This added strength helps them resist denting from hail or stray baseballs, and it also allows the siding to lay flatter against your home for a smoother, more attractive finish that is less likely to warp over time.

I love dark siding colors, but I'm worried about fading. Is this still a problem? That's a common concern, but modern siding technology has come a long way. Top manufacturers have developed advanced color-retention technologies with excellent UV protection specifically to address this issue. By choosing a quality brand known for its fade resistance, you can confidently select a rich, dark color and trust that it will maintain its vibrancy for years to come.

What’s the best way to clean my vinyl siding? Keeping your siding clean is simple. Once a year, use a soft-bristled brush and a bucket of soapy water to gently scrub away any dirt or mildew. While you can use a pressure washer, it's important to be careful. Keep the spray at a safe distance and never aim it upward into the seams, as this can force water behind the panels and lead to moisture issues.

What’s the difference between the manufacturer's warranty and the installer's warranty? This is a great question. The manufacturer's warranty covers defects in the siding material itself, such as issues with color fading or manufacturing flaws. The installer's workmanship warranty, on the other hand, covers the quality of the installation. A reputable contractor provides both, giving you complete protection and peace of mind that your investment is covered from every angle.

By Stephen Griswell April 30, 2026
By Stephen Griswell April 7, 2026
By Stephen Griswell March 26, 2026
Georgia’s weather puts every roof to the test. Between the intense summer sun, high humidity, and sudden heavy rainstorms, your roofing materials are constantly under stress. A standard sealant might not hold up to the constant expansion and contraction caused by our temperature swings. That’s why choosing a product designed for our specific climate is so critical for a lasting repair. You need a solution that stays flexible in the heat and waterproof in a downpour. In this guide, we’ll explore how our local weather impacts your roof and help you select the best roof sealant for asphalt shingles. CONTACT US Key Takeaways Match the sealant to your climate : For Georgia's intense sun and heavy rain, choose a product with excellent UV resistance and flexibility. This ensures the sealant can handle temperature swings without cracking or failing. Proper prep work is non-negotiable : A sealant will only work if it can bond correctly to the shingle. Always start with a completely clean and dry surface to create a durable, watertight seal that lasts. Sealant is for small fixes, not major problems : While great for minor cracks, sealant can't fix widespread issues like curling shingles or soft spots on your roof. These are signs of deeper damage that require a professional inspection. Our Top 5 Picks: The Best Roof Sealants for Asphalt Shingles When a small leak or crack appears, a quality roof sealant is your first line of defense. But with so many options on the shelf, it can be tough to know which one to grab. The right sealant can mean the difference between a quick, lasting fix and a recurring problem that leads to bigger headaches. As roofing professionals, we've seen it all and worked with countless products over the years. We know what stands up to Georgia's unique climate, from the intense summer sun to the heavy downpours. Below, we're sharing our top five picks for the best roof sealants for asphalt shingles. These are the products we trust to protect your home and deliver reliable results. Our Pro Pick: Sashco Through the Roof If we had to pick just one all-around performer, Sashco Through the Roof would be it. This sealant is incredibly versatile, which is why it’s a favorite among professionals. It creates a strong bond with almost any roofing material, and you can even apply it in wet conditions, making it perfect for those emergency repairs during a surprise Georgia shower. What we really appreciate is its elasticity. It expands and contracts as temperatures fluctuate, preventing the seal from cracking or pulling away over time. For most common residential roofing repairs, this is the sealant we reach for first because we know it will hold up. For Maximum UV Protection: Henry 887 Tropi-Cool Silicone Georgia summers can be brutal, and the sun’s UV rays can do a number on your roof. That’s where Henry 887 Tropi-Cool Silicone really shines. This is a 100% silicone sealant designed for maximum UV protection. Its bright white finish reflects sunlight, which helps keep your roof and attic cooler and can even contribute to lower energy bills. The silicone formula creates a completely waterproof, durable barrier that won't shrink, crack, or peel under the intense sun. It’s an excellent choice for sealing around vents and flashing, especially on low-slope or flat roofs often found in commercial roofing applications. For Rainy Climates: Geocel 2300 When you live in an area that gets its fair share of rain, you need a sealant you can count on to keep water out. Geocel 2300 is a top-tier choice specifically for its performance in wet climates. Professionals trust this tripolymer sealant for its incredible flexibility and long-lasting adhesion, even on damp surfaces. It’s perfect for sealing around flashing, skylights, and chimneys, which are common spots for leaks to start. Its durability ensures that once you’ve sealed a trouble spot, it stays sealed, giving you peace of mind through every storm season. It’s a reliable solution for keeping your home watertight and protected from the elements. The Best Budget-Friendly Option: DAP Waterproof Asphalt Filler & Sealant Not every roof repair requires an industrial-strength solution. For minor fixes, like sealing a small crack around a vent pipe or securing a loose shingle tab, DAP’s Waterproof Asphalt Filler & Sealant is a fantastic, budget-friendly option. It’s specifically formulated for asphalt surfaces, so you know it’s compatible with your shingles. This sealant is easy to apply and provides a tough, waterproof barrier that effectively stops small leaks in their tracks. While we wouldn't use it for major repairs, it’s the perfect product to keep on hand for quick, simple touch-ups. Our commitment to our clients means recommending the right product for the job, and sometimes, a simple solution is all you need. For Long-Term Durability: Liquid Rubber Waterproof Sealant If you’re looking for a sealant that offers exceptional long-term protection, Liquid Rubber Waterproof Sealant is a great investment. This product creates a seamless, rubberized membrane that is both incredibly strong and highly flexible. It moves with your roof through seasonal changes without cracking or breaking down. Because it forms such a durable layer, it’s an excellent choice for larger repair areas or for reinforcing sections of your roof that are prone to holding water. Think of it as adding a protective shield to your roof. This kind of long-term durability is key to a healthy roofing system, just like well-maintained gutters are. What to Look for in a Quality Roof Sealant Picking the right roof sealant can feel like a big decision, and it is. The right product will create a durable, waterproof barrier that protects your home for years, while the wrong one can fail quickly, leaving you back where you started. A quality sealant is more than just a temporary patch; it’s an investment in your roof's health. To make sure you’re choosing wisely, focus on a few key characteristics. You’ll want a product that can handle temperature swings, stand up to harsh weather, resist sun damage, and is made for your specific roof type. Let’s walk through what makes a roof sealant truly effective. It Stays Flexible in Any Temperature Your roof is constantly expanding and contracting as the temperature changes throughout the day and across seasons. A good sealant needs to be able to move with it. If a sealant becomes hard and rigid after it cures, it will crack and pull away from the shingles, creating new entry points for water. Look for sealants made from silicone or polyurethane, as these materials are known for remaining flexible. This elasticity allows them to maintain a tight seal through scorching summer heat and chilly winter nights, which is essential for the variable Georgia climate. It Offers Superior Weather Protection At its core, a roof sealant’s job is to act as a shield for your asphalt shingles. It’s your first line of defense against water damage. A high-quality sealant creates a waterproof barrier that stops leaks before they can start, preventing moisture from seeping into your roof deck and causing rot or mold. By sealing up vulnerable spots like flashing, vents, and nail holes, you can prevent small issues from turning into major roof repairs. This simple step not only protects your home but also helps extend the life of your entire roof, saving you significant money over time. It Resists Sun Damage and Lasts Longer The sun’s ultraviolet (UV) rays are relentless, and they can break down roofing materials over time, causing them to become brittle and ineffective. A quality roof sealant is formulated to withstand this constant exposure. Look for products with built-in UV resistance, as they will last much longer and provide more reliable protection. This feature is especially important in sunny climates where your roof bakes in the sun all day. By choosing a sealant that can handle intense sun, you ensure the repair remains strong and effective against moisture and temperature changes for years to come. It's Made for Asphalt Shingles Not all sealants are universal, so it’s crucial to choose one specifically designed for asphalt shingles. Using the wrong product can do more harm than good, as some chemicals can damage the shingles themselves. For example, silicone-based sealants are an excellent choice for asphalt shingles, especially in rainy areas, because they offer superior waterproofing and flexibility. Reading the product label carefully will ensure compatibility and help you achieve the best results. When in doubt, relying on professional roofing services guarantees the correct materials are always used for your specific roof type. It's Easy to Apply If you’re planning a DIY repair, the ease of application is a major factor. Roof sealants come in several forms, including liquids you can brush on, pastes for caulk guns, and even convenient sprays. Think about the size and location of the area you need to seal and choose a product that feels manageable for you. While a user-friendly product is helpful, remember that proper surface preparation is just as important. The roof must be clean and dry for the sealant to adhere correctly and create a lasting bond. Choosing the Right Sealant for Your Climate The sealant that works wonders on a roof in a dry, mild climate might not stand a chance against Georgia’s unique weather. Here, we deal with a combination of intense summer heat, high humidity, heavy rain, and the occasional cold snap. Your roof expands and contracts with these temperature swings, and the right sealant needs to be able to move with it. Choosing a product designed for our specific conditions is the key to a lasting repair. Think of a sealant as a critical part of your home's defense system. The wrong choice can lead to cracks, leaks, and bigger problems down the road. When you're selecting a sealant, you're not just patching a hole; you're investing in protection that needs to perform year-round. Let's look at what your sealant needs to handle the heat, rain, and everything in between. Handling High Heat and Humidity That summer sun can be brutal on an asphalt shingle roof. Prolonged exposure to high heat and UV rays can cause shingles to become brittle, leading to cracks and granule loss. This is why you need a sealant with excellent UV resistance. Look for silicone or advanced acrylic formulas that are specifically designed to reflect sunlight and resist breaking down under its constant glare. A quality sealant will maintain its integrity instead of drying out and failing. High humidity adds another layer of challenge, creating the perfect environment for algae and mildew to grow. Some sealants come with antimicrobial properties to stop this growth in its tracks, keeping your roof looking clean and preventing moisture from getting trapped. This is an essential feature for any residential roofing in the Atlanta area. Standing Up to Rain and Storms A sealant’s primary job is to keep water out, and in a rainy climate like ours, that job is non-stop. The best sealants create a completely waterproof and seamless barrier that protects the most vulnerable parts of your roof, like the areas around vents, chimneys, and flashing. They act as a shield for your asphalt shingles, preventing water damage that can lead to costly repairs and shorten your roof's lifespan. For areas that see a lot of rain, silicone-based sealants are often the top choice. They are incredibly waterproof and flexible, allowing them to handle heavy downpours and sudden temperature changes without failing. A reliable sealant works hand-in-hand with your gutters to direct water away from your home’s foundation, ensuring every part of your water management system is working correctly. Staying Flexible in the Cold While our winters are milder than in other parts of the country, the temperature still drops. As it gets colder, your roofing materials contract. If your sealant becomes hard and brittle in the cold, it will crack under the pressure, creating new entry points for moisture. This is why flexibility, or "elasticity," is so important. You need a sealant that remains pliable even on the chilliest days. This allows it to shrink along with your shingles without breaking its seal. A flexible sealant ensures that the small repairs you make in the fall are still holding strong when the spring rains arrive. This ability to withstand temperature changes is a hallmark of a high-quality product. Adapting to Seasonal Changes Your roof is constantly moving as it heats up during the day and cools down at night. A good sealant needs to stretch and shrink right along with it. This property is often referred to as elastomeric performance, which is just a technical way of saying it can stretch without tearing and return to its original shape. Without this flexibility, the sealant will eventually pull away from the shingles or crack, defeating its purpose. The ideal sealant for Georgia’s climate is one that can handle the full spectrum of our weather. It needs to withstand the intense UV rays of July, the heavy rains of April, and the cold snaps of January. Choosing a product built for this kind of seasonal variation ensures your roof stays protected no matter what the weather brings, which is crucial for both homes and large commercial roofing systems. How to Apply Roof Sealant for the Best Results Choosing the right sealant is half the battle; applying it correctly is the other half. A great product can fail if it’s not applied properly, so taking your time with preparation and application is key to getting a durable, watertight seal. Think of it like painting a room: the prep work is tedious, but it’s what makes the final result look professional and last for years. Following the right steps ensures the sealant bonds perfectly with your shingles, providing the protection you need. From cleaning the surface to giving the sealant enough time to cure, each step plays a vital role in protecting your home from the elements. Let’s walk through the process for getting the best possible results. Prep Your Roof Surface You can’t put a bandage on a dirty wound, and you can’t apply sealant to a dirty roof. For the sealant to create a strong, lasting bond, the surface of your asphalt shingles must be completely clean and dry. Start by removing any loose debris like leaves, twigs, and dirt with a broom or a leaf blower. If you have moss, algae, or stubborn grime, you may need to gently scrub the area with a roof-safe cleaning solution and rinse it. The most important part? You have to let it dry completely. Applying sealant over a damp surface will trap moisture, preventing proper adhesion and potentially causing more damage down the line. Use the Right Tools and Techniques Having the right tools makes any job easier, and applying roof sealant is no exception. For small cracks or sealing around flashing and vents, a caulking gun gives you the precision you need to get into tight spots. If you’re coating a larger area, a paint roller with a medium-nap cover or a sprayer will help you apply a consistent layer. The goal is to apply a smooth, even coat. Don’t glob it on, as thick patches can crack, but also don’t spread it too thin, which creates weak spots. Always read the manufacturer’s instructions on the product label, as they’ll provide the best guidance for the specific sealant you’re using. Pick the Perfect Day to Work Weather plays a huge role in how well your roof sealant applies and cures. The ideal time to tackle this project is on a clear, mild, and dry day. According to the Asphalt Roofing Manufacturers Association , it’s best to work when temperatures are above freezing, as the sun’s warmth helps the sealant bond effectively with the shingles. Avoid applying sealant in direct, intense sunlight or on extremely hot days, as it can cause the product to dry too quickly and bubble or crack. And, of course, check the forecast to make sure there’s no rain expected for at least 24 to 48 hours after you finish. Avoid These Common Application Mistakes A DIY sealant application can save money, but a few common mistakes can lead to bigger problems. One of the most frequent errors is applying the sealant unevenly, leaving some areas too thin and vulnerable while others are too thick and prone to cracking. Another issue is missing spots, especially in less-visible areas, which can leave your roof exposed to leaks. Applying sealant to a dirty or damp surface is another recipe for failure. If you’re not confident about getting uniform coverage or safely accessing all parts of your roof, it might be time to call in a professional. Our residential roofing team can ensure the job is done right the first time. Understand Curing Time and Maintenance Your work isn’t finished the moment you put the roller down. Roof sealant needs time to cure, which means it needs to fully dry and harden to form a protective barrier. Most products require at least 24 to 48 hours of dry weather to cure properly, but you should always check the product’s specific instructions. During this time, it’s critical to keep foot traffic off the sealed areas and ensure they don’t get wet. Once cured, your sealant will provide excellent protection, but it’s a good idea to inspect the sealed areas once a year, especially after major storms, to make sure everything is still intact. Know When to Call a Professional While a good roof sealant is a fantastic tool for minor repairs and maintenance, it’s important to recognize its limits. Think of it like first aid for your roof: it’s perfect for small cuts and scrapes, but it’s not a substitute for a doctor when you have a serious injury. Applying sealant to a roof with deep, underlying issues can be like putting a bandage on a broken bone. It might cover up the problem temporarily, but it won’t fix it and could lead to more extensive and expensive damage down the road. Knowing the difference between a simple DIY fix and a problem that needs an expert eye is key to protecting your home. A professional roofer can identify issues you might miss, ensuring the root cause of the problem is addressed correctly. Before you climb that ladder, take a moment to assess the situation. Sometimes, the smartest and safest move is to put down the sealant and pick up the phone to schedule a professional roof inspection. This step ensures you get the right solution the first time, saving you time, money, and stress. Signs of Deeper Roof Damage A small leak or a single cracked shingle can often be handled with sealant. However, certain signs point to more significant trouble. If you notice large areas where the shingle granules have worn away, shingles that are curling or buckling, or soft, spongy spots when you walk on the roof, you’re likely dealing with more than a surface-level issue. These are often symptoms of an aging roof or widespread moisture damage that has compromised the underlying structure. Sealants are simply not a magic fix for this kind of major roof damage; in these cases, a professional roof repair or even a full replacement might be necessary to protect your home. The Safety Risks of DIY Roof Repair Your safety should always come first, and working on a roof carries inherent risks. Falls are a serious concern, especially without the proper safety equipment and training. Beyond personal safety, there’s also the risk of damaging your roof further. Applying sealant yourself can easily lead to uneven coverage and missed spots, which could cause new leaks or trap moisture, leading to rot and mold. A professional has the experience to apply materials correctly, ensuring a proper, lasting seal that fully protects your home. They know how to work safely and efficiently, giving you peace of mind that the job is done right without putting you in harm’s way. When Sealant Isn't the Answer Sealant is a great solution for specific, minor issues, but it’s not the right tool for every job. If your roof is already 15 to 20 years old and showing its age, patching it up is only a temporary delay of the inevitable. You should also skip the sealant if you’re dealing with numerous leaks in different spots, have large sections of missing or badly damaged shingles, or see signs of structural problems like sagging. These are clear indicators that your roof’s integrity is compromised. In these situations, a full roof replacement is often the most cost-effective and responsible choice for the long-term health of your home. The Value of Professional Work and Warranties Hiring a professional isn't just about getting the job done; it's about investing in quality and confidence. When you work with an experienced team, you get the benefit of their expertise, ensuring the right products are used and applied correctly for maximum effectiveness. As an Owens Corning Platinum Preferred contractor , we stand by our detailed craftsmanship. Professional work often comes with strong warranties on both materials and labor, so if something goes wrong, you’re covered. Think of it as preventative care for your home. A professional job can lower your future repair costs and provides proper documentation that can even help support insurance claims if your roof gets storm damage. Related Articles Which Type of Asphalt Shingles Should I Use? | Total Roof Atlanta A Guide to the Commercial Roof Repair Process Key Factors in a Commercial Roof Replacement Maximizing Building Value With Rubber Roof Installations in Atlanta: A Comprehensive Guide Selecting the Ideal Flat Roof System for Atlanta Businesses CONTACT US Frequently Asked Questions How do I choose the right sealant from your list for my specific problem? Think about the specific job you need to do. For a quick fix on a small crack during a dry spell, the budget-friendly DAP sealant is a great choice. If you need to make an emergency repair while it's still damp, Sashco Through the Roof is designed to work in wet conditions. For areas that get intense, direct sun, Henry Tropi-Cool provides excellent UV protection that helps reflect heat. Can I use sealant to fix a missing or badly damaged shingle? Sealant is best used for small cracks, exposed nail heads, or reinforcing the seal around vents and flashing. It is not a substitute for a shingle. Trying to fill a gap where a shingle is missing or covering a large, crumbling area with sealant will not create a proper waterproof layer. This can actually trap water and lead to rot. A missing or severely damaged shingle should always be replaced. How long can I expect a sealant repair to last? The lifespan of a sealant repair really depends on the quality of the product, the preparation of the surface, and the local weather. A high-quality sealant that has been applied correctly to a clean, dry roof can last for many years. A less expensive product might only provide a temporary fix for a season or two. The key is to use the right product for the job and inspect the repair annually. Why is it so important to use a sealant made specifically for asphalt shingles? Asphalt shingles contain specific oils and materials that can be damaged by harsh chemicals found in generic caulks or sealants. Using a product that isn't compatible can cause the shingle to become brittle and crack, which ultimately makes the problem worse. Sealants formulated for asphalt are designed to bond securely and stay flexible without harming the shingle itself.  Is it really necessary to clean the roof before applying sealant? Yes, this step is absolutely critical for a lasting repair. Sealant needs to bond directly to the shingle surface to create a watertight seal. If you apply it over dirt, moss, or loose granules, it will stick to that debris instead of the roof. This creates a weak bond that is almost guaranteed to fail, letting moisture in and putting you right back where you started.
By Stephen Griswell March 26, 2026
That sinking feeling when you spot a water stain on your ceiling is universal. Your mind immediately starts racing with questions. How bad is the leak? How much will this cost? And most importantly, who can you trust to fix it right? The process of finding a reliable contractor can feel just as stressful as discovering the problem itself. You need someone who will give you an honest assessment without trying to upsell you on a full replacement you don't need. This guide is here to help you take a deep breath and move forward with a clear plan. We’ll walk you through how to identify the problem, what to look for in a professional, and how to find the best residential roof repair service for your home. CONTACT US Key Takeaways Focus on credentials and local experience : A trustworthy roofer will readily provide proof of their license and insurance. Prioritize local companies with strong community roots and top-tier certifications, which often grant access to the best warranties. Know the warning signs of roof damage : Catching problems early saves you money and stress. Look for cracked shingles, granules in your gutters, and any water stains on your interior ceilings to know when it's time to call a professional. Get everything in writing : A handshake isn't enough. A detailed contract protects you by clearly defining the project scope, materials, costs, and timeline, ensuring there are no surprises. How to Spot a Great Roofing Company Finding a roofer you can trust is the most important step in any repair project. While the options can feel overwhelming, a great company leaves clear clues about its quality and professionalism. Knowing what to look for helps you filter out the unreliable contractors and focus on the ones who will protect your home. It all comes down to checking their credentials, verifying their experience, and making sure everything is clearly documented. Check for Licenses, Insurance, and Bonding This is the absolute baseline for any contractor you consider hiring. A reputable roofing company must be fully licensed, insured, and bonded, and they should be ready to prove it. A state license shows they meet professional standards. General liability insurance protects your property from any accidental damage during the project, while workers' compensation covers their crew in case of injury, so you aren't held liable. Don't just take their word for it; ask to see their certificates of insurance. Any hesitation to provide these documents is a major red flag. A professional team, like the one at Total Roof Solutions , will always be transparent about their credentials. Look for Proven Experience and Certifications Experience is more than just years in business; it’s about a proven track record of quality work. Look for a company with deep roots in your community and a portfolio of completed projects. Check online reviews and ask for references you can speak with directly. Beyond general experience, look for manufacturer certifications. For example, being an Owens Corning Platinum Preferred contractor means a company has been vetted for financial stability, customer service, and installation quality. These top-tier certifications are awarded to only a small percentage of roofers and often grant you access to superior materials and the strongest warranties available, giving you extra peace of mind. Insist on Strong Warranties and Clear Contracts A great roofer stands behind their work, and the proof is in their warranties. You should receive two types: a manufacturer's warranty that covers the materials themselves and a workmanship warranty from the contractor that covers the installation. Be sure you understand the terms and duration of both. Before any work begins, you must also get a detailed, written contract. This document should clearly outline the full scope of the residential roofing project, the specific materials being used, a projected timeline, the total cost, and a payment schedule. A vague estimate on a handshake is not enough. A clear contract protects both you and the contractor, ensuring everyone is on the same page from start to finish. Signs Your Roof Needs Repair Your roof can't talk, but it sends clear signals when it needs attention. Catching these signs early can save you from the stress and expense of a major problem down the road. Knowing what to look for, both outside and inside your home, helps you act fast. Here’s a guide to what your roof might be trying to tell you. What to Look for Outside The easiest way to check on your roof’s health is to simply look at it from the ground. Are any shingles missing, cracked, or curling at the edges? These are signs that your shingles are past their prime and can no longer protect your home effectively. Another clue is finding a lot of shingle granules, which look like coarse black sand, in your gutters. This means the protective top layer of your shingles is wearing away. If your roof is over 20 years old and showing these signs, it’s definitely time for a professional residential roofing inspection. Warning Signs Inside Your Home Sometimes, the first sign of a roof problem appears inside your house. Head up to your attic on a sunny day and look for any beams of light coming through the roof boards. This is a clear sign you have a hole. You should also keep an eye out for water stains or discoloration on your ceilings or walls, which often point to a slow leak. A musty smell in certain rooms or visible mold growth are also red flags that moisture is getting in from somewhere. If you see any of these signs, it’s important to contact a professional right away to find the source of the leak. Repair or Replace? The 25% Rule When you have widespread damage, you might wonder if you can get by with a repair. A helpful guideline many roofing professionals use is the 25% rule. It suggests that if more than a quarter of your roof is damaged, a full replacement is often the smarter, more cost-effective choice. Simply patching up large sections can lead to an uneven roof surface and create weak spots where future leaks can occur. A full replacement ensures that your entire roofing system is sound, secure, and ready to protect your home for decades to come. What Kind of Roof Repair Do You Need? Roof damage isn’t a one-size-fits-all problem. The right solution depends entirely on the type and extent of the issue you're facing. A few loose shingles after a windy day requires a very different approach than widespread damage from a major storm. Understanding the severity of the problem helps you know what to expect and what to ask for when you call a professional. Let's break down the common types of roof repair, from quick fixes to a complete overhaul. Fixing Minor Issues Minor roof issues are the most common culprits behind a leak. This includes things like a few cracked or missing shingles, loose flashing around a chimney, or worn-out sealant on vents. While they might seem small, addressing them quickly is key. A small, ignored leak can lead to rotted wood, damaged insulation, and mold growth over time. The best way to catch these problems is with regular roof inspections that spot trouble early. For these types of repairs, a professional can typically isolate the problem area and fix it in just a few hours, extending the life of your roof without a major expense. Tackling Major Damage Sometimes, the damage is too widespread for a simple patch. This often happens after a severe storm or if a large tree limb falls on your house. If you're looking at a significant area of missing shingles or a large puncture, you're dealing with major damage. A good rule of thumb is the 25% rule: if more than a quarter of your roof is damaged, a full replacement is often the smarter, more cost-effective choice. Trying to patch a large section can create an uneven surface and lead to future leaks along the seams. A professional assessment is crucial here to determine if a large-scale repair is viable or if it’s time to consider a replacement. Handling Roofing Emergencies A roofing emergency is any situation that requires immediate attention to prevent serious damage to your home's interior. Think severe leaks during a storm, major structural damage from hail, or sections of your roof being torn off by high winds. In these cases, your first step is to call a trusted roofer for an emergency tarping service to protect your home. A reliable contractor will not only secure the area but also help you document the damage for your records. They can also help you identify hidden issues and guide you through the insurance claim process , making a stressful situation much more manageable. When a Full Replacement is Necessary Eventually, every roof reaches the end of its lifespan. A full replacement is necessary when repairs are no longer enough to protect your home. This is often the case for older roofs (20+ years), roofs with widespread cracking or curling shingles, or when damage covers more than 25% of the surface. Patching an old, failing roof is like putting a bandage on a serious wound; it’s a temporary fix that will likely fail again soon. Investing in a full roof replacement provides a long-term solution, improves your home's curb appeal, and gives you peace of mind knowing your home is protected for decades to come. How Much Do Roof Repairs Cost? Let's talk about one of the biggest questions on every homeowner's mind: the cost. While there’s no single price tag for a roof repair, understanding what goes into an estimate can help you feel more prepared. The final cost depends on the extent of the damage, the materials used, and the complexity of your roof. A minor fix might only cost a few hundred dollars, while more significant damage could run into the thousands. The best first step is always a professional inspection to get a clear picture of what your specific repair will involve. Typical Costs for Common Repairs For small issues like replacing a few missing shingles or sealing a minor leak, you can expect a straightforward and affordable fix. For more extensive damage, a contractor might price the job by the "square," a 10-by-10-foot section of your roof. The cost per square varies based on your roofing material and the labor involved, and it often includes removing the damaged sections. Getting a detailed quote is the only way to know for sure what your residential roofing repair will cost. What Affects the Final Price? Several key factors influence your final bill. The type of roofing material is a big one; asphalt shingles are typically less expensive to repair than slate or metal. The pitch, or steepness, of your roof also plays a role, as steeper roofs require more safety equipment and time. The extent of underlying damage is another critical variable. If water has rotted the decking beneath your shingles, the repair will be more involved. When you get quotes, remember that the cheapest option isn't always the best. A company's experience and quality of work are just as important as the price. Navigating Payments and Financing A trustworthy contractor will be transparent about payment. It’s a major red flag if a company demands full payment before starting the job. Reputable roofers usually ask for a reasonable deposit for materials, with the balance due upon completion or in installments. Be sure this schedule is clearly outlined in your contract. If a sudden repair isn't in your budget, don't hesitate to ask about payment plans. Many companies offer flexible financing options to help you manage the cost of essential repairs without the stress. Essential Questions to Ask Before You Hire Choosing a roofing contractor can feel like a big decision, because it is. The right team will protect your home for years to come, while the wrong one can lead to costly mistakes and endless stress. To make sure you hire a true professional, you need to go into the conversation prepared. Asking smart, direct questions is the best way to vet a potential contractor and feel confident you’re putting your home in good hands. Think of it as a job interview where you’re the hiring manager. Use the questions below to guide your conversation and find a roofer you can trust. Questions About Licensing and Insurance First things first, you need to cover the non-negotiables. A legitimate roofing company will always operate with the proper credentials to protect you, their crew, and your property. Don’t just take their word for it; always ask for proof. Any hesitation to provide these documents is a major red flag. A professional contractor will have them ready to go and will be happy to show you they run their business the right way. At Total Roof Solutions, we believe transparency is key, which is why we are a fully licensed and insured company . Key questions to ask: Are you licensed, bonded, and insured to work in Georgia? Can you provide a copy of your general liability and workers' compensation insurance certificates? Questions About Their Experience and Past Work A roofer’s history tells you a lot about their future performance. You want a company with deep roots in your community and a long list of happy customers. Look for a contractor with years of experience handling projects just like yours, whether it's a simple repair or a full residential roof replacement. Check online reviews on sites like Google and the Better Business Bureau to get a feel for their reputation. Also, ask about special certifications. For example, being an Owens Corning Platinum Preferred contractor shows a commitment to training and quality that goes above and beyond the basics. Key questions to ask: How many years have you been serving the Atlanta area? Can you share a portfolio of your work or provide local references? What manufacturer certifications do you hold? Questions About the Project Details Once you’ve confirmed a contractor is qualified, it’s time to get into the specifics of your project. A trustworthy roofer will provide a detailed written contract that leaves no room for confusion. This document should clearly outline the scope of work, the specific materials being used, a project timeline, the total cost, and a clear payment schedule. Remember, the cheapest bid isn't always the best. A low price could signal subpar materials or rushed labor. Also, be sure to ask about warranties. A solid warranty on both materials and workmanship is a sign that the company stands behind its work. Key questions to ask: Will you provide a detailed, itemized estimate in writing? What does your contract include? What warranties do you offer for materials and labor? Roofing Red Flags to Avoid Choosing the right roofer is just as important as the materials you put on your home. While most contractors are honest professionals, a few bad apples can make the process stressful. Knowing what to watch out for can save you from headaches, shoddy work, and financial loss. Trust your gut. If a deal seems too good to be true or a contractor makes you feel uncomfortable, it’s okay to walk away. Here are some of the most common red flags to keep on your radar. High-Pressure Sales and Storm Chasers Be wary of any roofer who uses high-pressure tactics to get you to sign a contract on the spot. They might create a false sense of urgency by mentioning a "limited-time offer" or using scare tactics about the immediate danger your roof is in. This is especially common with "storm chasers," who are out-of-town contractors that sweep into a neighborhood after a storm. They often do quick, low-quality work and then disappear, leaving you with no way to address issues or claim a warranty. A reputable, local company will give you the time and space you need to make an informed decision without pressure. Vague Estimates and Missing Contracts A professional roofer will always provide a detailed, written estimate and contract. This document is your protection, so never proceed with work based on a verbal agreement or a vague, one-page quote. Your contract should clearly outline the full scope of the project, including the specific materials to be used, a projected timeline, the total cost, and a clear payment schedule. If a contractor is hesitant to put everything in writing or their estimate is missing key details, consider it a major red flag. A clear contract is a sign of a transparent and professional residential roofing partner who stands by their work. Demands for Upfront Payment It’s normal for a roofing company to ask for a deposit before work begins, but you should never pay for the entire job upfront. A massive down payment request is a serious warning sign. It could indicate that the company is not financially stable or, in the worst-case scenario, that they plan to take your money and never complete the work. A reasonable deposit is typically a small percentage to cover initial material costs. The rest of the payments should be tied to specific project milestones and clearly laid out in your contract. A trustworthy contractor has the financial footing to start a project without needing a large sum from you. How to Confidently Vet a Roofing Contractor Choosing the right contractor is the most important decision you’ll make for your roof. A great roofer protects your investment, while the wrong one can lead to costly mistakes and endless headaches. Taking the time to properly vet your options ensures you partner with a professional who is reliable, skilled, and trustworthy. Think of it as conducting a job interview; you want to find the best candidate for the role of protecting your home or business. These simple steps will help you filter out the noise and hire with total confidence. Read Reviews and Check References Start your search by seeing what past customers have to say. Look for a contractor with consistently positive feedback on sites like Google and the Better Business Bureau (BBB). While a perfect record is rare, you’re looking for a pattern of professionalism, quality work, and good communication. Don’t stop there; a reputable company should be happy to provide you with references from previous jobs. Speaking directly with a past client can give you firsthand insight into their experience, from the initial quote to the final cleanup. This is a great way to learn more about a company and its track record. Confirm They're a Local, Reputable Business Hiring a local contractor is a non-negotiable. A roofer with a permanent, physical address in your area understands Georgia’s specific weather challenges and is familiar with local building codes. They have a reputation to uphold in the community and will be there for you if any issues arise down the road. Be wary of "storm chasers," who often appear after severe weather, perform subpar work, and then disappear. A stable, local business is invested in the community and focused on building long-term relationships, not just making a quick sale. They are your neighbors, providing reliable residential roofing services you can count on. Get and Compare Multiple Written Bids Never settle for the first quote you receive. It’s smart to get at least three detailed, written bids from different contractors. This isn't just about finding the lowest price. A detailed bid helps you compare the scope of work, the quality of materials proposed, labor costs, and project timelines. The cheapest option often cuts corners on materials or labor, which can cost you more in the long run. Make sure every estimate is in writing and clearly outlines all aspects of the job. Before any work begins, insist on a formal contract that protects both you and the contractor by setting clear expectations for the entire project. Finding Your Trusted Local Roofing Partner After you’ve done your research, read the reviews, and compared the bids, you’re left with the final, crucial step: choosing the right team for the job. This is where a local, community-focused company really shines. A contractor who lives and works in your area understands the specific challenges our Georgia weather throws at our homes, from the intense summer sun to sudden hailstorms. They know the local building codes inside and out and have established relationships with suppliers in the area. A local roofer isn’t just working on a house; they’re serving their neighbors. This deep connection to the community means they have a reputation to uphold and are committed to being there for you long after the project is finished. You can often get a sense of a company’s local roots and values by learning more about their team and their story. Checking out a company’s About Us page can give you insight into their commitment to the community. Beyond just being local, one of the clearest indicators of a top-tier contractor is their certifications from leading manufacturers. These aren't just fancy badges; they are proof of a roofer’s commitment to excellence and a sign that you’re putting your home in the most capable hands. Why Choose a Platinum Preferred Contractor? So, what does it mean when a company is an Owens Corning Platinum Preferred Contractor? It’s the highest level of certification a roofing contractor can achieve within the manufacturer's network. Only a small fraction of roofers meet the strict criteria required for this status, which includes a proven track record of professional service, business stability, and high-quality craftsmanship. For you, this means you’re working with a thoroughly vetted professional. More importantly, it gives you access to the industry’s best and most comprehensive warranties, providing an extra layer of protection for your investment. Choosing a Platinum Preferred Contractor ensures you get premium materials installed by experts who are held to the highest standards by the manufacturer itself. It’s one of the surest ways to guarantee peace of mind. Making Your Roof Repair Last A quality roof repair should do more than just patch a problem; it should restore your peace of mind. But the work doesn’t stop once the contractor leaves. To get the most out of your investment, a little proactive care goes a long way. It starts with making smart choices from the beginning and continues with consistent attention over the years. Focusing on the right materials, regular upkeep, and a solid warranty ensures your roof stays strong for years to come. Select the Right Materials for Your Climate Choosing the right roofing materials is crucial for durability, especially here in Georgia. Our climate throws a lot at a roof, from scorching sun to heavy rain. Selecting materials that can withstand these conditions will significantly enhance the lifespan of your roof repair. For example, architectural shingles are a popular choice because they offer excellent durability and resistance to wind uplift. When discussing your residential roofing project, ask your contractor which materials perform best locally. A professional will guide you toward options that balance cost, appearance, and long-term resilience against our specific weather patterns. Keep Up with Roof Maintenance Think of roof maintenance like a regular check-up; it’s the best way to catch small issues before they become expensive problems. Regular maintenance is essential for prolonging the life of your roof. This includes simple tasks like keeping your gutters clear of leaves and debris to prevent water backup, which can damage your roof deck. It’s also wise to schedule a professional inspection every year or two, especially after a major storm. A trained eye can spot subtle signs of wear and tear, like cracked sealant or loose shingles, and address them before a leak starts. Understand Your Warranty A strong warranty is a sign that a contractor stands behind their work. When getting a repair, it’s vital to ask about the warranties for both materials and workmanship. A material warranty covers product defects, while a workmanship warranty covers installation errors. As an Owens Corning Platinum Preferred contractor , we can offer some of the best warranties available. Always read the details to understand what’s covered, the duration, and any actions that could void it. This gives you peace of mind knowing you’re protected down the road. Related Articles 24 Hour Emergency Roof Repair: What to Do First Are Gutter Guards Worth the Cost? A Homeowner's Guide Your Guide to Average Roof Replacement Costs in Atlanta: Save Money and Make Informed Choices A Homeowner's Overview of Atlanta Roof Replacement Costs CONTACT US Frequently Asked Questions How often should I have my roof professionally inspected? A good rule of thumb is to have a professional look at your roof once a year, and always after a major storm passes through. Think of it as preventative care for your home. An annual inspection allows a trained eye to catch small issues, like a cracked shingle or worn sealant, before they turn into a serious leak that causes much bigger problems. What's the real difference between a repair and a replacement? A repair is a targeted fix for a specific, isolated issue, like replacing a few shingles that blew off in the wind or sealing flashing around a chimney. A full replacement, on the other hand, is a complete overhaul of your entire roofing system. This is the right choice when your roof is old and showing widespread wear or if more than a quarter of it has been damaged. What should I do immediately if I notice a leak in my ceiling? First, don't panic. Move any furniture or valuables from under the spot and place a bucket to catch the water. If the water is causing a bulge in the paint, you can carefully puncture it with a pin to relieve the pressure. Your next step should be to call a professional roofer right away. A water stain means moisture is getting in, and it's important to find the source quickly to prevent mold and structural damage. Why is a manufacturer certification like "Owens Corning Platinum Preferred" a big deal? This certification is more than just a title; it’s a sign that a contractor has been thoroughly vetted by the manufacturer for financial stability, customer service, and installation quality. Only a small percentage of roofers earn this status. For you, it means you're hiring a proven expert and you gain access to the industry's best materials and strongest warranties, which other contractors simply can't offer.  Is the cheapest bid for a roof repair usually the best choice? While it's tempting to go with the lowest price, an unusually cheap bid can be a red flag. It often means the contractor might be using subpar materials, cutting corners on safety, or isn't properly insured, which puts you at risk. It's better to compare estimates based on the overall value, including the quality of materials, the scope of work, and the strength of the warranties provided.
By Stephen Griswell March 24, 2026
When a storm hits or you discover a leak, the last thing you want to worry about is how you’ll cover the cost of a repair or replacement. An emergency roofing situation creates immediate stress, and the financial pressure can feel just as overwhelming as the damage itself. Thankfully, you don’t have to drain your savings or wait for an insurance check to clear before taking action. Fast and flexible roof financing is designed for these exact moments. It provides a clear path to securing the funds you need right away, allowing you to hire a trusted contractor and protect your home from further damage. Let’s explore the options that can help you manage an urgent roofing project without the financial panic. CONTACT US Key Takeaways You have multiple ways to pay for a roof : Beyond paying with cash, you can use home equity loans, personal loans, government-backed programs, or financing offered directly by your contractor. Comparing these options is the best way to find a plan that fits your budget. Understand the true cost of your loan : A low monthly payment can be misleading. To see the full picture, look at the annual percentage rate (APR), the length of the loan term, and any potential hidden fees, as these factors determine the total amount you'll pay over time. Don't let a less-than-perfect credit score stop you : While a strong credit history helps, it isn't the only factor. Many financing solutions, including FHA loans and plans offered through roofing partners, are designed to work for homeowners with a wide range of credit situations. What Are Your Roof Financing Options? A new roof is one of the most important investments you can make in your home, but that doesn't mean you have to pay for it all at once. Thankfully, you have several financing options to make the project more manageable for your budget. From using your home's equity to working directly with your contractor, there's a path that can work for you. Let's walk through the most common ways homeowners fund their new roof so you can find the right fit. Home equity loans and HELOCs If you've built up equity in your home, you can use it to your advantage. A home equity loan gives you a lump sum of cash with a fixed interest rate, which is great for predictable monthly payments. Think of it as a second mortgage. Another option is a Home Equity Line of Credit (HELOC), which works more like a credit card. You get a credit limit and can draw funds as needed, which is helpful if your project costs are uncertain. Both options use your home as collateral, so they often come with lower interest rates than other types of loans. Personal loans for roofing A personal loan is another popular way to pay for a new roof. Unlike a home equity loan, a personal loan is usually unsecured, meaning you don't have to use your house as collateral. This can be a big relief for many homeowners. You’ll receive a fixed amount of money upfront and repay it in consistent monthly installments over a set term. Loan amounts are flexible, often ranging from $1,000 to $100,000, making them suitable for both minor repairs and full replacements. Because they aren't tied to your home, the approval process can be much faster, getting you the funds you need in just a few days. Contractor financing programs Many roofing companies simplify the process by offering financing directly. Here at Total Roof Solutions, we partner with trusted third-party lenders to provide flexible payment plans that fit your budget. This is an incredibly convenient option because you can manage your project and your payment plan all in one place. We handle the details so you don't have to shop around for a separate loan. While these programs are straightforward, it's always smart to review the terms and interest rates. Our team is committed to transparency and will walk you through all the details to ensure you feel confident in your decision. We believe in making quality roofing accessible, which is why we offer these flexible financing options . Government-backed loan options Did you know there are government-backed loans designed to help homeowners with essential improvements? Programs insured by the Federal Housing Administration (FHA), for example, can be a fantastic resource for financing a new roof. These loans often have more accessible credit score requirements than conventional loans, opening the door for more homeowners to qualify. An FHA Title I loan, for instance, is specifically for home repairs and improvements. If you've had trouble securing financing elsewhere, exploring these government-insured loans could be the perfect next step. They are a great way to fund necessary repairs without draining your savings. How Much Does a New Roof Cost? This is the big question, isn't it? Pinning down an exact number for a new roof can feel tricky because it’s not a one-size-fits-all purchase. The final price tag depends on several moving parts, from the materials you choose to the unique features of your home. Think of it less like buying a product off the shelf and more like a custom project tailored to protect your home for decades to come. Understanding the key cost drivers will help you set a realistic budget and make informed decisions when you start getting quotes. Let's break down what goes into the cost of a new roof so you can approach your project with confidence. Factors that affect roofing costs The cost of a new roof changes a lot based on things like its size, style, the type of shingles, other materials, and even the contractor you hire. The square footage of your roof is the most obvious factor, but the complexity, or pitch, also plays a big role. A steep, multi-level roof with dormers and valleys requires more time, safety equipment, and skill to install than a simple, low-slope roof. The materials you select for your residential roofing project, from the underlayment to the shingles, will also significantly influence the final price. Average price by material type While it's tough to give a single number, most homeowners find that replacing a roof costs about $9,500 on average. However, that price can climb over $45,000 for high-end or specialty materials. Standard architectural asphalt shingles are a popular and cost-effective choice for many homes in Georgia. If you're looking at options like metal, slate, or tile, you can expect the initial investment to be higher, though these materials often come with a longer lifespan. The best way to get an accurate picture is to get a detailed quote based on the specific materials you're considering for your home. Additional expenses to consider Beyond the shingles and labor, a few other costs can pop up. If the inspection reveals that your roof's underlying wood decking is rotted or damaged, it will need to be replaced, adding to the total cost. You’ll also need to account for things like permits, flashing, ventilation, and the removal and disposal of your old roof. This is also a great time to think about upgrading your gutters and gutter guards to create a complete system that protects your home from water damage. Always ask your contractor for an itemized quote that clearly lists all potential expenses. Find the Best Financing Option for Your Roof Once you have a clear idea of your project's cost, it's time to figure out the best way to pay for it. Financing a new roof might seem complicated, but it's really about finding the right fit for your financial situation. The main options fall into two categories: secured and unsecured loans. Understanding the difference is the first step toward making a confident choice for your home and your budget. From there, you can compare the details like interest rates and repayment terms to find a plan that won't keep you up at night. It’s also smart to think about your credit score and how it might affect your options. Different loans have different requirements, and knowing where you stand can help you focus on the most realistic paths. Exploring these elements will help you find a financing solution that makes your new residential roofing project feel manageable and stress-free. Secured vs. unsecured financing When you start looking at loans, you'll see the terms "secured" and "unsecured" a lot. A secured loan is tied to an asset you own, usually your home. Think of home equity loans or home equity lines of credit (HELOCs). Because you're using your house as collateral, the lender takes on less risk. This often means you can get a lower interest rate, which is a huge plus. The trade-off is that if you can't make your payments, the lender could claim your home. Unsecured loans, like personal loans, don't require any collateral. This can feel safer since your home isn't on the line. However, because the lender is taking a bigger risk, these loans usually come with higher interest rates. It's a balance between risk and cost that you'll need to weigh for your own peace of mind. Compare interest rates and terms The interest rate and loan term will determine your monthly payment and the total amount you pay over time. As we covered, secured loans typically have lower interest rates than unsecured ones. For example, a personal loan's interest rate can range anywhere from 6% to 36%, depending on your credit. You'll want to get quotes from a few different lenders to see who can offer you the best rate. Also, pay attention to the loan term, which is how long you have to pay it back. Personal loans often have terms between two and seven years. A longer term means a lower monthly payment, but you'll pay more in interest overall. A shorter term gets you out of debt faster with less interest, but your monthly payments will be higher. You can find great roof financing options by carefully comparing these details. Know the credit requirements for each option Your credit score is a key factor that lenders look at when you apply for financing. For a secured loan like a HELOC, lenders will also consider how much equity you have in your home. For an unsecured personal loan, your credit score is even more important. While some lenders have strict requirements, others are more flexible. For instance, government-backed options like FHA loans can be a great choice for homeowners with lower credit scores. The good news is that many lenders let you pre-qualify or check your potential rate with a soft credit check. This doesn't impact your credit score, so you can shop around without any risk. It’s a fantastic way to see what you’re eligible for and compare offers before you commit to a formal application. How Does Your Credit Score Affect Roof Financing? Your credit score is one of the main things lenders look at when you apply for financing, but it’s not the whole story. Think of it as a financial snapshot that helps them understand your history with borrowing money. A higher score often leads to more favorable loan terms, like lower interest rates, which can save you a lot of money over time. But please don't panic if your score isn't perfect. A less-than-stellar credit history doesn’t automatically close the door on financing your new roof. There are various loan programs and strategies available for homeowners across the credit spectrum. The key is to understand where you stand and what options are the best fit for your financial situation. Let’s walk through what lenders typically look for, what you can do if you have poor credit, and how you can strengthen your application before you even start. Minimum credit score requirements When it comes to financing a major project like a residential roof replacement, lenders want to see a track record of responsible borrowing. While there’s no single magic number, many lenders prefer credit scores in the mid-600s or higher for unsecured personal loans. For options tied to your home, like a home equity loan or HELOC, the requirements might be a bit different. Your best financing path really depends on the project's cost, your timeline, your credit score, and your available home equity. A stronger credit score generally gives you access to more lenders and lower interest rates, which means a lower monthly payment and less paid in interest over the life of the loan. Options for homeowners with poor credit If your credit score is a source of stress, take a deep breath. It’s a common misconception that you need perfect credit to finance a roof. While a lower score might limit some options, it certainly doesn’t eliminate all of them. Many homeowners find success with government-insured loans, like an FHA Title I loan, which are specifically designed for home improvements and can have more flexible credit requirements. Another great step is to talk directly with your roofing contractor. At Total Roof Solutions, we work with financing partners who understand that everyone's financial situation is unique. We can help you explore programs that look beyond just the credit score. How to improve your credit before applying If your roofing project isn’t an immediate emergency, taking some time to polish your credit can pay off. Start by getting a free copy of your credit report to check for any errors that might be dragging your score down. From there, focus on making all your payments on time and, if possible, paying down high-balance credit cards. Before you apply, it’s also smart to check your budget and figure out exactly how much you can comfortably afford for a monthly loan payment. When you’re ready, gather your important documents like recent pay stubs, W-2s, and bank statements. Having everything organized shows lenders you’re a prepared and reliable borrower. What to Ask Your Roofer About Financing Once you’ve found a contractor you trust, the next step is talking about money. This conversation is a normal and necessary part of any major home improvement project, so don’t hesitate to ask direct questions. A reputable roofer will be prepared to walk you through their payment and financing processes with clarity. Understanding your options is the key to making a confident decision that protects both your home and your budget. Before you sign a contract, make sure you have a firm grasp of how the payment process works. Your roofer should be able to explain their available financing partnerships, any special promotions they’re running, and the specific payment terms you’ll be agreeing to. Getting these details upfront ensures there are no surprises down the road and helps you find a financial solution that fits your needs. At Total Roof Solutions, we believe in transparency and are always ready to discuss how we can make your roofing project affordable. Available financing partnerships You don’t always have to search for a loan by yourself. Many established roofing contractors work directly with financing companies to offer plans specifically for homeowners. Ask your roofer if they have any of these partnerships. These collaborations can simplify the application process and often provide competitive rates and terms tailored to home improvement projects. Working with a roofer’s preferred lender can be a seamless way to secure the funds you need. As an experienced company , we have built relationships to help our clients find solutions that work for their budgets. Special promotions and zero-interest offers It never hurts to ask about current deals. Some roofing companies offer special promotions or zero-interest financing for a limited time. A zero-interest offer typically allows you to delay payments for a set period, like six or twelve months, without accruing any interest. This can be a fantastic option if you need time to pay off the loan early or want to align your payments with other financial goals. Be sure to ask if any such offers are available for your commercial roofing project, as they can provide significant savings and financial flexibility. Payment terms and contractor payment plans Getting into the details of the payment terms is essential. You’ll want to know if you can finance the entire project or just a portion of it, which is helpful if you’re combining financing with insurance money or personal savings. Ask about the minimum project cost required to qualify for financing and the range of loan terms available, as they can vary from a few years to two decades. Understanding the length of the loan, the interest rate, and the final monthly payment will help you choose a plan that you’re comfortable with for the long haul, whether you're installing a new roof or new gutters . How to Finance an Emergency Roof Repair A sudden roof leak or storm damage can feel overwhelming, especially when you’re worried about the cost. When you’re facing an urgent repair, you need clear, quick solutions. The good news is that you have several ways to handle the expense without draining your savings. From fast financing to insurance claims, here’s how you can manage the cost of an emergency roof repair and protect your home. Fast-track financing options When your roof needs immediate attention, you don’t have time for a lengthy loan process. Thankfully, many financing options are designed for speed. Personal loans and contractor financing programs often have simple online applications you can complete in minutes. Many lenders offer instant pre-approval, which lets you see your options without affecting your credit score. This allows you to secure the funds you need for a residential roofing project right away. This speed means you can hire a contractor and fix the problem before it gets worse, all while managing the cost with predictable monthly payments. Working with your insurance claim Before you do anything else, check your homeowner's insurance policy. Most policies cover roof damage caused by specific events like storms, hail, or fallen trees, though you’ll have to pay your deductible first. It’s important to know that insurance typically doesn’t cover damage from old age or lack of maintenance. Document everything with clear photos and contact your insurance agent as soon as possible to start the claims process. Since claims can take time to get approved, many homeowners use a fast financing option as a bridge to cover the immediate repair costs while waiting for the insurance payout. Deciding between temporary repair vs. full replacement In an emergency, you might be tempted to go with a quick, cheap patch. While a temporary repair can stop an active leak, it may not be the best long-term solution. Consider the age of your roof and the extent of the damage. If your roof is nearing the end of its lifespan or the damage is widespread, a full replacement is often a smarter investment. Understanding roof financing can help you see how an unexpected problem can become an opportunity to upgrade your roof. A new roof protects your home for decades and can even improve its value. Compare and Choose the Right Financing Option Once you have a few financing options on the table, it’s time to compare them side-by-side. Making the right choice comes down to looking at the details and aligning them with your personal financial situation. This process ensures you select a loan that not only covers your new roof but also fits comfortably within your budget for years to come. Here’s how to break it down and choose with confidence. Get multiple quotes and pre-qualify Before you can secure financing, you need to know exactly how much your project will cost. To make an informed decision, it’s essential to ask several reputable roofing companies for detailed price estimates. This helps you understand how much money you need and gives you a clear picture of the scope of work. Getting quotes for your residential roofing project is the critical first step. Once you have a target number, you can start the pre-qualification process with lenders. This gives you a realistic idea of the loan amount and interest rates you might receive without requiring a hard credit check, protecting your credit score while you shop around. Evaluate loan terms and total costs When a loan offer comes in, look beyond the monthly payment. You should carefully evaluate the loan terms and total costs to ensure the financing is manageable for your budget. Pay close attention to the annual percentage rate (APR), which is the true cost of borrowing, and the loan term, or how long you have to pay it back. A longer term might mean a lower monthly payment, but it often results in paying more interest over the life of the loan. Understanding the full picture of roof financing helps you avoid surprises and choose a loan that works for you financially, not just for the lender. Match the financing to your budget and timeline The best financing plan is one that fits comfortably within your life. Roof financing allows you to pay for a new roof over time in smaller, affordable amounts each month, rather than a large lump sum. Take a close look at your monthly budget to determine a payment amount that won’t stretch your finances too thin. Also, consider your project’s timeline. An urgent replacement might require a faster funding option, while a planned upgrade gives you more time to shop for the best rates. The goal is to find a solution that meets your immediate needs without creating long-term financial stress, backed by a company you can trust. Overcome Common Roof Financing Challenges Financing a new roof can feel like a major hurdle, but it doesn’t have to be. Many homeowners face similar challenges, from worrying about their credit score to dealing with the sheer cost of the project. The good news is that these obstacles are common, and there are straightforward solutions for each one. Understanding these challenges and knowing how to approach them can make the entire process feel much more manageable. With a little planning, you can secure the financing you need to protect your home with a durable, high-quality roof. Credit score obstacles and solutions It’s a common myth that you need a perfect credit score to get roof financing. In reality, financing options are designed for a wide range of credit situations. Lenders understand that everyone’s financial history is different. If you’re worried about how applying might affect your score, you can rest easy. Many financing partners, including those we work with, allow you to get pre-approved without a hard credit check. This process lets you explore your options and see what you qualify for without any negative impact on your credit. We are committed to helping every homeowner find a workable solution . High cost barriers and workarounds Let’s be honest: a new roof is a significant investment. The average replacement can cost around $9,500, and projects with premium materials run much higher. That number can be intimidating, but financing is the perfect workaround. Instead of draining your savings or putting off a necessary replacement, financing breaks the total cost into predictable monthly payments. This approach makes a top-tier residential roof accessible and affordable. It’s an investment in your home’s safety and value, made manageable for your budget. You get the roof you need now without the financial strain. Pressures of emergency timing Roofing emergencies rarely happen at a convenient time. When a storm hits or a leak appears, you need a solution fast, but you may not have the cash on hand for a full replacement. This is where financing is a lifesaver. It gives you the ability to address urgent damage right away, so you can move forward with a permanent fix instead of a temporary patch. Having a financing plan in place helps you make a clear, confident decision under pressure. It removes the financial stress from an already stressful situation, allowing you to get the protection your home or business needs without delay. Avoid These Costly Roof Financing Mistakes Financing a new roof is a major financial step, and it's easy to feel overwhelmed by the options. While finding the right loan can make a necessary project affordable, a few common missteps can turn a smart investment into a long-term headache. The key is to move forward with your eyes wide open, armed with the right information. Many homeowners rush into agreements without fully understanding the terms, only to face unexpected costs or unmanageable payments later. At Total Roof Solutions, we believe an informed customer is an empowered one. That’s why we encourage everyone to understand the financing process completely before signing on the dotted line. By learning about the potential pitfalls ahead of time, you can secure a financing plan that works for your budget without any unpleasant surprises. Let's walk through some of the most common mistakes homeowners make and how you can steer clear of them, ensuring your roofing project is a smooth success from start to finish. High-interest financing traps It’s a common myth that all roof financing comes with steep interest rates. While some lenders do charge high rates, many reputable contractors partner with financial institutions to offer competitive options. You can often find special promotions, including deferred payments or even 0% interest for a promotional period. Don't assume the first offer you see is the best one available. It pays to compare different loan options to find a rate and term that truly fits your financial goals. A little research can save you a significant amount of money over the life of the loan. Hidden fees and costs A low interest rate can be appealing, but it doesn't tell the whole story. Some financing agreements come with hidden costs that can inflate the total amount you pay. Be on the lookout for things like origination fees, appraisal fees, and closing costs, which can add up quickly. Before you sign anything, request a full breakdown of all charges associated with the loan. Carefully read the fine print in your agreement to make sure you understand every line item. Knowing the full cost of borrowing is essential for making an informed decision and avoiding any unwelcome financial surprises. Overextending your budget Focusing only on the monthly payment is one of the easiest traps to fall into. A low payment might seem manageable, but it could stretch your loan out for many years, costing you more in interest over time. Before you commit, take a hard look at your entire household budget. It's important to understand how this new payment fits into your overall financial situation. A good financing plan shouldn't put a strain on your ability to cover other essential expenses or save for the future. Using a personal budget worksheet can help you see the big picture and choose a loan you can comfortably afford. Finalize Your Roof Financing Plan You’ve compared your options, checked your credit, and found a plan that fits your budget. Now it’s time to take the final steps and get your roofing project underway. Finalizing your financing involves gathering your documents, confirming details with your contractor, and signing the agreement with confidence. This last phase ensures the logistics are handled smoothly so you can focus on what matters: getting a safe, beautiful new roof over your head. Essential documentation and agreements Getting your paperwork in order is the first step to a smooth approval. Many lenders now let you apply online or through an app, often giving you an answer in minutes. To be prepared, have your key financial documents ready. This typically includes recent W-2s, pay stubs, bank statements, and a form of ID. Having these items on hand will make the application process a breeze. Before you sign any agreement, read it carefully to understand the interest rate, repayment term, and any potential fees. Knowing all the details upfront ensures there are no surprises down the road. Insights from professionals and contractors Your roofing contractor is a great resource, so don’t hesitate to talk with them about payment options. Many established roofers, like our team at Total Roof Solutions , have partnerships with lenders or offer their own payment plans. Asking your contractor about financing can lead you to convenient offers designed for home improvement projects. From a contractor's perspective, offering financing helps homeowners move forward faster and choose higher-quality materials without the stress of a large upfront payment. It’s a solution that helps everyone get the best possible outcome for the home. Move forward with confidence Choosing to finance your roof is a smart investment in your home’s safety and value. It allows you to address urgent problems, like unexpected storm damage, without draining your savings. It also gives you the freedom to get the roof you really want, with durable materials that will protect your home for years to come, at a manageable monthly cost. By finalizing your financing, you’re not just fixing a problem; you’re investing in your home’s future. You can move ahead with your residential roofing project knowing you’ve made a sound financial decision. Related Articles Your Guide to Average Roof Replacement Costs in Atlanta: Save Money and Make Informed Choices Breaking Down the Average Cost of a New Roof in Atlanta: What Homeowners Need to Know Discover Tools for Calculating Atlanta Roof Replacement Costs Financing | Residential & Commercial Roofing in McDonough | Total Roof CONTACT US Frequently Asked Questions Do I need perfect credit to finance a new roof? Not at all. While a higher credit score can certainly help you get a lower interest rate, many financing options are available for homeowners with varied credit histories. Lenders understand that life happens. Government-backed programs, for example, often have more flexible requirements. We also partner with Is it better to get a loan through my roofer or find one on my own? There are benefits to both paths, and the best choice depends on what you value most. Finding a loan yourself through a bank or credit union gives you the chance to compare many different offers. However, using your roofer’s financing partner is incredibly convenient. The process is streamlined, the application is simple, and you can manage your project and payments all in one place without having to coordinate between multiple companies. What happens if I need an emergency roof repair and can't afford it? This is one of the most common reasons homeowners choose to finance. When you're dealing with a sudden leak or storm damage, you need a fast solution. Financing allows you to address the problem immediately with a permanent fix, preventing more extensive and costly damage to your home. Many personal loans and contractor financing programs have quick application processes that can get you the funds you need in just a few days. Besides the interest rate, what other loan costs should I look out for? It's smart to look beyond the interest rate to understand the total cost of the loan. Ask your lender about the Annual Percentage Rate (APR), which includes the interest rate plus any associated fees. You should also ask for a clear breakdown of any potential charges, such as origination fees or closing costs. A trustworthy lender will be transparent about all costs so you can make a decision without worrying about hidden expenses. Can I finance a roof replacement if I'm also using insurance money? Yes, this is a very common situation. Financing can be a perfect tool to bridge the gap while you wait for your insurance claim to be processed and paid out. You can use a loan to cover your deductible or even the full replacement cost upfront. This allows the repair work to begin immediately, and then you can pay off the loan once your insurance funds arrive.
By Stephen Griswell March 23, 2026
Getting quotes for a new roof can feel a bit like a rollercoaster. The prices can vary widely, leaving you to wonder why one estimate is so different from the next. The truth is, the average cost to replace asphalt roof is just a starting point and doesn't tell the whole story. The real cost is tailored to your home’s unique needs, from its architectural complexity to the condition of the wood decking hidden underneath your old shingles. We’re going to pull back the curtain and explain what truly drives the price, from materials and labor to those potential "hidden" costs, so you can compare quotes fairly and make an informed decision. CONTACT US Key Takeaways Understand what you're paying for : Your final roof cost is a custom figure based on your roof's unique shape, the specific shingles you select, and the expert labor required, which typically accounts for about 60% of the total bill. Budget for more than just the shingles : A complete roof replacement often includes necessary steps like tearing off the old roof, repairing the underlying wood deck, and handling permits, so it's smart to plan for these potential costs from the start. Focus on long term value, not just the lowest price : To make a smart investment, get multiple detailed quotes to compare, choose durable materials that last longer, and always hire a licensed professional to guarantee quality work. How Much Does a New Asphalt Roof Really Cost? Let’s get straight to the point: you want to know how much to budget for your new asphalt roof. It’s one of the most common questions we hear, and for good reason. A roof replacement is a significant investment in your home’s safety and value, and the final cost can feel like a moving target. While there’s no single price that fits every home, understanding the key components of a roofing estimate can help you feel confident about where your money is going. The final price tag depends on a handful of important variables, including the size and shape of your roof, the specific materials you select, and the labor rates in our area. Think of it less like buying a product off the shelf and more like commissioning a custom project tailored to your home’s specific needs. Below, we’ll break down the national averages to give you a general idea, look at how costs are calculated per square foot, and show you exactly what you’re paying for when you hire a professional team. This will give you a solid foundation for understanding any quote you receive for your residential roofing project. A Look at National Averages To get a ballpark idea, it helps to look at what homeowners are paying across the country. Nationally, an asphalt roof replacement typically costs between $7,500 and $16,000. For a standard home with a roof size of about 1,500 to 2,000 square feet, most people find themselves paying somewhere in the $12,000 to $15,000 range. Remember, these are just averages. They provide a helpful starting point, but costs in the Atlanta metro area can differ based on local material prices and labor demand. Think of these numbers as a general guide to frame your budget, not a final quote. The specific details of your home will ultimately determine the exact cost. Breaking Down the Cost Per Square Foot When you receive a roofing estimate, you’ll likely see the price broken down by the square foot. In the roofing world, costs are often calculated "per square," which is a 10-by-10-foot area, or 100 square feet. Depending on the type of shingle you choose and the complexity of your roof, you can expect the cost to range from about $4.25 to $10 per square foot. This range accounts for everything from basic 3-tab shingles to higher-end architectural styles. A simple, single-story gable roof will fall on the lower end of that scale, while a multi-level roof with steep pitches, dormers, and valleys will require more labor and materials, pushing the price toward the higher end. Where Your Money Goes: Labor vs. Materials Ever wonder what you’re actually paying for in a roof replacement? The cost is primarily split between two categories: labor and materials. Surprisingly to some, labor makes up the biggest piece of the pie, typically accounting for about 60% of the total project cost. This covers the skilled, experienced crew that safely removes your old roof and installs the new one according to strict industry standards. The remaining 40% goes toward the physical materials, including the shingles, underlayment, flashing, and ventilation components. Investing in quality labor from a certified and insured team ensures those materials perform as they should for decades. When you work with an experienced company, you’re paying for the peace of mind that comes with expert craftsmanship and strong warranties . What Factors Change the Price of a New Roof? When you start gathering quotes for a new roof, you'll quickly notice that the prices can vary quite a bit. That’s because a roof replacement isn't a standard, off-the-shelf purchase. The final cost is a tailored figure based on your specific home. Several key factors come into play, from the sheer size of your roof to the style of shingles you fall in love with. Understanding these variables will help you make sense of your estimate and see exactly where your money is going. It’s not just about buying materials; it’s about investing in a complex system designed to protect your home for decades. Let's walk through the main elements that shape the price of a new residential roof so you can feel confident in your decision. Your Roof's Size and Pitch The most straightforward factor in your roof’s cost is its size. We measure roofs in "squares," where one square equals 100 square feet. The more squares your roof has, the more materials and labor are needed. For example, a standard 2,000-square-foot home might need 22 to 25 squares of shingles to cover the entire surface and account for cuts and waste. Beyond size, the pitch, or steepness, of your roof plays a big role. A steeper roof requires more safety precautions and specialized equipment for our crew to work on, which increases the labor time and, consequently, the cost. Local Labor Rates Labor is a huge piece of the puzzle, often making up around 60% of the total project cost. These rates can differ based on your location and the experience level of the roofing team. While it might be tempting to go with the lowest bidder, remember that a quality installation is crucial for the longevity of your roof. When you hire a certified and insured team, you're paying for expertise, safety, and peace of mind. Our experienced professionals at Total Roof Solutions are trained to handle every detail correctly, ensuring your new roof is built to last and backed by strong warranties. Your Roof's Complexity Is your roof a simple, flat plane, or does it have multiple angles, dormers, and valleys? The complexity of your roof's design directly impacts the price. Features like chimneys, vents, and skylights require extra time and skill to work around. Each one needs precise cutting and fitting of materials, along with special flashing to create a watertight seal. A roof with many facets and interruptions is more labor-intensive than a straightforward gable roof, which is reflected in the final quote. Our team takes the time to ensure every one of these details is handled with care to prevent future leaks. The Shingles You Choose The materials you select are another major cost factor, and you have plenty of options. Asphalt shingles come in a few main categories. Basic 3-tab shingles are the most budget-friendly choice. A popular upgrade is architectural shingles, which are thicker, more durable, and create a beautiful dimensional look. For a high-end appearance, luxury shingles mimic the look of natural slate or wood shakes without the high maintenance. As an Owens Corning Platinum Preferred contractor, we can help you explore a wide range of high-quality options that fit your budget and aesthetic goals. Comparing Asphalt Shingle Types and Costs When you hear "asphalt shingles," you might picture one specific style, but there's a whole range of options to fit your home's look and your budget. The shingles you pick are one of the biggest factors in your roof replacement cost, so it helps to know what you’re choosing from. Each type offers a different balance of price, appearance, and longevity. Let's break down the three main categories so you can find the perfect fit for your home. 3-Tab: The Basic Choice If you're looking for a straightforward, budget-friendly option, 3-tab shingles are a classic choice. They have a flat, uniform appearance that provides a clean, consistent look for any home. Because they are the most economical option, they are perfect for homeowners focused on keeping initial costs down or for rental properties. You can expect to pay between $3.50 and $5.00 per square foot. For a typical 2,000-square-foot roof, this usually adds up to a total project cost between $7,000 and $11,000. While they are a solid, affordable choice, they don't offer the same lifespan as more advanced options, which is an important trade-off to consider. Architectural: The Popular Upgrade Architectural shingles are the go-to for most homeowners today, and for good reason. They offer a fantastic balance of curb appeal, durability, and value. Unlike the flat look of 3-tab shingles, architectural shingles have a dimensional, layered appearance that can mimic the look of more expensive materials like wood shake. This added texture makes your roof stand out. They are thicker and more durable, making them a smart investment for your residential roofing project. The cost generally runs from $4.00 to $9.00 per square foot, putting a 2,000-square-foot roof in the $7,500 to $16,000 range. They are a great middle-ground that doesn't compromise on quality. Luxury: The Premium Look For homeowners who want to make a statement, luxury shingles deliver maximum performance and a high-end aesthetic. These are the top-of-the-line asphalt shingles, designed to replicate the appearance of natural slate or cedar shake without the high cost and maintenance. They are the thickest and heaviest option, offering superior protection against the elements and a truly distinctive look that can significantly enhance your home's curb appeal. This premium quality comes with a higher price tag, typically between $8.00 and $17.00 per square foot. A full replacement on a 2,000-square-foot home could range from $13,600 to over $28,900, reflecting their superior design and materials. How They Compare in Durability When you're investing in a new roof, you want it to last. Durability is where the differences between shingle types really become clear. Budget-friendly 3-tab shingles generally have a lifespan of about 20 to 25 years. That’s a solid run, but architectural shingles take it a step further. Thanks to their thicker construction, they typically last around 30 years, giving you more peace of mind and a longer period before you need to think about another replacement. Luxury shingles, being the most robust, often last even longer. The upfront cost is higher for architectural and luxury options, but their extended lifespan often makes them a better long-term value. How Your Roof's Shape and Size Affect the Final Bill When you get a quote for a new roof, you’ll notice it’s not just a simple price-per-square-foot calculation. Two homes with the exact same square footage can have wildly different replacement costs. That’s because the final price tag is heavily influenced by your roof’s specific size, pitch, and complexity. These factors determine how much material is needed and, just as importantly, how much labor is involved. A simple, single-gabled roof on a ranch-style home will almost always be less expensive to replace than a complex roof on a Victorian home with multiple dormers and turrets, even if the houses are the same size. Understanding how these elements work together will help you make sense of your estimate and see where your money is going. It's about more than just the shingles; it's about the unique character of your roof and the skill required to do the job right. From the steepness of the slopes to the number of chimneys and skylights, every detail contributes to the final bill . This knowledge empowers you to have a more informed conversation with your contractor and appreciate the craftsmanship that goes into a durable, long-lasting roof. Sizing Up Your Home's Footprint The most straightforward factor in your roof’s cost is its total surface area. A larger roof requires more shingles, underlayment, and other materials, which naturally increases the price. For example, a typical 2,000-square-foot home often needs around 22 to 25 "squares" of roofing material (one square equals 100 square feet). This extra material accounts for cuts and waste. While national averages for a full replacement can range from $10,000 to $20,000, the size of your residential roofing project is the primary starting point for any estimate. The bigger the footprint, the more you can expect to invest in both materials and the time it takes for a professional crew to complete the job. The Challenge of Steep Slopes and Access The pitch, or steepness, of your roof plays a huge role in labor costs. A gently sloped roof is relatively easy and safe for a crew to walk on and work from. However, a steep roof is a different story. It requires more safety equipment, specialized techniques, and careful maneuvering, which slows down the installation process. This increased difficulty and risk translate directly into higher labor expenses. Similarly, if your home is difficult to access with equipment or has extensive landscaping that needs protection, the crew will need to spend extra time setting up and taking precautions. These logistical challenges are always factored into the final quote. Working Around Dormers, Valleys, and Skylights A simple, flat roof plane is much quicker to shingle than one with multiple angles and features. If your roof has dormers, valleys, chimneys, or vents, each one adds a layer of complexity to the job. These elements require precise cutting, fitting, and sealing to ensure a watertight finish. Technicians must install flashing, a thin metal material, around each protrusion to direct water away and prevent leaks. This detailed work takes significantly more time and skill than laying shingles in a straight line. The more complex your roof’s architecture, the more labor hours will be needed to handle the intricate details and ensure every corner is protected. What "Hidden" Costs Should You Plan For? When you get a quote for a new roof, the main figures usually cover materials and labor. But a full roof replacement is a major construction project, and other costs can pop up once the work begins. A trustworthy contractor will always prepare you for these possibilities, but knowing what to expect can help you budget more accurately and avoid surprises. Think of these potential expenses not as "hidden fees" but as necessary investments in the structural integrity and longevity of your home. Many of these costs are impossible to predict with 100% certainty until the old roofing material is removed. For example, a roofer can't see the condition of the underlying wood deck until they tear off the old shingles. Planning for these variables from the start ensures you have a contingency fund ready. This way, you can address any issues properly without cutting corners, leading to a safer, more durable residential roof that truly protects your home. From disposal fees to unexpected repairs, let's walk through the most common costs that can affect your final bill. Tearing Off and Disposing of the Old Roof Before your beautiful new shingles can be installed, the old ones have to go. This tear-off process is a crucial first step that involves labor, equipment, and responsible disposal of the old materials. The cost for this service can range from $1,000 to $2,000 or more , depending on the size and complexity of your roof. While it might seem like an extra expense, removing the old shingles is non-negotiable for a quality job. It allows your roofing team to thoroughly inspect the underlying roof deck for any damage that needs to be addressed before the new materials are laid down. This step ensures your new roof has a solid foundation. Repairing the Roof Deck The roof deck is the layer of wood that serves as the foundation for your entire roofing system. Over the years, small leaks or poor ventilation can cause this wood to rot, soften, or become damaged. You can't know the true condition of your roof deck until the old shingles are removed. If your contractor finds issues, these repairs are essential for the stability and performance of your new roof. Depending on the extent of the damage, fixing the roof deck can add $1,000 to $4,000 to your project cost. It’s a necessary investment to prevent future problems and ensure your new roof lasts as long as it should. Local Permits and Inspection Fees A roof replacement is a significant structural project, and most local municipalities require a permit to ensure the work meets safety and building codes. The cost of these permits can vary, but they typically fall between $150 and $500 . An experienced and professional contractor, like our team at Total Roof Solutions , will handle the entire permitting process for you, from application to final inspection. While the fee itself is a line item on your final invoice, it gives you peace of mind knowing your new roof is fully compliant with local regulations, which is crucial for insurance and future home resale. Updating Gutters, Flashing, and Vents Your roof is more than just shingles; it's a complete system designed to protect your home from the elements. Components like flashing (the metal strips around chimneys and vents), vents, and gutters play a critical role in directing water away and allowing your attic to breathe. If these elements are old or damaged, it’s wise to replace them during your roofing project. For example, new roof flashing is vital for preventing leaks in vulnerable areas. It's far more cost-effective to update these components while the roof is already being worked on. We can also install new gutters and gutter guards to create a comprehensive system that protects your entire home. Understanding Labor Costs When you get a quote for a new roof, a large portion of the cost goes toward labor. This isn't just for the crew's time on site; it covers their experience, specialized training, insurance, and the safety equipment needed to do the job right. Labor costs aren't a flat rate, either. They can change quite a bit based on where you live, the time of year, and the specific challenges your roof presents. Think of it as paying for craftsmanship. An experienced team knows how to handle unexpected issues and ensure every shingle is perfectly placed for maximum protection. Understanding what drives these costs helps you see the true value in a professional installation from a team of local experts . How Location Affects Labor Rates Just like the price of housing or gas varies from one city to another, so do roofing labor rates. The cost of living in the Atlanta metro area, for example, directly influences wages for skilled roofers. Higher demand for qualified crews in a busy market can also play a part. Beyond wages, local factors like building codes and permit requirements can add to the time and administrative work involved in a project, which gets factored into the labor cost. A contractor who is familiar with the specific regulations in counties from Henry to Fulton will handle this smoothly, but it’s still a necessary part of the overall price. Does the Time of Year Matter? Timing your roof replacement can definitely impact the price. Roofing has a peak season, which usually runs from late spring through fall when the weather is most predictable. During these busy months, contractors have full schedules, and prices tend to be firm. In the off-season, typically winter, things slow down. With less demand, some roofing companies may offer more competitive pricing to keep their crews working. If your roof isn't in critical condition and you can be flexible with scheduling, asking about an off-season installation could lead to some savings. The trade-off, of course, is the less predictable Georgia winter weather, which can sometimes cause delays. Why a Complex Job Costs More Not all roofs are created equal, and a more complex design requires more time, skill, and safety precautions. A simple, low-slope gable roof is far more straightforward to work on than a steep, multi-faceted roof with dormers, valleys, and skylights. Steep pitches require extra safety harnesses and careful maneuvering, which slows down the installation process. Features like chimneys and vents need precise cutting and flashing to prevent leaks, demanding a higher level of craftsmanship. This extra attention to detail on a complex residential roofing project ensures a durable, watertight result, but it naturally increases the labor hours and the final cost. Common Roof Cost Myths to Ignore When you’re facing a major home project like a roof replacement, it’s easy to get overwhelmed by all the information out there. Friends, family, and neighbors all have opinions, and a quick internet search can leave you with more questions than answers. Unfortunately, a lot of this "common knowledge" about roofing costs is based on myths that can lead to confusion and poor financial decisions. Believing these misconceptions can cause you to overpay, underestimate your budget, or even take on dangerous risks. That’s why it’s so important to separate fact from fiction. Understanding what really goes into the price of a new roof helps you become a smarter, more confident homeowner. It allows you to evaluate quotes fairly, ask contractors the right questions, and make choices that protect your investment for years to come. Let’s clear up some of the most common myths about roofing costs so you can approach your project with clarity and peace of mind. Myth: It's All About Square Footage It seems simple enough: a bigger roof should cost more, and a smaller roof should cost less. While the size of your roof is definitely a factor, it’s far from the only thing that determines the final price. The idea that cost is based solely on square footage is a huge oversimplification. In reality, the overall cost can vary widely depending on the type of shingles you choose, the complexity of your roof’s design (think steep slopes, dormers, and valleys), and local labor rates. Square footage gives you a starting point, but it doesn't tell the whole story of your project's scope. Myth: The First Quote Is the Final Price When you get that first estimate, it can be tempting to just sign on the dotted line and get the project started. However, accepting the first quote you receive is rarely a good idea. Prices can vary significantly between different roofing companies, even for the exact same job. It is always wise to obtain several estimates to compare your options. This isn't just about finding the lowest price; it's about understanding the value you're getting. Comparing detailed quotes helps you see what each contractor includes, vet their professionalism, and ensure you’re getting quality work at a fair market rate. Myth: DIY Will Save You Money Tackling a home improvement project yourself can be incredibly rewarding, but replacing a roof is not the place to test your DIY skills. While the goal is often to save money, a DIY roof installation can end up costing you far more in the long run. Roofing is dangerous work that requires specialized safety equipment and training. A small mistake can lead to major leaks, structural damage, or serious injury. Furthermore, improper installation can void your shingle manufacturer’s warranty and even lower your home’s value. Hiring a professional for roofing work ensures the job is done safely, correctly, and is backed by a workmanship guarantee. Myth: Materials Are the Biggest Expense When you picture a new roof, you probably think of stacks of shingles. It’s a common assumption that the materials are the most expensive part of the job, but that’s usually not the case. In most professional roof replacements, labor is the biggest line item. In fact, skilled labor accounts for about 60% of the total project cost. You aren't just paying for shingles and nails; you're paying for the expertise, experience, and safety of a professional crew. Their craftsmanship is what turns a pile of materials into a durable, watertight system that protects your home, and that skill is a critical part of your investment. How to Get the Best Value on Your New Roof Getting the best value on a new roof isn't just about finding the lowest price. It’s about making a smart, long-term investment in your home’s safety and curb appeal. A high-value roof combines durable materials, expert installation, and a fair price, giving you confidence and peace of mind for decades. When you approach your roof replacement with a clear strategy, you can ensure you get a fantastic return on your investment without overspending. It all comes down to knowing what to look for and what questions to ask. Here are four key steps to make sure you get the most for your money. Get Several Detailed Quotes Always get several estimates from different roofing companies to ensure you get good quality work at a fair price. This isn't just about comparing the bottom-line number; a detailed, itemized quote is a sign of a professional contractor. It should clearly break down the costs for materials, labor, tear-off of the old roof, disposal fees, and any necessary permits. Comparing these detailed proposals helps you understand exactly what each company is offering. Be wary of any quote that seems unusually low, as it might signal cut corners or subpar materials. A thorough roof inspection and quote process is the first step toward a successful project. Time Your Project for Better Pricing Did you know the time of year you replace your roof can affect the cost? The busiest seasons for roofers are typically late summer and fall, as homeowners rush to prepare for winter weather. If your roof isn't in critical condition, try to schedule your replacement in late winter or early spring. Contractors might offer better prices during these slower times because their schedules are more open. Planning ahead gives you more flexibility and leverage. By avoiding the peak season rush, you not only have a better chance at a more competitive price but also more focused attention from your installation crew. Choose Materials That Last It can be tempting to choose the cheapest shingles to lower your upfront cost, but this rarely pays off in the long run. The best value comes from choosing a strong roofing system to protect your home, even if it costs more initially. High-quality materials, like the architectural shingles we install, are designed to withstand harsh weather and last for decades. This durability means fewer repairs and a longer lifespan before you need another replacement. Investing in quality materials from the start is one of the smartest financial decisions you can make for your residential roofing project, saving you money and stress down the road. Hire a Licensed and Insured Pro This might be the most important tip of all: always hire a licensed, bonded, and insured professional. This protects you from liability if a worker is injured on your property and ensures the work meets local building codes. A reputable contractor will have certifications, like our status as an Owens Corning Platinum Preferred contractor , which means we're recognized for our high standards of craftsmanship and professionalism. Hiring an unvetted handyman might seem cheaper, but it can lead to costly mistakes, voided material warranties, and major headaches. Working with a proven pro guarantees the job is done right the first time. How Can You Pay for Your New Roof? A new roof is one of the most important investments you can make in your home, but that doesn't mean you have to pay for it all at once. Figuring out the finances for a large project can feel like a big hurdle, but you have several great options. From traditional loans to working directly with your contractor or your insurance company, there are paths available to make your roof replacement manageable and stress-free. Let's walk through the most common ways to fund your project so you can choose the one that works best for your budget and your peace of mind. Exploring Traditional Financing When you’re looking at a significant home improvement, traditional financing is a common route. The average asphalt roof replacement can cost between $9,500 and $11,000, so spreading that expense over time is often a smart move. You can talk to your bank or credit union about a personal loan, which gives you a lump sum of cash to pay your contractor directly. Another popular choice is a home equity line of credit (HELOC), which lets you borrow against the equity you’ve built in your home. Both options allow you to get the quality roof you need now while making predictable monthly payments. Ask About Contractor Financing Did you know your roofing contractor might be able to help with the financing? Many established companies, including us at Total Roof Solutions, offer in-house financing plans to make the process as simple as possible. This is often the most convenient option because you can handle the project details and the payment plan with one team. Some contractors even provide promotional offers, like 0% interest for the first year, which can save you a lot of money. When you get your estimate, always ask about the flexible financing options available. It’s a straightforward way to get your project started without delay. Check Your Insurance Coverage Before you assume the full cost is on you, take a look at your homeowner's insurance policy. If your roof needs to be replaced because of specific damage from an event like a hailstorm, high winds, or a fallen tree, your insurance may cover a significant portion of the cost. It’s important to know that policies generally don’t cover replacements needed simply because the roof is old or hasn't been maintained. The best first step is to call your insurance agent to understand your coverage and find out what you need to do to file a claim. This one phone call could save you thousands. Related Articles Choosing the Right Roofing Materials for Lasting Quality How to Get Insurance to Pay for Roof Replacement in Georgia Average Cost of New Gutters: A Comprehensive Pricing Guide for 2025 What to Know Before Replacing Your Roof: A Comprehensive Guide Seamless Gutter Installation Cost Guide: Pricing Insights for Homeowners CONTACT US Frequently Asked Questions How much should I realistically budget for a new roof in the Atlanta area? While national averages suggest a range of $7,500 to $16,000, the final cost for your home depends on a few key things. The specific type of shingle you choose, the size and steepness of your roof, and its overall complexity all play a major role. The best way to get a precise number is to have a professional conduct a thorough inspection and provide a detailed quote tailored to your home's specific needs. Can I just install new shingles over my old ones to save money? While it might seem like a cost-effective shortcut, we strongly advise against it. Placing a new layer of shingles over an old one adds significant weight to your roof's structure and can trap heat and moisture, shortening the life of your new shingles. More importantly, it prevents us from inspecting the underlying wood deck for rot or damage, which is a critical step for ensuring your new roof has a solid foundation. Why does labor make up such a large part of the cost? Labor typically accounts for about 60% of the total cost because you are investing in professional craftsmanship. This covers the skill, safety training, and insurance of an experienced crew. Proper installation is what ensures your high-quality materials perform correctly for decades, protecting your home from leaks and weather damage. You're paying for the peace of mind that comes with knowing the job was done right. Will my homeowner's insurance pay for my new roof? It depends on the reason for the replacement. Insurance policies typically cover damage from specific events like storms, hail, or high winds. They generally do not cover a replacement that is needed simply due to the roof's old age or lack of maintenance. Your best first step is to review your policy or call your insurance agent to understand your specific coverage before starting the process.  Besides the shingles, what other costs should I prepare for? A complete roof replacement is more than just the shingles. Your estimate should also account for the removal and disposal of the old roofing materials. You should also budget for potential repairs to the underlying wood deck, which can only be assessed after the old roof is torn off. Finally, costs for local permits and updating components like flashing or vents are standard parts of a quality roofing project.
By Stephen Griswell March 22, 2026
When most people decide to paint their home, they head straight for the paint chips. But here’s a pro tip: the secret to a beautiful exterior starts with the elements you can’t change. Your roof, brick, or stone accents have their own distinct undertones that provide the perfect roadmap for your color palette. By working with these fixed features instead of against them, you can create a cohesive and harmonious look that feels intentional and professionally designed. This guide will show you how to build your palette from the ground up, ensuring you find the best colour combination for house exterior that feels like a natural fit for your home. CONTACT US Key Takeaways Start with Your Fixed Features : Your home's roof, stonework, and architectural style provide a built-in color guide. Select paint colors with undertones that match these permanent elements to create a naturally harmonious look. Always Test Colors on a Large Scale : A small paint chip looks different on a large wall, so test your top choices on big sample boards. Move them around your home at different times of day to see how sunlight and shadows change the color before you commit. Balance Your Palette for a Polished Look : Use the 60-30-10 rule to create a visually balanced exterior, with a main color, a secondary trim color, and a smaller accent color. This simple ratio helps you combine colors confidently and gives your home a professional, well-designed finish. First Things First: What Makes a Great Exterior Color Scheme? Picking the perfect exterior color for your home feels like a huge commitment, but it doesn't have to be stressful. A great color scheme does more than just look good; it highlights your home’s best features, reflects your personal style, and boosts its curb appeal. Before you get lost in a sea of paint swatches, let’s walk through the three key things that will guide you to the perfect palette. By starting with these fundamentals, you can choose your colors with confidence. Consider Your Home's Architecture The best place to start is with your home's bones. Its architectural style offers a built-in roadmap for color. A historic Victorian can handle deep, complex combinations, while a modern farmhouse shines with clean whites and dark accents. As paint experts at Sherwin-Williams note, "Bold and optimistic colors create a contemporary style that complements the clean, simple lines of mid-century modern homes." Thinking about your home's design first helps you narrow down the options and ensures the final look feels cohesive and intentional. You can find great inspiration in these exterior home style color palettes to see what works for styles similar to yours. Check Your Neighborhood Vibe (and HOA Rules) Your home doesn't exist in a vacuum, so take a walk around your block. What colors do you see on neighboring houses? The goal isn't to copy them, but to choose a palette that feels harmonious with the streetscape while still letting your home’s personality shine. This is especially important if you live in a community with a Homeowners' Association (HOA). Before you fall in love with a specific color, be sure to check your HOA guidelines, as they often have a pre-approved list of colors. This simple step can save you a major headache and a potential fine down the road, ensuring your beautiful new paint job is fully compliant. Work With What You've Got: Roof, Stone, and Landscaping Some of your home's biggest features aren't going anywhere, so it's best to work with them. Start your color search by looking at the elements that won't change, like your roof, stone, or brick. These fixed features have their own undertones that your paint colors should complement. For example, a charcoal gray roof pairs beautifully with cool blues, while a brown roof works well with warm, earthy tones. If you're planning a new residential roofing project, you have a great opportunity to coordinate your roof and siding for a completely refreshed look. Don't forget your landscaping, either; the greens of your lawn and garden can make certain siding colors pop. 5 Can't-Miss Exterior Color Palettes Ready for some inspiration? These five color palettes are popular for a reason. They offer a balanced and beautiful look that can suit a wide range of home styles, from classic colonials to modern farmhouses. Think of these as starting points to help you find the perfect combination for your home's exterior. Warm Greige, Deep Charcoal, and Crisp White If you're aiming for a look that’s modern but still feels warm and inviting, this combination is a winner. Greige (a mix of gray and beige) serves as a perfect neutral main color, creating a soft, welcoming backdrop. Deep charcoal adds sophisticated contrast and visual weight when used on shutters, trim, or even a garage door. A touch of crisp white on window frames, fascia, and soffits keeps the whole look clean and defined, making the architecture pop. This palette is incredibly versatile and gives your home a polished, contemporary feel without feeling cold. It’s a safe but stunning choice that works well with various stone or brick accents you may already have. Navy Blue, Soft Gray, and Bright White For a bold yet timeless statement, you can’t go wrong with navy blue. It has a classic, almost nautical charm that feels both elegant and strong, making it a standout choice in any setting. Pairing deep navy siding with soft gray accents on a porch floor or gables creates a striking, layered contrast. Bright white trim is essential here, as it sharply outlines windows and rooflines, highlighting your home’s architectural details. This combination feels fresh and clean, offering major curb appeal that stands out in any neighborhood. It’s a confident choice that works beautifully on everything from a cozy cottage to a grand colonial. Sage Green, Cream, and Natural Wood To create a calm and earthy vibe, consider pairing soft sage green with a warm cream. This palette feels deeply connected to nature and provides a serene, welcoming look for your home. The cream trim softens the green, preventing it from feeling overwhelming and adding a touch of classic elegance. Incorporating natural wood elements is what truly makes this combination shine. A beautiful wood front door, garage door, or porch columns can really tie this entire look together. This combination is perfect if your home is surrounded by greenery or if you simply want to create a peaceful retreat. It’s a gentle palette that feels both fresh and grounded. Classic Black and White with a Pop of Color There's nothing more timeless than a black and white color scheme. It’s a high-contrast look that feels both modern and classic at the same time, offering a clean and sophisticated canvas. You can use white for the main siding and black for shutters, trim, and doors for a dramatic, graphic effect. The best part of this palette is adding a fun pop of color. A vibrant red, sunny yellow, or even a bright teal front door can add a touch of personality and make your entrance a true focal point. This entire look is a fantastic example of how strategic exterior painting can completely change your home's character, making it look sharp and intentional. Terracotta, Cream, and Dark Gray Inspired by Mediterranean and Southwestern styles, a terracotta color palette brings incredible warmth and character to a home’s exterior. This earthy, sun-baked orange-red hue is inviting and full of personality. When you pair it with a soft cream for the trim, it creates a beautiful, gentle contrast that keeps the look from feeling too heavy. Adding a dark gray for accents, like the front door or window frames, helps ground the warm tones and adds a touch of modern sophistication. This is a great choice for making your home feel unique and welcoming, and it pairs beautifully with many residential roofing materials like dark architectural shingles or clay tiles. 4 Things to Consider Before You Pick a Color Choosing a paint color feels like the most exciting part of an exterior refresh, but there’s a little more to it than just picking a shade you love from a tiny swatch. Before you commit, it’s important to think through a few practical factors that will influence how the final color looks and performs on your home. These considerations go beyond simple aesthetics; they touch on durability, perception, and even your home's long-term value. Thinking about these elements ahead of time is the key to ensuring you’ll be happy with the result for years to come, avoiding that sinking feeling of "it looked different on the sample card." Think of this step as a final check to make sure your vision matches reality. We’ll walk through how our Georgia climate, your home’s size, the changing sunlight, and your long-term plans can all play a role in finding the perfect palette. Taking a moment to think about these four points will help you choose a color that not only looks beautiful but also protects your investment and adds lasting value to your property. It’s the secret to getting that picture-perfect finish you’re dreaming of and making sure your exterior project is a complete success. How Will Your Climate Affect the Paint? Here in Georgia, our weather brings a unique mix of intense sun and high humidity, which should definitely factor into your paint choice. Darker colors absorb more heat, which can put extra stress on your siding and even slightly increase cooling costs. Lighter shades, on the other hand, reflect sunlight and can help keep your home cooler. Beyond the color itself, the paint's sheen, or its level of shine, is also important. Different paint sheens are best for different parts of your home's exterior. For example, a satin or eggshell finish is great for siding, while a shinier, more durable semi-gloss is perfect for trim, doors, and shutters that need to withstand more wear and cleaning. A quality paint job is one of the best exterior renovations you can make. Does Your Home's Size Matter? Yes, it absolutely does! Color can be a powerful tool for playing with perception. If you have a smaller home, a lighter color scheme can work wonders. As a general rule, light colors can make a smaller house look bigger and more prominent from the street. Shades like off-white, pale gray, or soft beige reflect more light, creating an open and airy feel. Conversely, if you have a large, sprawling home, dark colors can help it feel more grounded and distinguished without seeming overwhelming. Deep charcoals, navy blues, or rich greens can add a sense of substance and elegance to a larger structure. It’s all about using color to create the scale and presence you want. How Does Natural Light Change the Color? The same paint color can look completely different depending on the time of day and the quality of light. That’s why you should always check how paint colors look at different times of day, as sunlight and shadows can change them. The warm, golden light of morning and evening will bring out the warmer undertones in a color, while the bright, direct sun of midday can wash it out or reveal cooler tones. A color you love on a sunny afternoon might look dull on a cloudy day. Before making a final decision, paint large sample boards and place them on different sides of your house. Observe them throughout the day to see how the color shifts and ensure you love it in every light. How Do You Balance Personal Taste with Resale Value? It’s your home, and you should choose a color that makes you happy every time you pull into the driveway. However, if you think you might sell your home in the next five to ten years, it’s wise to consider resale value. Choosing exterior colors means thinking about your home's surroundings, what your neighbors' homes look like, and current trends. Wildly unique or overly bright colors might not appeal to a broad range of buyers. A great strategy is to stick with a timeless, neutral color for the main body of the house and express your personality with the accent colors. A bold front door or colorful shutters are easy and inexpensive for a new owner to change, giving you the best of both worlds. Which Paint Brands Are Best for Exteriors? Choosing the right color is exciting, but the brand of paint you use is just as crucial for a beautiful, long-lasting finish. Think of it this way: exterior paint is your home's first line of defense against the elements. It’s a protective shield that stands up to Georgia’s humid summers, intense sun, and unexpected storms. A high-quality paint does more than just look good; it’s formulated with better binders, pigments, and additives that prevent moisture from seeping in, resist fading from UV rays, and stop mildew in its tracks. Investing in a reputable brand means you’ll get better coverage, richer color, and a finish that won't crack, peel, or chip after just a few seasons. While it might be tempting to save a few dollars on a budget brand, you often end up paying more in the long run with frequent repainting and repairs. When it comes to your home’s exterior, quality paint is always a smart investment that protects your property and keeps it looking its best for years. Below, we’ll cover some of the top brands we trust for their consistent performance and durability. Benjamin Moore's Top Exterior Paints Benjamin Moore is a name that consistently comes up for a reason. They offer a fantastic range of high-quality paints that deliver on both appearance and protection. Their products are engineered to enhance your home's curb appeal while standing up to the elements. With a focus on durability and color retention, Benjamin Moore helps you select exterior paint colors and products that not only make your home look great but also provide a tough, protective layer. It’s a trusted choice for homeowners who want a premium finish that lasts. Sherwin-Williams' Best Exterior Options If you love having plenty of options, Sherwin-Williams is another top-tier brand to consider. They are known for their extensive color palettes, offering endless inspiration for every style of home. But their paints aren't just about looks. Sherwin-Williams formulates its exterior products for exceptional durability and long-term performance. Their paints are designed to resist peeling, blistering, and fading, ensuring your home looks freshly painted for years. With a strong reputation for quality, you can feel confident that you’re getting a product made to look great and last a long time. Our Go-To Paint Partners At Total Roof Solutions, our reputation is built on quality craftsmanship and durable materials. That’s why we exclusively partner with brands we trust to deliver exceptional results for our clients. We frequently recommend Benjamin Moore and Sherwin-Williams because their exterior paints are designed to endure. They are formulated to resist fading, cracking, peeling, and mildew, offering superior protection against harsh weather. Our decades of experience in exterior renovations have shown us that starting with a premium product is the key to a finish you’ll love for years to come. Is Premium Paint Worth the Price? It’s easy to look at the price difference between budget and premium paint and wonder if it’s worth the extra cost. The answer is a definite yes. Premium paint contains higher-quality resins and pigments, which translates to better coverage, more vibrant color, and superior durability. You’ll often need fewer coats, saving you time and labor costs. More importantly, a premium paint job will last much longer, protecting your investment and preventing you from having to repaint every few years. Choosing the right exterior colors is about creating a cohesive look, and a quality paint ensures that look will last. How to Test Colors the Right Way Picking a paint color is a huge commitment, and the last thing you want is to realize you chose the wrong shade after the job is done. Those tiny paint chips from the store can be deceiving. To make sure you’ll love the final result for years to come, you need to see how your top contenders look in the real world, on your actual home. Taking the time to test colors properly is the single most important step in any exterior painting project. It saves you from potential regret and ensures your vision comes to life exactly as you imagined. Our team can guide you through selecting the perfect colors for your exterior renovations , making sure every detail is just right. Use Large Sample Boards, Not Tiny Swatches Those small paper swatches are a great starting point for narrowing down your choices, but they won’t give you the full picture. To truly understand how a color will look on a large scale, you need a bigger sample. Instead of painting test patches directly on your house (which can alter your perception due to the underlying color), buy a few sample pots and paint them on large white poster boards. This method allows you to move the samples around to different parts of your home’s exterior. You can see how the color looks next to your brick, against your trim, and near your landscaping, giving you a much more accurate preview. Try Digital Color Visualization Tools Before you even buy a sample pot, technology can be your best friend. Many major paint brands offer digital tools that let you preview colors on your home. For example, the Sherwin-Williams ColorSnap Visualizer allows you to upload a photo of your house and apply different paint colors to the walls, trim, and doors. While these tools aren't a substitute for testing real paint samples, they are an incredible way to experiment with different combinations and rule out colors that just don’t work. It’s a fun, no-risk way to get a feel for your options and build confidence in your color palette. Test Colors in Morning, Noon, and Evening Light Natural light changes dramatically throughout the day, and so will your paint color. A warm, inviting beige in the soft morning light might look washed out in the harsh midday sun or take on a completely different tone in the evening shadows. Place your large sample boards on different sides of your house (north, east, south, and west) and observe them at various times. Pay attention to how the light and shadows interact with the color. This simple step is critical for choosing a shade that looks beautiful and consistent no matter the time of day, ensuring your home’s exterior painting looks fantastic from dawn until dusk. See How Colors Look on Sunny vs. Cloudy Days Just as the time of day affects color, so does the weather. A bright, sunny day can make colors appear more vibrant and saturated, while a gray, overcast sky can bring out cooler undertones you might not have noticed otherwise. Since you'll be living with this color through every season, you want to make sure you love it in all conditions. Leave your sample boards up for a few days to see how they perform in different weather. A color that looks perfect on a sunny afternoon should still feel right on a rainy morning. This thorough approach ensures there are no surprises once the final coat is on. Let's Talk Budget: What Does Exterior Painting Cost? A fresh coat of paint is one of the most impactful ways to update your home’s curb appeal, but it’s also a significant investment. Understanding the costs involved is the first step in planning your project. The final price tag depends on several factors, including the size of your home, the type of materials used, and the amount of prep work required. Let’s break down the numbers so you can create a realistic budget for your exterior painting project. How to Estimate Your Paint Costs The size of your home is the biggest driver of your total painting cost. For most single-family homes under 2,500 square feet, you can expect the price to fall somewhere between $3,000 and $7,000. The average cost to paint a 2,000-square-foot house can range from $3,000 to $8,000, with the variation coming from factors like your home’s siding material, its architectural complexity, and the number of stories. A simple, one-story ranch will cost less to paint than a three-story Victorian with intricate trim. Planning for Labor and Materials Your total project cost is split between two main categories: labor and materials. Labor typically makes up the largest portion of the bill, as it covers essential prep work like pressure washing, scraping, sanding, and caulking. Materials include more than just paint; you also have to account for primers, masking tape, surface repair compounds, and cleanup supplies. A helpful way to get a rough idea of your costs is to use a per-square-foot estimate. You can find a detailed cost calculator online, but a general range is between $2.20 and $4.37 per square foot. Finding Seasonal Sales and Rebates If you have some flexibility in your timeline, you can save money by scheduling your project strategically. Paint suppliers and contractors are often busiest during the warm, dry months. By planning your project for the off-season, like early spring or late fall, you might find better pricing. Keep an eye out for seasonal sales at major paint retailers, as these promotions can significantly reduce your material costs. Signing up for email newsletters from brands like Sherwin-Williams or Benjamin Moore is a great way to get notified about upcoming discounts. Budget vs. Premium Paint: Making the Choice It can be tempting to choose a budget-friendly paint to lower your upfront costs, but it’s important to think long-term. Premium paints are formulated with higher-quality resins and pigments, which means they provide better coverage, are more resistant to fading and cracking, and last longer. While you’ll pay more per gallon, a premium paint job can delay the need for repainting by several years, saving you money down the road. Investing in a quality paint job often means a longer-lasting finish and a better return on your investment. Pro Tips for a Stunning Finish Choosing the right colors is exciting, but getting the combination just right is what creates that "wow" factor. A professional, polished look doesn't happen by accident. It’s the result of a thoughtful strategy that balances color, highlights your home's best features, and works with your existing landscape. These simple design principles will help you pull together a color scheme that looks cohesive and beautiful for years to come. By thinking like a designer, you can create a stunning finish that feels both personal and timeless. Apply the 60-30-10 Rule for a Balanced Look If you’re feeling overwhelmed by color choices, the 60-30-10 rule is your best friend. This classic design principle helps create a balanced and visually appealing exterior. Here’s how it works: 60% of your home’s exterior should be the dominant color, which is typically your siding. The secondary color makes up 30% and is used for trim, windows, and garage doors. Finally, the remaining 10% is your accent color, perfect for the front door or shutters. Most homes use about three to four colors, and this ratio ensures none of them overpower the others, creating a harmonious look. Use Accent Colors to Add Personality Your accent color is where you can really let your personality shine. Think of your front door and other small features as mini canvases for bold expression. While the main color sets the overall tone, the accent is what catches the eye and makes your home memorable. This is your chance to pick paint colors that you truly love, whether it’s a vibrant yellow, a calming blue, or a sophisticated black. A pop of color on your front door or shutters can add character and charm without committing to a bold color for the entire house. Coordinate with Your Landscaping and Hardscaping Your home doesn't exist in a bubble, so your color choices shouldn't either. Before you fall in love with a paint chip, take a look at the elements of your home that aren't changing. Your residential roofing, brick or stone accents, and even your landscaping provide a built-in color palette. For example, you can pull a warm gray from your stonework for the trim or choose a siding color that complements the deep brown of your roof shingles. Choosing shades that harmonize with these fixed features ensures your new paint job looks like a natural fit from day one. Common Color Mistakes (and How to Avoid Them) Choosing an exterior paint color feels like a huge commitment, and a misstep can be costly and frustrating. The good news is that most color mistakes are completely avoidable with a little planning. By sidestepping these common pitfalls, you can ensure your home’s new look is one you’ll love for years to come. Let’s walk through the most frequent errors I see and, more importantly, how you can steer clear of them for a beautiful, cohesive finish. Clashing with Your Roof Color Your roof is one of the largest and most permanent features of your home's exterior. Before you fall in love with a paint color, look up! The color of your residential roofing shingles, whether they're charcoal gray, earthy brown, or architectural black, sets the foundation for your entire color scheme. A cool-toned gray paint will likely clash with a warm, reddish-brown roof. The best approach is to start by identifying the undertones in your fixed elements, like your roof, brick, or stone, and choose paint colors that share that same undertone for a harmonious look. Ignoring Your Home's Natural Surroundings Your home doesn't exist in a vacuum. Take a walk around your property and notice the colors that work well with the local landscape and architecture. An earthy green might look stunning in a wooded, natural setting, while a crisp, modern gray could feel right at home in a more contemporary development. The goal is to choose a palette that feels connected to its environment, not one that sticks out for the wrong reasons. Considering your surroundings helps create a look that feels intentional and thoughtfully designed. Forcing a Trend That Doesn't Fit Your Home It's easy to get swept up in the latest color trends, but what looks amazing on a sleek, modern home might feel out of place on a classic craftsman. Instead of forcing a trend, think about how you can adapt it to your home’s unique character. A great exterior look comes from finding the right combination of colors for the main body, trim, and accents that complements your home's existing architectural style . If you love a bold color, try using it on the front door or shutters instead of the entire house. Skipping the All-Important Sample Test A tiny paint chip can be incredibly deceiving. The single most important step before you commit is to test your top choices in the real world. Paint large sample boards and move them around your house throughout the day. Notice how the color looks in the bright morning sun versus the soft evening light, and see how it changes on a cloudy day. This step is non-negotiable. It’s the only way to see how a color will truly look on your home, in your light, before you invest in gallons of paint. Related Articles The Ultimate Guide to Exterior House Painting Benefits of Choosing Commercial Metal Roofs in Atlanta CONTACT US Frequently Asked Questions I'm completely overwhelmed by all the color choices. Where should I even begin? The best way to cut through the noise is to start with what you can't change. Look at the fixed elements of your home, like your roof shingles, brick, or stone accents. These features have built-in undertones (warm or cool) that can give you a natural starting point for your color palette. Once you have that direction, consider your home's architectural style to narrow down the options that will feel most authentic. Is it really that important to coordinate my paint with my roof color? Yes, absolutely. Your roof makes up a huge part of your home's visual real estate, and its color sets the tone for the entire exterior. Choosing a siding color that clashes with your roof can make the whole project feel off, no matter how beautiful the paint color is on its own. A harmonious look starts from the top down, so making sure your paint complements your roofing is key to a cohesive and polished result. How can I use paint to make my small house look bigger? Color is a fantastic tool for creating visual illusions. If you want to give your home a larger, more prominent appearance, stick with lighter colors for the main siding. Shades like soft whites, light grays, and pale beiges reflect more sunlight, which makes surfaces appear bigger and more open. This simple trick can significantly enhance your home's presence from the street. Should I follow the latest color trends or stick with something more classic? This really comes down to balancing personal taste with long-term appeal. A great strategy is to do both. Choose a timeless, neutral color for the main body of your house, which will appeal to a wide range of people if you decide to sell later. Then, use your front door, shutters, or other small accents to experiment with trendier or bolder colors that show off your personality. Is premium, more expensive paint actually worth the money for an exterior job? It definitely is. Think of exterior paint as your home's protective shield. Premium paints are made with higher-quality ingredients that provide better coverage and are far more durable against sun, rain, and humidity. While the upfront cost is higher, a quality paint job will resist fading, cracking, and peeling for much longer, saving you the cost and hassle of repainting every few years.
By Stephen Griswell March 20, 2026
Every business owner knows to check for a license and insurance. But let’s be honest, that’s the bare minimum. Those credentials don’t tell you about a contractor’s attention to detail, their communication during a project, or the quality of their work when no one is watching. Finding the 'best commercial roofing contractors' means looking beyond the basic checklist and identifying a true partner who is invested in the long-term integrity of your building. This article will guide you through the less obvious, but far more important, qualities to look for, from the specific materials they use to the strength of their warranties and their reputation in the community. CONTACT US Key Takeaways Create content that solves problems : Focus on answering the specific questions your ideal customers are searching for. When you provide genuine value and establish yourself as a trusted expert, viewers have a compelling reason to subscribe for more helpful advice. Optimize every video for discovery : Help your audience find you by using relevant keywords in your titles, descriptions, and tags. A great video is only effective if people can see it, so pair your quality content with strong, clickable thumbnails to stand out in search results. Turn viewers into a community : Don't just post videos; build relationships. Actively ask for subscriptions using end screens, respond to comments to show you're engaged, and promote your channel on your website and social media to create a loyal following. Your YouTube Growth Cheat Sheet Growing a YouTube channel can sometimes feel like shouting into the void. You pour your heart into creating amazing videos, hit publish, and then… crickets. If you’re tired of wondering why your subscriber count is stuck, you’re in the right place. Getting more subscribers isn’t about finding a single magic bullet or a viral fluke; it’s about building a system of smart, repeatable habits that attract viewers and turn them into loyal fans. Think of this as your personal cheat sheet, a guide packed with actionable strategies that cover every angle of channel growth. We’ll get into everything from nailing your content strategy to optimizing your videos so the right people can find them. It all starts with a simple foundation: creating valuable content for a specific audience and then consistently showing up for them. The YouTube algorithm is designed to connect viewers with videos they’ll enjoy, and your job is to give it all the right signals. This means focusing on high-quality production, writing compelling titles, and engaging with the community you’re building. Forget the hacks and shortcuts. Instead, let’s focus on the proven tactics that create sustainable, long-term growth and help you build a thriving channel you’re proud of. 21 Ways to Get More YouTube Subscribers As a business owner, you’re always looking for new ways to connect with customers and showcase your expertise. Whether you're a general contractor, a realtor, or a property manager, video is one of the most powerful tools in your marketing toolkit. YouTube, in particular, offers a unique platform to build trust, demonstrate your craftsmanship, and educate potential clients before they even pick up the phone. Think of it as a visual portfolio that works for you 24/7. A well-managed channel can show potential clients exactly how you handle a complex residential roofing project or the care you put into a seamless gutter installation. But starting a channel is one thing; growing a dedicated audience of subscribers is another. Subscribers are your most engaged viewers. They’re the ones who get notified about your new videos, are more likely to watch your content regularly, and eventually become loyal customers or refer you to others. Growing that subscriber base is key to turning your YouTube channel from a simple video gallery into a powerful lead-generation machine. To help you get there, we’ve put together 21 actionable steps you can take to attract more subscribers and build a thriving community around your brand. 1. Create Content Your Audience Craves The foundation of any successful YouTube channel is content that people actually want to watch. Before you hit record, think about your ideal customer. What are their biggest questions or problems? For instance, a homeowner might be searching for "signs of a roof leak" or "how to choose an asphalt shingle color." Creating videos that answer these specific questions provides immediate value and positions you as a trusted expert. The more you help your audience solve their problems, the more likely they are to hit subscribe to see what other helpful advice you’ll share next. Think of each video as a chance to build a relationship by proving your expertise. 2. Polish Your Production Quality You don’t need a Hollywood film crew, but your video quality does reflect your brand’s professionalism. A shaky, poorly lit video can make a potential customer question your attention to detail. Invest in the basics: a simple tripod for your smartphone to keep shots steady, a small microphone to ensure your audio is crisp and clear, and good lighting. Natural light from a window is often best. The most important step is to ruthlessly edit your videos. Cut out any mistakes, long pauses, or rambling sections. A tight, well-edited video shows that you respect your viewer's time and helps you come across as confident and professional. 3. Define Your Channel's Niche You can’t be everything to everyone. Instead of creating broad content, focus on a specific niche. For a contractor, your niche might be "high-end exterior renovations" or "storm damage restoration for commercial properties." Defining your focus helps you attract a dedicated audience that is genuinely interested in your specific expertise. When a viewer knows your channel is the go-to resource for their particular need, they have a compelling reason to subscribe. This targeted approach ensures that you’re not just getting random viewers; you’re building a community of potential customers who value what you have to say. 4. Build a Smart Keyword Strategy People find videos on YouTube by searching for them. A smart keyword strategy is what helps your videos show up in those search results. Think about the words and phrases your potential customers would type into the search bar. Tools like Google Keyword Planner can help you discover what people are looking for. Once you have a list of relevant keywords, include them naturally in your video titles, descriptions, and tags. For example, a video titled "How to Install Gutter Guards in McDonough, GA" is much more likely to be found by a local homeowner than one simply called "Gutter Project." 5. Establish a Consistent Posting Schedule Imagine your favorite TV show aired on a random day and time each week; you’d probably stop trying to watch it. The same goes for YouTube. A consistent posting schedule trains your audience to expect new content from you regularly. Whether you decide to post once a week or once a month, pick a schedule you can stick to and let your audience know what it is. Consistency signals to both viewers and the YouTube algorithm that your channel is active and reliable. This predictability builds anticipation and keeps your subscribers engaged and coming back for more. 6. Repurpose Long Videos into YouTube Shorts Not everyone has time to watch a 15-minute video. YouTube Shorts are vertical, bite-sized videos (under 60 seconds) that are perfect for capturing attention quickly. You can easily create Shorts by repurposing clips from your longer videos. Pull out a quick tip, a dramatic before-and-after shot, or a compelling customer testimonial. Shorts are a fantastic way to reach new audiences who might not have discovered your channel otherwise. If they like your short-form content, they’ll be more inclined to check out your longer videos and hit the subscribe button. 7. Write Irresistible Video Titles Your video's title is its first impression, and it has a huge impact on whether someone decides to click. A great title is clear, intriguing, and includes your main keyword. Instead of a generic title like "Roofing Job," try something more compelling like "Watch Us Transform This Historic Home's Roof" or "5 Critical Mistakes to Avoid When Filing a Roof Insurance Claim." Using numbers, asking questions, and creating a sense of urgency can all make your titles more clickable. A great title gets the click, and great content earns the subscription. 8. Design Click-Worthy Thumbnails Along with your title, the thumbnail is the most important factor in getting someone to watch your video. It’s the small preview image that viewers see when scrolling through YouTube. Your thumbnail should be bright, clear, and visually represent what the video is about. Use high-quality images, bold text, and contrasting colors to make it stand out. Including a person's face, especially one showing emotion, can also draw the eye. A well-designed thumbnail acts like a mini-billboard for your video, and a great one can dramatically increase your views and, consequently, your subscribers. 9. Craft Compelling Video Descriptions The video description is prime real estate for telling viewers and the YouTube algorithm what your video is about. The first few lines are the most important, as they appear in search results. Start with a clear, engaging summary of the video that includes your main keywords. Below that, you can add more details, link to your company website , and include a direct call-to-action. Don't be afraid to simply ask people to subscribe. A simple line like, "If you found this helpful, subscribe for more home exterior tips!" can make a big difference. 10. Use Tags to Improve Discoverability Tags are another way to give YouTube context about your video's topic. Think of them as hidden keywords that help categorize your content. Use a mix of broad and specific tags. For a video about replacing a roof, you might use broad tags like "roofing" and "home improvement," as well as specific ones like "asphalt shingle replacement," "roofing contractors in Atlanta," and "Owens Corning shingles." This helps YouTube recommend your video to viewers who are watching other, similar content, which is a great way to get your channel in front of a relevant new audience. 11. Guide Viewers with YouTube Cards YouTube Cards are small, interactive pop-ups that you can add to your videos. You can use them to suggest another one of your videos, link to a relevant playlist, or even poll your audience. Strategically placing a card that links to a related video can keep people watching your content for longer. For example, in a video about roof repair, you could add a card that links to your video on gutter maintenance. The longer someone stays on your channel, the more familiar they become with your brand and the more likely they are to subscribe. 12. Connect with Your Community in the Comments The comment section is where you can build a real community around your channel. Make an effort to read and respond to as many comments as you can, especially in the first few hours after a video goes live. Answering questions and thanking people for their feedback shows that you’re engaged and that you value your audience. This interaction fosters a sense of loyalty and makes viewers feel like they’re part of a conversation. A strong community is a subscribed community, so don't neglect this powerful tool for connection. 13. Go Live with a Q&A or Webinar Going live on YouTube is a fantastic way to connect with your audience in real time. You can host a live Q&A session where you answer common questions about your industry, or you could even stream a live "walk-through" of a recently completed project. Live sessions feel personal and unscripted, which helps build a stronger connection with your viewers. Announce your live stream in advance to build anticipation. The direct interaction you get during a live event can be incredibly effective at converting casual viewers into loyal subscribers. 14. Collaborate with Other Creators Partnering with other creators or businesses in a related, non-competing field is a powerful way to cross-promote and reach new audiences. For example, a roofing contractor could collaborate with a local realtor, a home inspector, or a landscaping company. You could create a video together offering "Top 5 Tips for Increasing Your Home's Curb Appeal" and promote it to both of your audiences. This introduces your channel to a whole new group of relevant viewers who are likely to be interested in your services and subscribe for more content. 15. Run YouTube Ads to Reach New Viewers If you have a marketing budget, running YouTube ads can be a highly effective way to get your channel in front of a targeted audience. You can promote one of your best videos to viewers based on their location, demographics, and interests. This is a great way to accelerate your channel's growth and attract subscribers who are your ideal customers. Start with a small budget to test what works, and focus on promoting a video that provides a lot of value and has a clear call-to-action to subscribe. 16. Embed Videos on Your Website and Blog Your YouTube channel shouldn't exist in a silo. Promote your videos on your other marketing channels, especially your company website. You can embed relevant videos on your service pages or in blog posts. For example, on your "Commercial Roofing" page, you could embed a video showcasing a recent commercial project. This not only makes your website more engaging but also drives traffic from your site to your YouTube channel. Visitors who are already interested in your services are highly likely to subscribe for more video content. 17. Organize Your Content into Playlists Playlists are a simple but powerful tool for increasing watch time. By grouping related videos together into a playlist, you encourage viewers to watch multiple videos in one session. When one video ends, the next one in the playlist automatically begins. You could create playlists for different topics, like "Roof Repair Tips," "Gutter Installation Guides," or "Customer Testimonials." This makes it easy for viewers to find the content they’re most interested in and keeps them on your channel longer, which often leads to a new subscription. 18. Pinpoint and Promote Your "Subscriber Magnet" Videos Dive into your YouTube Analytics to see which of your videos are bringing in the most subscribers. These are your "subscriber magnet" videos. Once you've identified them, you should actively promote them. You can feature one in your channel trailer, add it to your end screens, and link to it with YouTube Cards in your other videos. Understanding what makes these videos so effective can also give you valuable insights into what kind of content you should create more of in the future. Double down on what works. 19. Use End Screens to Ask for the Subscription The last 5-20 seconds of your video are a perfect opportunity to ask for a subscription. YouTube's end screen feature allows you to add a clickable subscribe button and a suggested video directly on top of your video. Always include an end screen that encourages viewers to subscribe and watch another video. You can even verbally remind them by saying something like, "If you enjoyed this video, please subscribe to our channel and check out this other video we think you'll love." This simple, direct ask can significantly increase your subscriber conversion rate. 20. Develop a Strong, Recognizable Channel Brand A consistent brand makes your channel look professional and memorable. This includes your channel art, your video thumbnails, and even the way you talk and edit your videos. Use consistent colors, fonts, and logos across your channel to create a cohesive look and feel. Your brand is also about your personality. Are you the friendly, helpful expert? The no-nonsense pro? Developing a consistent brand identity helps viewers know what to expect from your channel and builds a loyal following of people who connect with your style. 21. Promote Your Channel Everywhere Don't just wait for people to find you on YouTube. Promote your channel across all your marketing platforms. Add a link to your YouTube channel in your email signature, on your business cards, and in your social media bios. Share your new videos on Facebook, LinkedIn, and any other platforms where your customers spend their time. The more places you promote your channel, the more opportunities you create for people to discover your content and become subscribers. Think of it as creating multiple pathways that all lead back to your channel. CONTACT US Frequently Asked Questions How long until I start seeing subscribers from these efforts? Growth on YouTube is a marathon, not a sprint. While you might see some initial traction, building a loyal subscriber base takes time and consistency. Focus on implementing these strategies steadily for a few months. The key is to create a library of valuable content. The more helpful videos you have, the more opportunities people have to find your channel and the more reasons they have to subscribe. Do I need expensive camera gear to get started? Absolutely not. Your smartphone is more than capable of shooting high-quality video. The most important factors are clear audio and stable shots. A simple tripod and an inexpensive lavalier microphone will make a huge difference and show a level of professionalism that viewers appreciate. Great content and clear communication will always be more important than a fancy camera. What's the best way to come up with video ideas my customers will actually watch? The best video ideas come directly from your customers. Pay attention to the questions they ask you during consultations, over the phone, or via email. Each question is a potential video topic. You can also type common industry phrases into the YouTube search bar and see what suggestions pop up. This shows you what people are actively looking for. Should I focus on long videos or YouTube Shorts? You should use both, as they serve different purposes. Think of YouTube Shorts as your handshake; they are great for grabbing attention and introducing your channel to new people who might not have found you otherwise. Your longer videos are the conversation; they allow you to build trust, demonstrate your expertise in detail, and truly connect with potential clients. Use Shorts to lead viewers to your more in-depth content. How do I find the right keywords for my videos? The easiest way to start is to think like your customer. What would you type into Google or YouTube if you had a leaky roof or needed new gutters? Use those exact phrases. You can also use YouTube's search bar as a tool. Start typing a phrase like "roof replacement" and see what autocomplete suggestions appear. Those are real searches from real people, and they make excellent keywords for your titles and descriptions.