The DIYer's Guide to Residential Metal Roof Installation
Stephen Griswell • June 17, 2026
When it comes to installing a metal roof, success is often defined by the mistakes you avoid. A single over-tightened screw or a poorly sealed piece of flashing can undermine the entire project, leading to leaks and costly repairs down the road. While a DIY residential metal roof installation can save money, those savings disappear quickly if you have to fix problems later. This guide is built to help you get it right the first time. We will focus on the critical details that separate a professional-grade job from a leaky nightmare, giving you a roadmap to a secure, long-lasting, and worry-free roof.
Key Takeaways
- Solid prep work is non-negotiable: A successful installation begins long before you touch a panel. This means thoroughly inspecting and repairing the roof deck, gathering all your materials beforehand, and confirming your plans meet local building codes.
- Details like flashing and fasteners are critical: Most roof leaks happen because of small installation mistakes. To prevent them, focus on creating perfect seals around flashing, using the correct tension on every screw, and ensuring your first panel is perfectly square.
- A professional installation protects your warranty and peace of mind: A DIY metal roof project is complex and can void your warranty if done incorrectly. Hiring a certified contractor guarantees the job is done right, protecting your home and your investment for decades.
Why Choose a Metal Roof?
If you're considering a new roof, you've probably heard the buzz about metal. It's a big step up from traditional shingles, and for good reason. Choosing a metal roof is more than just an aesthetic upgrade; it's a long-term investment in your home's safety, value, and efficiency. While the installation process requires careful planning, the benefits you'll enjoy for decades to come make it a project worth tackling. From its incredible lifespan to its energy-saving properties, a metal roof addresses many of the common headaches homeowners face with traditional materials. It stands strong against harsh weather, helps keep your home cooler in the summer, and asks for very little in return when it comes to maintenance. Before you grab your tool belt, it’s important to understand what makes this material so special. Let's break down exactly why so many homeowners are making the switch and why it might be the perfect fit for your home. This isn't just about following a trend; it's about making a smart, informed decision that will protect your biggest asset for a lifetime.
Built to last a lifetime
Think about this: a typical asphalt shingle roof might last 20 years if you're lucky. A metal roof, on the other hand, can last 50 to 70 years. That’s a lifetime of protection. It means you could install a roof and never have to worry about replacing it again. This incredible durability makes it one of the most cost-effective residential roofing choices over the long run. You're not just buying a roof; you're buying peace of mind for decades, knowing your home is protected by a material designed to endure.
Lower your energy bills
Especially here in Georgia, summer cooling costs can be a real budget-buster. This is where a metal roof truly shines, literally. Metal roofs are designed to reflect the sun's intense heat away from your home, rather than absorbing it like dark asphalt shingles do. This simple act of reflection can significantly reduce the workload on your air conditioning system. Over time, that translates into noticeable savings on your monthly energy bills. It’s a smart way to make your home more comfortable and more energy-efficient at the same time.
Enjoy fire resistance and low maintenance
Beyond its long life and energy savings, a metal roof offers incredible resilience. These roofs are exceptionally strong and can handle just about anything Mother Nature throws their way, from heavy rain to strong winds. Plus, they are non-combustible, giving you an added layer of fire protection. One of the best parts is how little upkeep they require. Forget about constantly checking for cracked or missing shingles. A metal roof needs very little maintenance, saving you time and money on future repairs. It’s a tough, reliable, and low-stress option for any homeowner.
Your Pre-Installation Checklist
Before you climb a single ladder, the success of your metal roof installation begins on the ground. Getting organized is the best way to ensure the project goes smoothly, stays on schedule, and results in a roof you can be proud of. Think of it like preparing your ingredients before you start cooking a new recipe; a little prep work up front saves you from scrambling later. This checklist covers the three main areas you need to sort out: your materials, your tools, and your safety gear. Taking the time to gather everything will make the entire process feel more manageable and far less stressful.
Essential materials
Having all your materials on-site before you start is a non-negotiable first step. A mid-project run to the hardware store can throw off your entire workflow and lead to mistakes. You’ll need your metal panels, of course, but don’t forget the supporting cast. This includes underlayment to protect the roof deck, various trims for the edges and peak (like eave, gable, and ridge caps), high-quality sealants, the correct screws for fastening, and foam closure strips to keep pests and moisture out. Gathering these essential items ahead of time will help you work efficiently and avoid frustrating delays.
The right tools for the job
Working with metal requires a few specialized tools that you might not have in your standard toolbox. To get clean cuts and a professional finish, you’ll need aviation snips for detailed work and either special metal cutters or a saw with a metal-cutting blade for the panels. A hand seamer will help you create crisp, clean bends in the flashing and trim. Most importantly, you absolutely need proper fall protection gear, as roof work is inherently dangerous. Using the right equipment isn’t just about making the job easier; it’s about achieving a secure, weather-tight, and great-looking final product.
Must-have safety gear
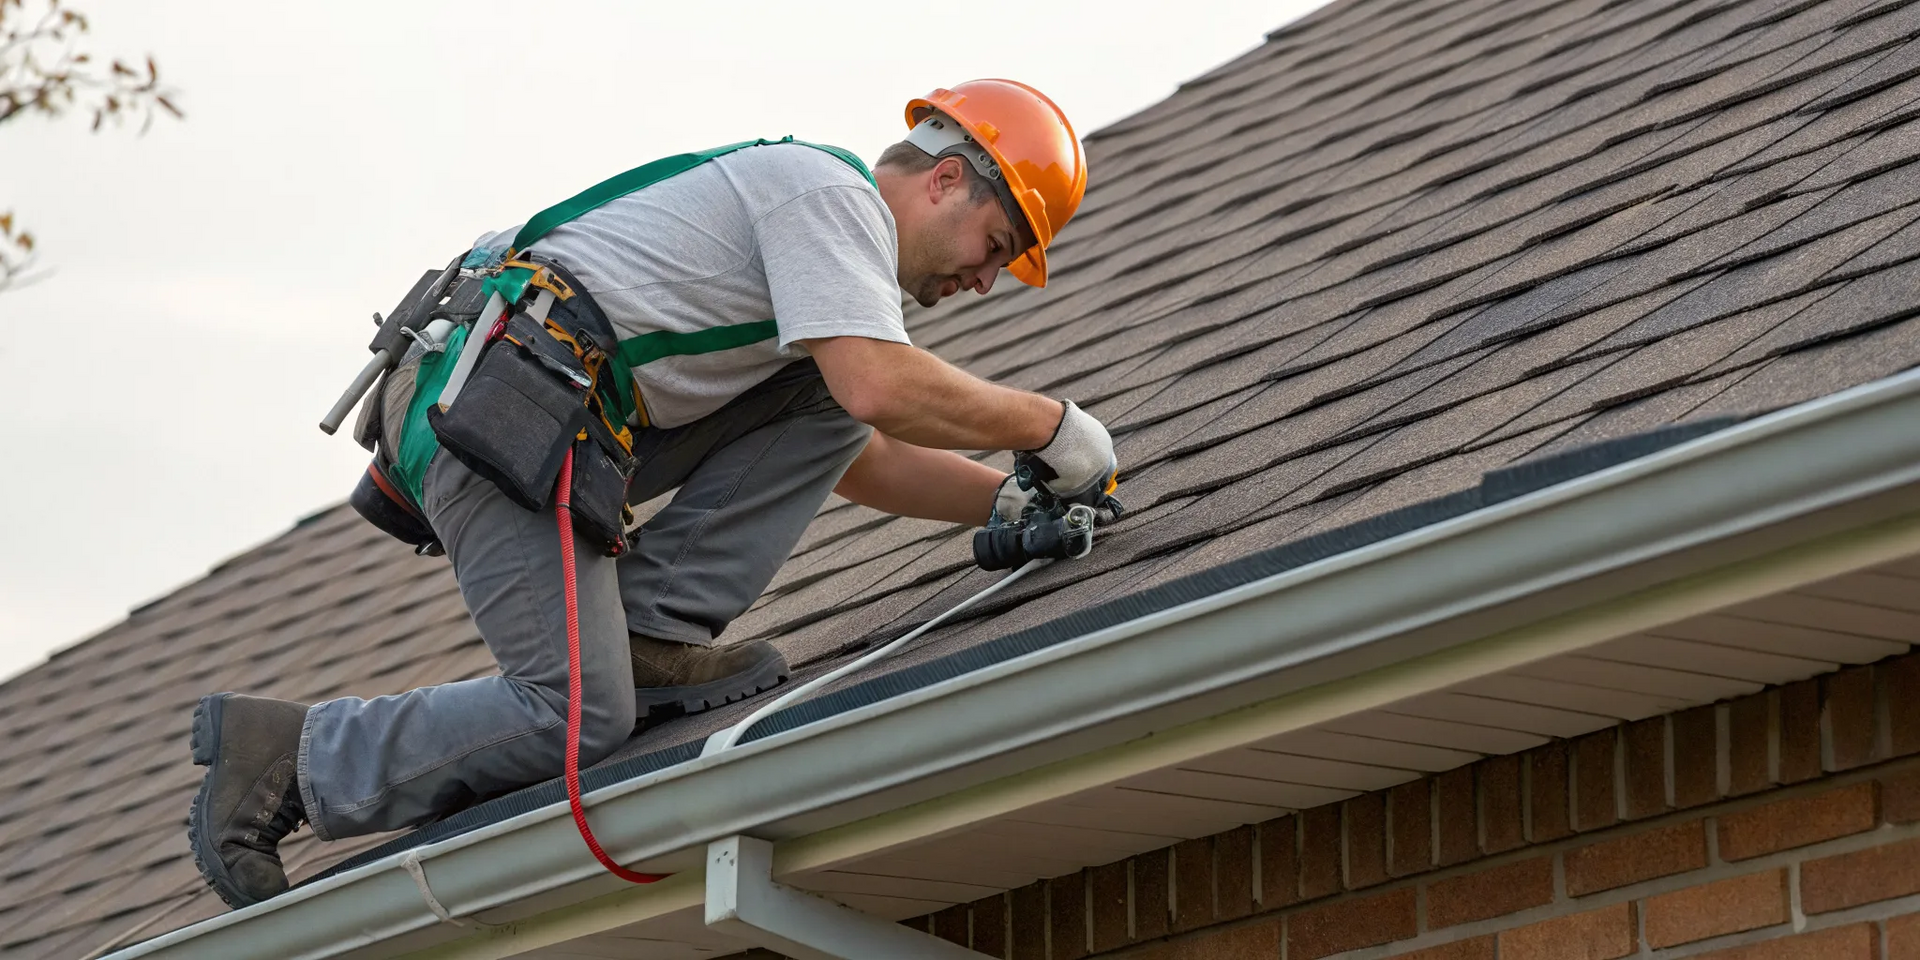
Speaking of safety, let’s make it the top priority. A successful project is one where everyone goes home safe at the end of the day. Before you start, make sure you have and are committed to using the right safety gear. This includes a hard hat, heavy-duty gloves to protect from sharp edges, and sturdy, non-slip footwear. Also, make it a habit to clean up any metal shavings as you go. These tiny scraps can cause rust spots on your new roof and create a slippery, hazardous work area. If handling these safety requirements feels overwhelming, remember that professional residential roofing crews are trained and equipped to manage these risks every day.
How to Prep Your Roof for Installation
A successful metal roof installation is all about the prep work. Before you even think about laying down your first panel, you need to create a solid, clean, and compliant foundation. Rushing through these initial steps is the fastest way to run into problems down the road, from leaks to poor performance. Taking the time to prepare your roof correctly will make the entire installation process smoother and ensure your new roof lasts for decades. Think of it as setting the stage for a flawless performance.
Inspect and clean the roof deck
You can’t build a strong house on a shaky foundation, and the same goes for your roof. After you remove the old roofing material, take a hard look at the exposed roof deck. This is your chance to find and fix any soft, spongy, or rotting wood. If you find any damage, you’ll need to replace those sections to create a solid, stable surface. Once all repairs are made, sweep the entire deck clean of any debris, like old nails or wood splinters. A clean surface is essential for the next step: applying a waterproof layer, or underlayment, over the whole roof. If the damage seems widespread, it might be a sign to consult with a residential roofing professional.
Check local building codes and permits
Before you buy materials or begin work, you absolutely must check with your local building authority. Every county, from Henry to Fulton, has specific building codes that dictate roofing requirements. These rules cover everything from the type of underlayment you can use to how many fasteners are needed per panel. A quick call or visit to your local permit office will save you major headaches later. Following these codes isn't just about avoiding fines; it's about ensuring your roof is safe and structurally sound. You can find more information on statewide standards through the Georgia Department of Community Affairs.
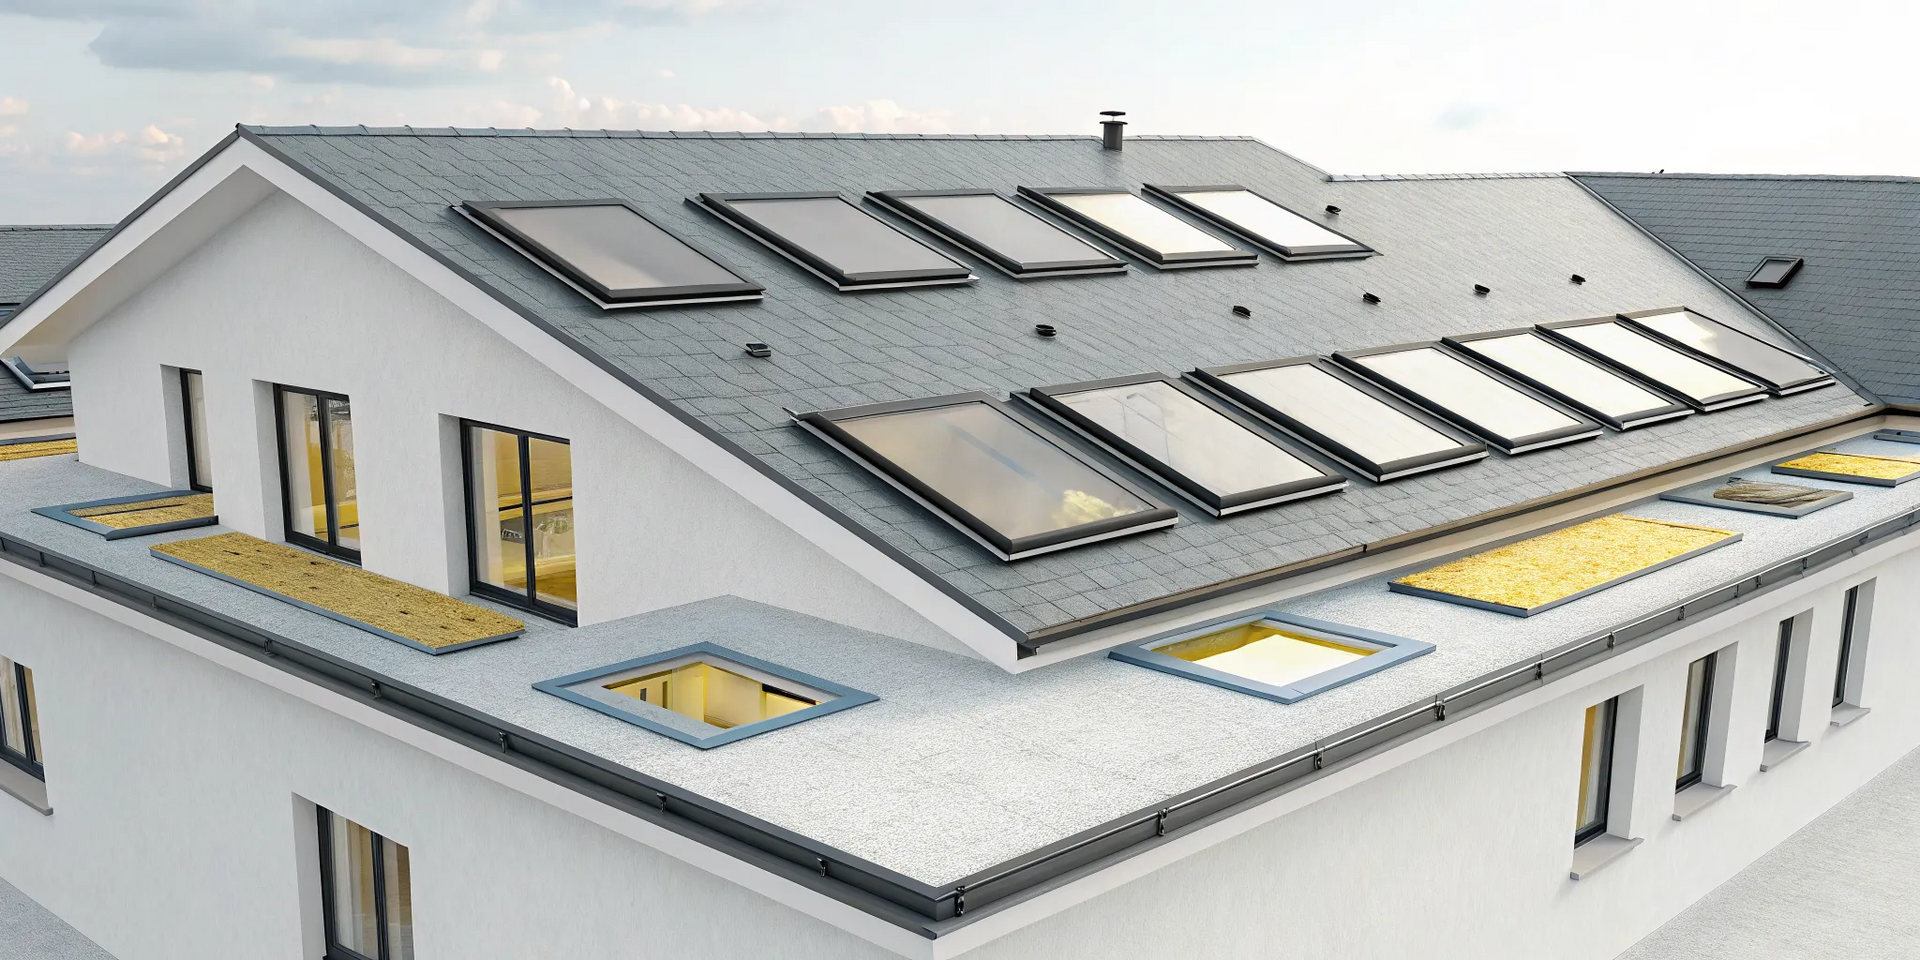
Plan for ventilation and insulation
Metal roofs are excellent at reflecting solar heat, but they can also transfer heat and cold easily. Without proper insulation, you might notice your energy bills creeping up as your HVAC system works overtime to keep your home comfortable. Good insulation acts as a thermal barrier, preventing this energy loss. Equally important is ventilation. A well-ventilated attic allows air to circulate, which helps regulate temperature and prevent moisture buildup that can lead to mold or ice dams in the winter. Planning for both insulation and ventilation is key to creating an energy-efficient and healthy home. As an Owens Corning Platinum Preferred contractor, we know how crucial a complete roofing system is for performance.
How to Install Your Metal Roof: A Step-by-Step Guide
Alright, you’ve done your homework, picked your materials, and you're ready to tackle this project. Installing a metal roof is a rewarding but demanding job that requires precision, patience, and a serious commitment to safety. This guide breaks down the process into manageable steps, from tearing off the old shingles to fastening the final ridge cap. Remember, every roof is different, so you should always follow the specific guidelines provided by your metal panel manufacturer. While a DIY installation can save you money on labor, it's a significant undertaking where small mistakes can have big consequences. A single misplaced screw or improperly sealed flashing can lead to leaks, water damage, and expensive future repairs.
Think of your roof as a complete system where every component has to work together perfectly. That's why we take such a detailed approach to every project. If you start to feel unsure or out of your depth at any point, it's always wise to pause and consider your options. There's no shame in calling for backup. A professional residential roofing team has the experience and specialized equipment to handle the complexities of any roofline, ensuring your home is protected for decades to come. But if you're confident and prepared, let's get started.
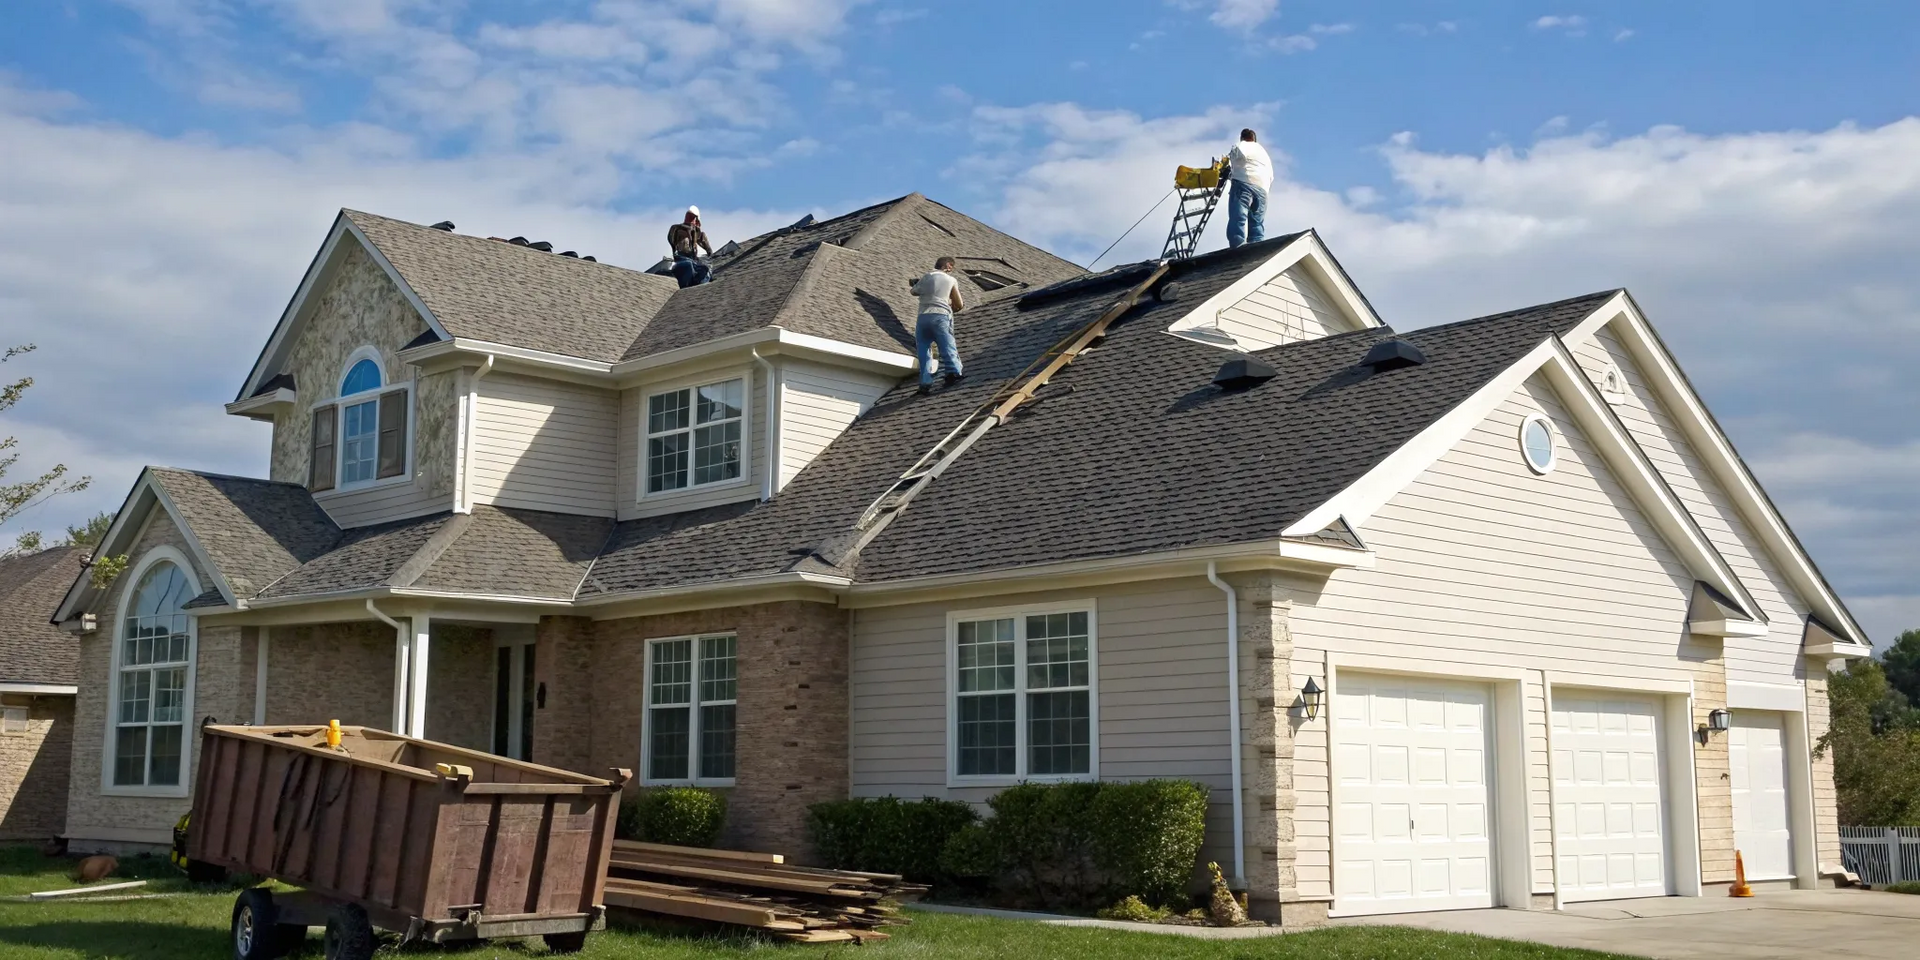
Step 1: Remove the old roof and inspect the deck
First things first, you need a clean slate. Unless your local codes allow for a metal roof to be installed over a single layer of asphalt shingles, you’ll need to remove the old roofing material completely. Once the old roof is off, it’s time for a thorough inspection of the roof deck, which is the plywood or OSB sheathing underneath. Look for any signs of water damage, rot, or soft spots. Press down firmly on the decking across the entire roof. Any area that feels spongy or weak must be cut out and replaced with new sheathing of the same thickness. This step is critical; your new metal roof is only as strong as the foundation it’s attached to.
Step 2: Install the membrane and underlayment
With a solid and clean roof deck, your next step is to install a waterproof barrier. This involves laying down a self-adhering ice and water shield along the eaves, rakes, and in any valleys. This membrane provides extra protection in areas most vulnerable to ice dams and water penetration. After that, you’ll cover the entire roof deck with a high-quality synthetic underlayment. Think of this as your roof’s second line of defense. It protects the sheathing from moisture that might get under the metal panels. Overlap each course according to the manufacturer's instructions and fasten it securely to create a smooth, watertight surface for your new roof.
Step 3: Attach the drip edge and flashing
Now it’s time to install the metal trim pieces that direct water away from your house. Start by attaching the drip edge along the eaves (the lower edges of the roof) and then along the rakes (the sloped sides). This metal strip guides water directly into your gutters and away from the fascia board. Next, install flashing in all roof valleys and around any penetrations like chimneys, vents, and skylights. Flashing is one of the most critical parts of any roofing system. When installed correctly, it creates a waterproof seal in the areas where your roof is most likely to leak. Take your time here to ensure every piece is cut, bent, and sealed perfectly.
Step 4: Add closure strips and sealant
Metal roofing panels have a ribbed or corrugated profile, which creates small gaps where the panels meet the roof deck at the eave and ridge. To seal these openings, you’ll use foam closure strips. These strips are designed to match the specific profile of your metal panels, filling the gaps to keep out wind-driven rain, insects, and other pests. Apply a bead of high-quality roofing sealant to the top of the closure strip before placing the metal panel over it. This creates a durable, watertight seal that is essential for the long-term performance of your roof. Don't skip this step; it's a small detail that makes a huge difference.
Step 5: Snap a square line and align the first panel
Proper alignment is everything when it comes to installing metal panels. If your first panel is crooked, every subsequent panel will be too, resulting in a messy and potentially leaky roof. To start straight, you need to snap a reference line that is perfectly square (at a 90-degree angle) to your eave. A common technique is the 3-4-5 method: measure 3 feet up one side from a corner and 4 feet along the adjacent side, then check if the diagonal distance between those two points is exactly 5 feet. Adjust until it is, then snap a chalk line. Align the edge of your first panel with this line, ensuring it overhangs the eave by the manufacturer-recommended distance.
Step 6: Fasten the remaining metal panels
With your first panel perfectly aligned and secured, you can proceed with installing the rest. Overlap each new panel onto the previous one according to the manufacturer's design. The key to a watertight seal is using the correct fasteners, which are typically screws with rubber washers. These screws should be driven through the flat part of the panel, next to the rib, not on top of it. Be careful not to over-tighten or under-tighten the screws. The washer should be compressed just enough to create a seal without being squished or distorted. Consistent spacing and proper torque are essential for preventing leaks and ensuring your roof can withstand high winds.
Step 7: Install the ridge cap and finishing touches
The final step is to seal the very top of your roof by installing the ridge cap. This piece covers the gap where the panels from both sides of the roof meet at the peak. Before installing the cap, you’ll need to add vented closure strips to allow for attic ventilation while still keeping out pests and rain. Secure the ridge cap by driving fasteners through it and into the high ribs of the panels below. Once the ridge cap is on, your roof is officially weatherproof. All that’s left is to install any remaining trim, clean up the site, and admire your hard work.
Common Installation Mistakes to Avoid
Installing a metal roof can be a rewarding DIY project, but a few common errors can turn your dream roof into a leaky nightmare. Even the highest quality materials won't perform well if they aren't installed correctly. Paying close attention to the details and avoiding these frequent missteps will help you get a professional-quality result that protects your home for decades. Think of it this way: your patience during installation is what ensures your roof’s long-term performance.
Rushing the underlayment
It’s tempting to speed through the prep work to get to the main event of laying down the metal panels, but rushing the underlayment is a critical mistake. This layer is your roof deck’s primary defense against moisture. A properly installed underlayment acts as a secondary water barrier, protecting the wood sheathing from condensation and any water that might find its way past the metal. Take your time to ensure the roof deck is clean and dry before you begin. When you roll out the underlayment, make sure it lies flat without any wrinkles or tears that could trap water or create an uneven surface for the panels. Good planning and careful preparation at this stage will save you from costly repairs down the road.
Improper flashing and sealing
Most roof leaks don’t happen in the middle of a solid panel; they happen at the edges, seams, and penetrations. This is where flashing and sealants do their most important work. Improperly installed flashing around chimneys, vents, skylights, and valleys is one of the leading causes of roof failure. These areas require precise cutting, fitting, and sealing to create a watertight barrier. Even a small gap can allow water to seep in, leading to rot and structural damage. Be meticulous with your measurements and use a high-quality sealant specifically designed for metal roofing. Double-checking your work in these vulnerable spots is one of the best ways to prevent common metal roof problems from developing.
Over-tightening screws
When it comes to fastening your metal panels, there is a "just right" that you need to hit. Many first-time installers make the mistake of over-tightening the screws, thinking tighter is better. However, driving a screw too far can damage the rubber washer that creates the waterproof seal. This can cause the washer to bulge or break, creating an immediate entry point for water. It can also dimple the metal panel itself. On the other hand, a screw that is too loose won’t compress the washer enough to form a seal. A full guide to metal roof installation will show you that the goal is to drive the screw until the washer is snug and flat against the panel. Also, remember to sweep away any metal shavings from drilling, as these can rust and stain your new roof.
Forgetting about thermal expansion
Metal naturally expands when it gets hot and contracts when it gets cold. If your installation doesn't account for this movement, you’re setting your roof up for trouble. Without room to shift, the panels can start to buckle, warp, or create a wavy appearance known as "oil canning." This constant stress can also cause fasteners to loosen or pull out over time, compromising the roof's integrity and creating potential leak points. To prevent this, make sure you are using the correct fastening system for your panels. Some systems have slotted holes that allow the panels to move freely with temperature changes. Always follow the manufacturer's specific instructions for fastener placement to accommodate thermal movement.
How to Maintain Your New Metal Roof
One of the best things about a metal roof is how little maintenance it requires. But low-maintenance doesn’t mean no-maintenance. After putting in all the hard work to install your new roof, you’ll want to protect that investment. A little bit of care goes a long way toward making sure your roof looks great and performs perfectly for decades.
Think of it like caring for a new car. You wouldn’t just drive it for years without ever checking the oil or washing it, right? The same principle applies to your roof. Regular check-ups are the key to preventing bigger, more expensive issues down the road. By staying on top of a few simple tasks, you can catch small problems before they escalate, ensuring your roof lasts a lifetime. Most of these maintenance steps are simple visual checks you can do yourself, but it’s also wise to know when a professional eye is needed.
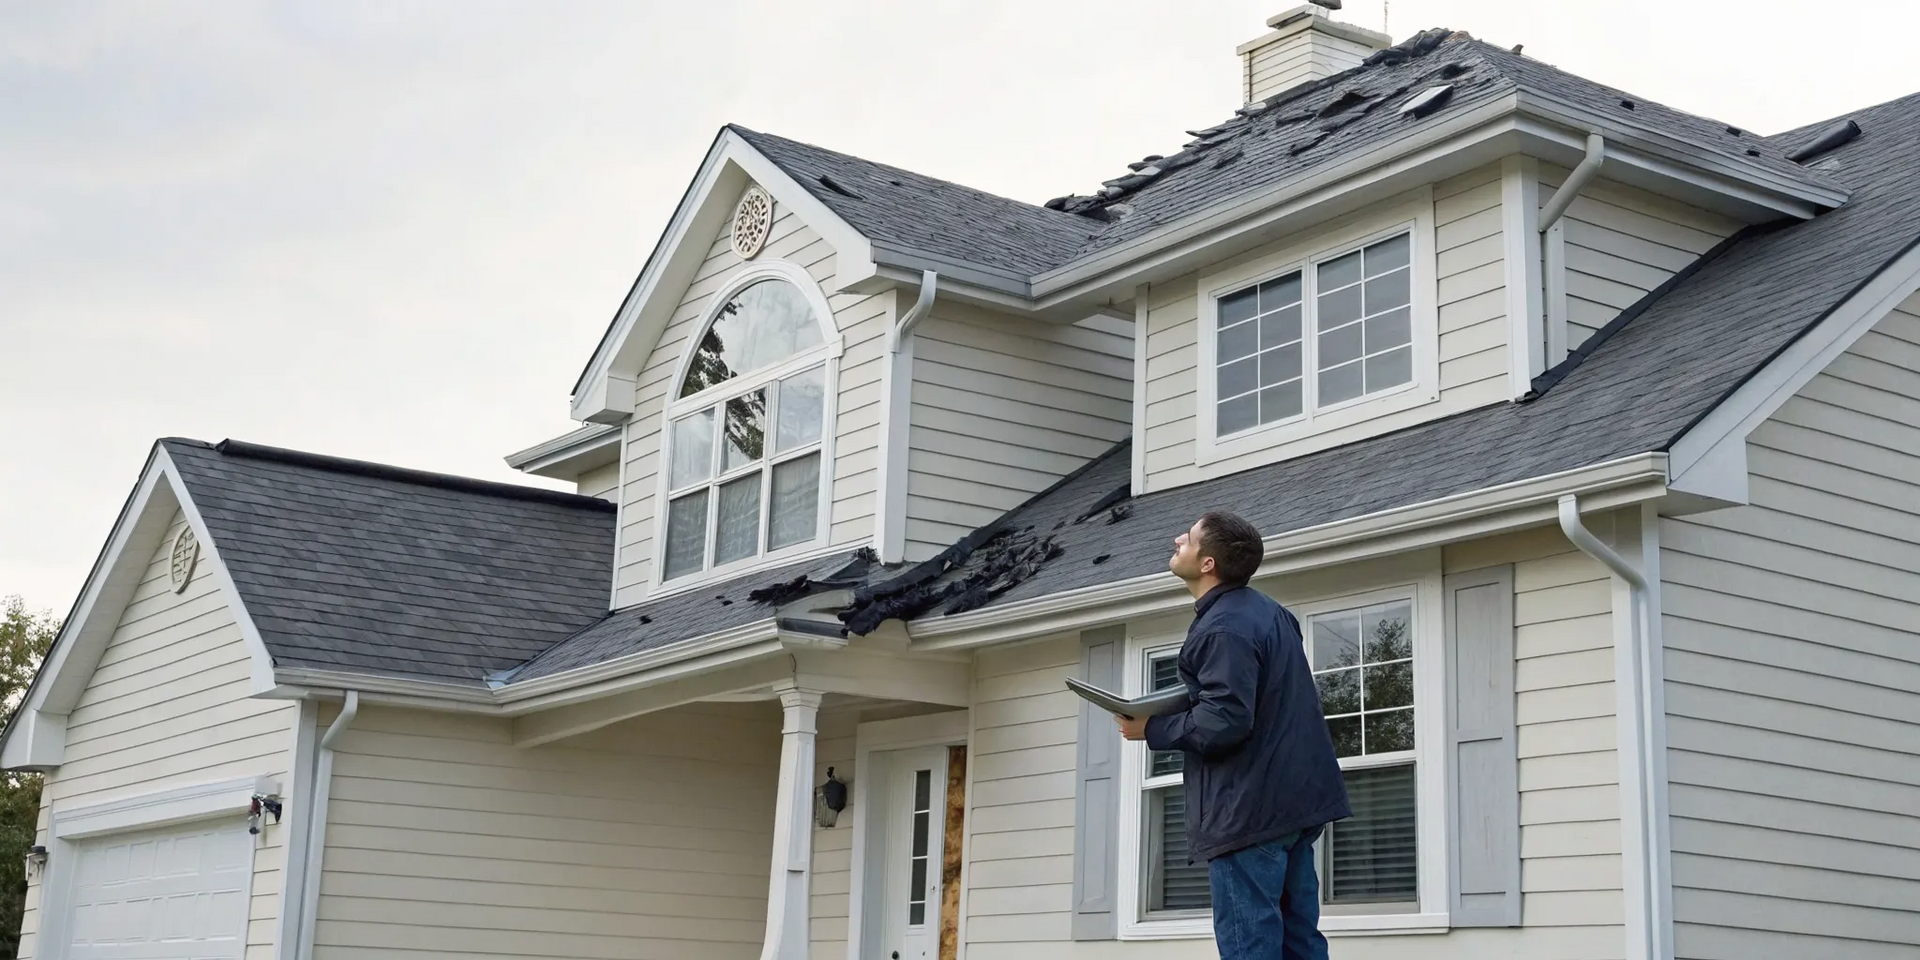
Perform routine inspections
Getting into the habit of performing routine inspections is the most effective thing you can do for your roof’s longevity. We recommend doing a thorough visual check at least twice a year, ideally in the spring and fall after the most extreme weather has passed. From the ground, walk around your home and look for any debris like leaves, twigs, or branches that may have collected on the panels or in the valleys. This debris can trap moisture and lead to corrosion over time. Also, look for any scratches, dents, or areas of discoloration. While you can handle most visual checks yourself, having a professional roofer perform a detailed inspection every few years can give you complete peace of mind.
Check fasteners and seals regularly
The fasteners and seals on your metal roof are critical for keeping it watertight. Over time, the constant expansion and contraction of the metal panels due to temperature changes can cause screws to loosen slightly. During your routine inspections, pay close attention to the fastener lines. If you see any that look raised or loose, they should be addressed right away to prevent water from seeping underneath the panel. Similarly, check the sealant around flashing, vents, and other roof penetrations. Look for any signs of cracking, peeling, or gaps. Maintaining these seals is a simple but crucial step in preventing leaks before they start.
Address rust or damage immediately
Modern metal roofs are incredibly durable and coated with advanced finishes to resist rust. However, if the surface gets a deep scratch or is dented by hail or a falling branch, the protective coating can be compromised. If the underlying metal is exposed to moisture, rust can begin to form. If you spot any rust or damage, it’s important to act quickly. For minor scuffs, you might be able to touch them up with a paint kit from the manufacturer. For anything more significant, like a dented panel or a developing leak, your best bet is to call for a professional repair. An expert can properly seal gaps, replace damaged panels, or apply protective coatings to stop the problem in its tracks and keep your warranty intact.
DIY vs. Hiring a Pro: What's Right for You?
After walking through all the steps, you might be feeling either energized or a little overwhelmed. That’s completely normal. Installing a metal roof is a major project, and it’s smart to honestly assess if it’s the right fit for your skills, timeline, and comfort level. While the satisfaction of a DIY job is huge, the risks of getting it wrong are even bigger. A small mistake can lead to leaks, rust, or even structural damage down the road. Before you haul that first panel onto your roof, let’s talk about when it makes more sense to put down the tools and pick up the phone.
Know when to call a professional
Even for a seasoned DIYer, installing a metal roof is considered an advanced project. It’s a job that often takes multiple days and a significant investment in materials. If a metal roof isn't put on correctly, it can lead to big issues that are far more expensive to fix than hiring an expert in the first place. Hiring a professional ensures the job is done right the first time, helping you avoid those costly problems later. If you’re not completely confident in your ability to manage every detail, from underlayment to flashing, it’s wise to consider professional roofing services. An expert can handle the complexities and give you peace of mind.
Protect your warranty
Your new metal roof is a major investment, and one of the best ways to protect it is by keeping the manufacturer’s warranty intact. Many material warranties specify that the products must be installed according to their instructions, and a common requirement is installation by a certified professional. Unfortunately, many roofing problems start with bad installation, and a DIY job could void your warranty, leaving you on the hook for any material defects. Working with certified contractors ensures your roof is installed to the highest standards. A professionally replaced roof is not only covered by strong warranties but is also safer and more efficient, especially during severe weather.
Related Articles
Frequently Asked Questions
Can I just install a new metal roof over my old shingles? While some local codes might permit installing metal over a single layer of shingles, it’s rarely the best approach. A complete tear-off is the only way to properly inspect the roof deck for rot or damage, which is a step you absolutely cannot skip. Laying metal over an uneven or compromised surface can lead to problems down the road. Starting with a clean, solid deck is the best way to ensure your new roof performs as it should for decades.
Aren't metal roofs incredibly noisy when it rains? This is a common myth, but the reality is quite different. The old image of rain hammering on a tin barn roof doesn't apply to modern residential metal roofing. When installed correctly over a solid roof deck with proper underlayment and attic insulation, a metal roof is no louder than a traditional asphalt shingle roof. The layers underneath do an excellent job of muffling the sound, so you can enjoy the rain without the racket.
What’s the real upfront cost difference between metal and shingles? I won't sugarcoat it: a metal roof is a bigger upfront investment than an asphalt shingle roof. However, it's important to look at the full picture. A metal roof can last 50 years or more, while you might have to replace a shingle roof two or even three times in that same period. When you factor in the longevity, minimal maintenance costs, and potential energy savings, the lifetime value of a metal roof often makes it the more economical choice.
How do I know if my roof deck is too damaged for a new roof? After you remove the old shingles, you need to carefully walk over every square foot of the exposed wood deck. If you feel any sponginess, softness, or "give" under your feet, that's a red flag for rot. You should also look for any dark water stains or areas where the wood is splintering and falling apart. If you only find one or two small problem areas, you can likely cut them out and patch them. If the damage seems widespread, it's a sign of a bigger issue that a professional should evaluate.
My roof has a steep pitch and a chimney. Does that make a DIY installation much harder? Yes, absolutely. A simple, low-slope gable roof is one thing, but features like a steep pitch, valleys, dormers, or chimneys dramatically increase the project's complexity and risk. Each of these elements requires precise, multi-layered flashing to create a waterproof seal, and this is where experience really matters. An improperly flashed chimney is one of the most common causes of major leaks. For any roof that isn't a straightforward shape, I strongly recommend calling a professional.