The Best Exterior Paint for Wood: Our Top Picks

Stephen Griswell • March 19, 2026
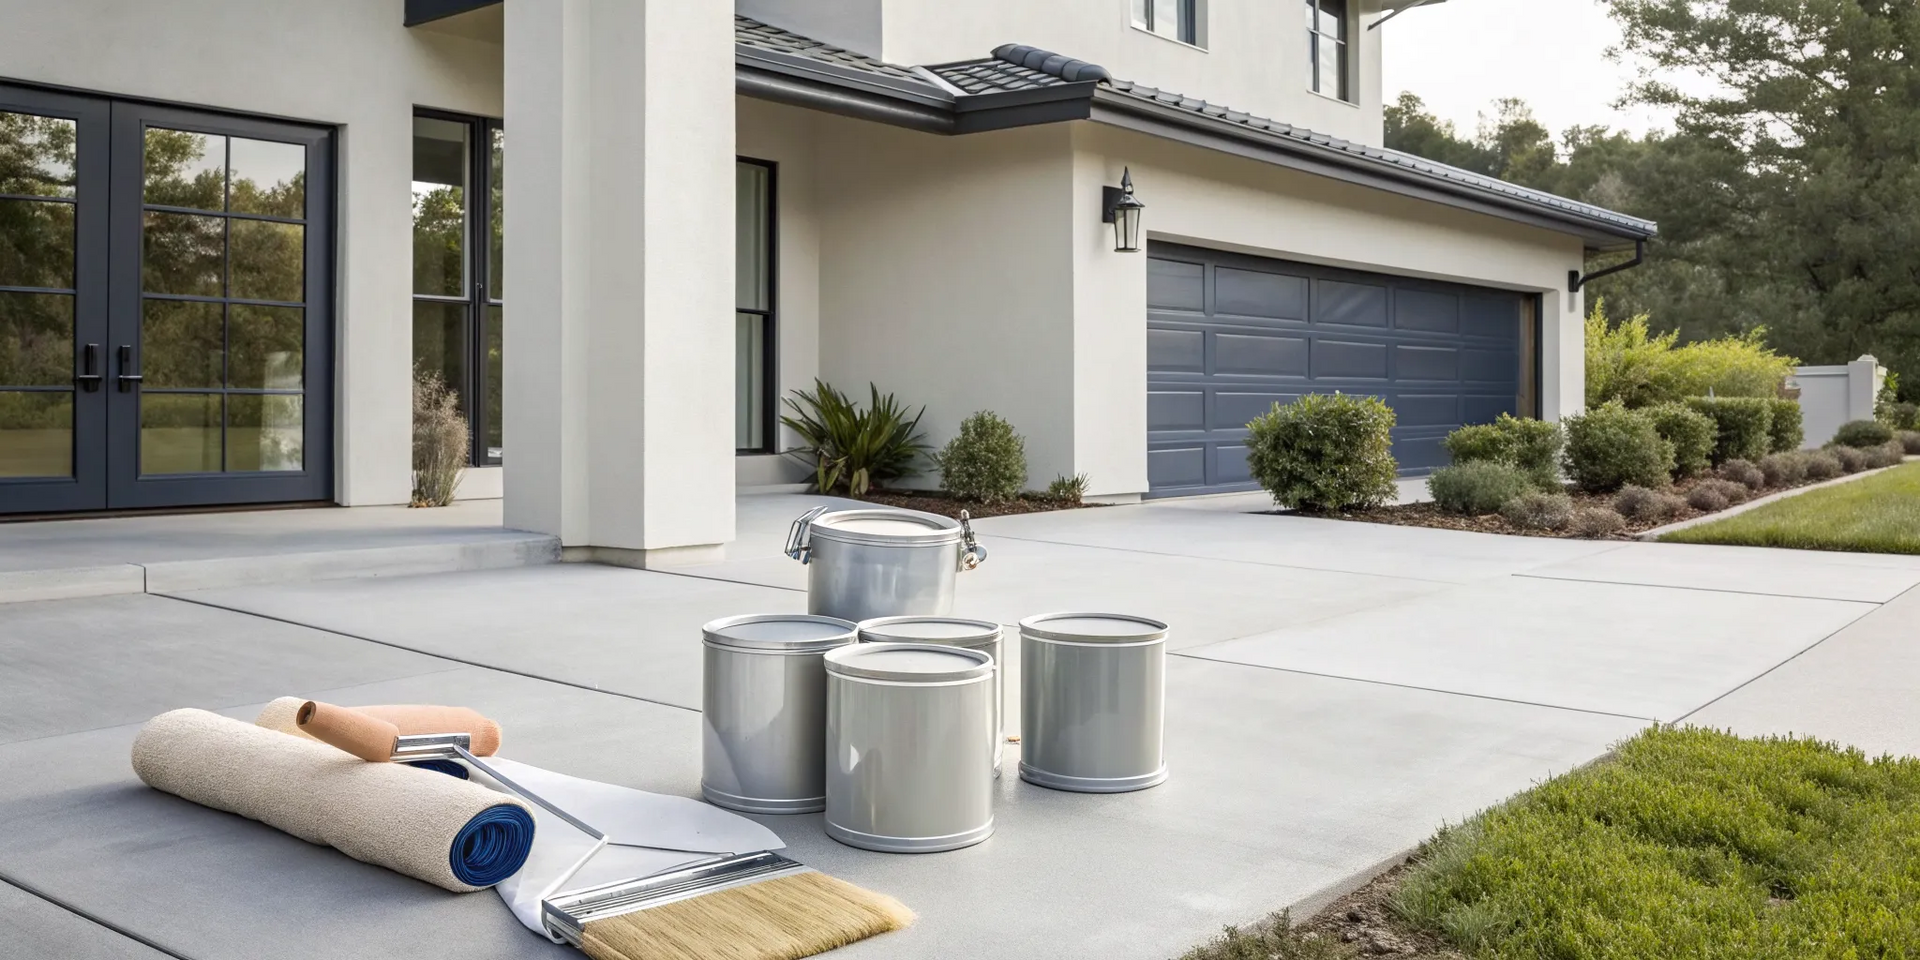
A fresh coat of paint is one of the most impactful ways to update your home’s curb appeal. But the secret to a job that lasts isn’t just in the can you buy; it’s in the preparation you do beforehand. The most expensive paint in the world will fail if it’s applied to a dirty or poorly prepped surface. Taking the time to properly clean, sand, and prime your wood is the single most important step for a durable, professional-looking finish. In this guide, we’ll cover those crucial prep steps and show you how to choose the best exterior paint for wood to protect your hard work.


CONTACT US


Key Takeaways

  • Choose the Right Formula for Wood: A high-quality acrylic latex paint is your best bet for exterior wood. It offers the flexibility needed to handle temperature changes without cracking and provides superior protection against moisture and UV damage.
  • Prep Work is the Key to Longevity: The secret to a paint job that lasts is the prep work. Taking the time to properly clean, sand, and prime the wood surface ensures the paint adheres correctly and gives you a smooth, durable finish.
  • Consider the Specific Surface: The paint for your siding isn't always the best choice for your deck or trim. Select products designed for specific uses, like floor paint for decks, and choose a sheen that offers the right balance of durability and style for the area.

What to Look for in an Exterior Wood Paint

Choosing the right exterior paint can feel like a huge decision. Walk into any home improvement store, and the wall of color swatches and different paint types is enough to make anyone’s head spin. But the secret to a beautiful, long-lasting finish isn’t just about picking the perfect shade of blue. The best paint for your home’s wood exterior is one that acts as a shield, protecting your investment from the elements while keeping its color true for years.

Think of exterior paint as your home's first line of defense. It needs to be tough enough to handle everything from scorching summer sun to heavy rain and humidity. When you're comparing cans, focus on three key factors: how well it will stand up to the weather, how well it covers the surface and holds its color, and how easy it is to work with. A high-quality paint will excel in all three areas, saving you from the headache of peeling, fading, and premature repainting. Making a smart choice now means less work and more enjoyment down the road.

Weather Resistance and Durability

Here in Georgia, our homes face intense sun, high humidity, and sudden storms. That’s why your exterior paint needs to be incredibly durable. Look for a formula that offers excellent weather resistance. The best options are designed to fend off damage from moisture and harsh UV rays, which can cause paint to break down and fade. For wood surfaces, a "100 percent acrylic" latex paint is often the top recommendation. Its flexibility allows it to expand and contract with the wood as temperatures change, which means it’s far less likely to crack and peel over time. This durability is a key part of our exterior renovations philosophy.

Coverage and Color That Lasts

Have you ever had to apply three or four coats of paint just to cover an old color? That’s often a sign of a lower-quality paint. Premium exterior paints contain more high-quality solids and pigments, making them thicker and more effective at hiding what’s underneath. This means you’ll get better coverage with fewer coats, saving you time and effort. These better ingredients also help the color stay vibrant and resist fading from sun exposure. A quality paint job can keep your wood siding looking fresh for up to seven years, making it a worthwhile investment in your home’s curb appeal and protection.

Ease of Application and Cleanup

A great paint job starts long before you dip a brush. Proper surface preparation is the most critical step for a lasting finish. Before you begin, always clean the wood surface thoroughly, let it dry completely, and scrape away any old, flaking paint. This ensures the new paint can bond properly. When it comes to the paint itself, latex and acrylic formulas are popular for a reason. They tend to dry quickly, often ready for a second coat in just a few hours. Plus, cleanup is simple, requiring just soap and water. This makes the entire painting process more efficient, whether you’re tackling it yourself or hiring professionals.

Oil vs. Latex vs. Acrylic: Which Paint is for You?

Walking down the paint aisle can feel overwhelming, but it gets easier when you understand the three main types of exterior paint: oil, latex, and acrylic. Each has unique strengths suited for different jobs. Choosing the right one is the first step toward a paint job that not only looks great but also protects your home’s exterior for years to come. Let's break down the pros and cons of each to help you decide.

Oil-Based: The Heavy-Duty Option

Oil-based paint is the classic choice for durability. It creates a tough, hard finish that stands up incredibly well to moisture and daily wear, making it ideal for high-traffic areas like porch floors and trim. Its slow drying time allows the paint to level out into a beautifully smooth coat. The downsides are a strong odor from volatile organic compounds (VOCs) and a more involved cleanup process that requires mineral spirits. It’s a powerful option when you need maximum protection for specific parts of your home.

Latex: The All-Around Performer

For a user-friendly experience, latex paint is a fantastic choice. These water-based paints have a low odor, dry quickly, and clean up easily with just soap and water. The biggest advantage of latex is its flexibility. It expands and contracts with the wood as temperatures change, which helps prevent cracking and peeling over time. This quality makes it an excellent choice for large surfaces like your home's exterior siding. Modern latex formulas also provide great coverage and stand up well to sunlight, keeping your home looking fresh.

Acrylic: The Flexible and Vibrant Choice

Think of acrylic paint as a premium, high-performance version of latex. In fact, most modern latex paints are acrylic blends. A 100% acrylic formula offers superior durability, adhesion, and flexibility, making it a top-tier choice for almost any exterior wood surface. Acrylics are especially good at resisting UV damage, so your colors will stay vibrant for longer. While it’s incredibly tough, it may not form the same rock-hard shell as an oil-based paint for surfaces that get a lot of scuffs. For most projects, however, acrylic is a smart investment.

How to Choose the Right Exterior Paint for Your Project

Picking the right exterior paint feels like a big commitment, but it doesn't have to be overwhelming. When you know what to look for, you can confidently choose a paint that will protect your home and look fantastic for years. It really comes down to three key things: your local weather, the condition of your wood, and finding the sweet spot between your budget and long-term quality. Thinking through these points will help you narrow down your options and make a choice you’ll be happy with.

Consider Your Local Climate

Here in Georgia, our homes deal with a lot, from intense summer sun and high humidity to sudden rainstorms. These conditions can be tough on exterior paint. That’s why it’s so important to choose a paint specifically formulated to handle our climate. Look for paints with excellent resistance to moisture and mildew, which can be a real issue in humid environments. You’ll also want a formula that can withstand strong UV rays without fading or cracking. A high-quality, weather-resistant paint acts as a shield for your wood, preventing damage and keeping your home looking fresh no matter what the forecast brings.

Assess Your Wood's Type and Condition

Before you even think about opening a can of paint, take a close look at the wood you’ll be working with. Is it smooth or rough? Is the old paint peeling, or is the wood bare? The condition of the surface dictates your prep work, which is the true secret to a lasting paint job. You’ll need to thoroughly clean the surface, let it dry completely, and scrape away any loose or flaking paint. This ensures the new paint can adhere properly. And don’t forget the primer. Even the most expensive paint will fail if it’s applied over a poorly prepped surface or a low-quality primer.

Balance Your Budget with Long-Term Value

It can be tempting to go for the cheapest paint on the shelf, but investing in a higher-quality product often saves you money and hassle down the road. The best exterior paints are designed for durability. They resist fading, chalking, and peeling, which means you won’t have to repaint nearly as often. Think of it as an investment in your home’s protection and curb appeal. Studies comparing different brands often show that premium paints hold their color and finish far better over time. When you factor in the cost of repainting sooner, a top-performing paint proves to be the more economical choice.

Our Top Picks for Exterior Wood Paint

With so many paint cans lining the shelves, picking the right one can feel like a huge decision. You want something that looks great and holds up against Georgia's sun and humidity. To make it easier, we've sorted through the options for you. Here are our top picks for exterior wood paint, broken down by budget and performance. Whether you're looking for a premium finish that lasts for over a decade or a reliable paint for a weekend DIY project, you'll find a great choice here. Our exterior renovation team often uses these brands for their reliability and beautiful finish.

Pro-Grade Picks: Sherwin-Williams and Benjamin Moore

When you want the absolute best protection and color retention, professional-grade paints are worth the investment. Sherwin-Williams Emerald Exterior Acrylic Latex is a top contender, known for its incredible resistance to moisture, mildew, and fading. It’s a formula built to last, often for 12 to 15 years. Another fantastic option is Benjamin Moore Aura Exterior Paint. It uses special Color Lock technology to keep your chosen shade vibrant and true, even after years of sun exposure. These paints are considered some of the best paints for exterior wood and are trusted by professionals for high-quality results.

Quality Mid-Range Options: Behr and Sherwin-Williams

You don't have to splurge to get a high-quality finish. There are excellent mid-range paints that offer a great balance of performance and price. Sherwin-Williams Duration Exterior Acrylic Latex is a standout because it's self-priming and flexible, which helps it resist peeling and blistering over time. Another one to consider is Behr Pro e600. In some multi-year tests, it was named one of the best exterior paint options and happens to be one of the most affordable in its class. These paints are perfect for homeowners who want a durable, beautiful finish without the premium price tag.

Budget-Friendly Paints That Perform: Rust-Oleum

Working on a budget doesn't mean you have to settle for a subpar paint job. There are several affordable paints that deliver impressive results, especially for smaller projects or quick refreshes. Rust-Oleum 2X Ultra Cover is a popular choice for DIYers because it provides amazing coverage, often requiring just a few light coats to completely transform a surface. Another solid option is Valspar Duramax, which gives you a durable finish without a hefty investment. These paints are great for projects like fences, sheds, or trim, proving that a fresh look can be both beautiful and budget-friendly.

Don't Skip the Prep: Getting Your Wood Ready for Paint

The secret to a paint job that looks incredible and lasts for years isn’t just about the paint you choose; it’s about the work you do before you even open the can. It’s tempting to jump right to the color, but skipping prep is the fastest way to a finish that chips, peels, and fades. Taking the time to properly prepare your wood surfaces ensures the paint can do its job, giving you a durable, professional-looking result that protects your home. Think of it as building a strong foundation for your new color. When it comes to exterior renovations, proper preparation is everything.

The Essentials: Clean, Sand, and Prime

First things first: your wood needs to be completely clean. Over time, exterior surfaces collect dirt, pollen, and mildew that prevent paint from sticking. Use a pressure washer on a low setting or a stiff brush with a good cleaning solution to scrub everything down. After rinsing, let the wood dry completely, which can take a day or two. Next, you’ll want to sand the surface. After scraping away any loose or peeling paint, a light sanding with medium-grit sandpaper smooths out rough spots and gives the new paint a slightly textured surface to grip. Finally, apply a coat of high-quality exterior primer. This step is crucial because it seals the wood, prevents natural wood oils and tannins from bleeding through, and creates a uniform base so your final color looks even and vibrant.

Primer vs. All-in-One Paint: When to Use Each

You’ve probably seen paints that claim to have primer mixed in. While these all-in-one products can be convenient for a quick refresh on a surface that’s already in great shape, they aren’t always the best choice. For bare wood, stained wood, or surfaces with imperfections, a separate, high-quality primer is your best bet for proper adhesion and durability. Primer is specifically formulated to bond to the surface and block stains, while paint is formulated for color and weather resistance. Combining them is a compromise. Using a dedicated primer is especially important when painting old wood siding or making a drastic color change, as it creates a reliable bond that self-priming paints can’t always match. Don't try to save money here; a quality base coat is a smart investment in your paint job’s longevity.

Common Prep Mistakes to Sidestep

Even the best paint won't perform well if it’s applied over a poorly prepped surface. One of the biggest mistakes is painting over dirty or damp wood. Always clean the surface well and give it plenty of time to dry completely, as trapped moisture will cause the new paint to bubble and peel. Another common error is skipping the scraping and sanding. If you paint over loose, flaky paint, you’re just gluing the new coat to an unstable foundation that will fail. Finally, don't undermine your project with a low-quality primer. It’s the critical link between the wood and your topcoat, so a cheap primer won't seal or bond properly, leading to a disappointing finish. If the prep work feels overwhelming, it’s a good sign to call in the pros at Total Roof Solutions to get the job done right.

Matching the Paint to the Project

Not all exterior surfaces are created equal, and the paint you choose for your siding might not be the best fit for your deck or trim. Different areas of your home face unique challenges, from high-foot traffic on a porch to direct sun exposure on shutters. Thinking about each part of your home as a separate project helps you select a paint that will not only look great but also provide the right kind of protection where it’s needed most. Let’s break down the best paint choices for the most common wood surfaces on your home’s exterior.

The Best Paint for Wood Siding

Your home’s siding is its first line of defense against the elements, so you need a paint that’s tough, durable, and built to last. For wood siding, a high-quality acrylic latex paint is almost always the right call. It’s flexible enough to expand and contract with the wood as temperatures change, which prevents cracking and peeling. A product like Sherwin-Williams Emerald Exterior Acrylic Latex Paint is a fantastic choice because it offers a mildew-resistant coating and a durable surface that stands up to dirt and rain. When you’re choosing a paint for your siding, always consider your local climate; here in Georgia, that means prioritizing moisture and mildew resistance.

Choosing Paint for Trim and Shutters

Trim and shutters are the finishing touches that give your home character, so the paint you choose for them matters. Since these are high-contact areas that you’ll likely want to clean from time to time, the paint’s finish is key. A satin or semi-gloss finish is ideal for trim and shutters because it’s durable and easy to wipe down. A glossier finish can create a sharp, modern look, while an eggshell or satin finish offers a softer, more rustic feel. This is your chance to add a pop of personality, so don't be afraid to pick a paint sheen that complements your siding and reflects your personal style.

Durable Paints for Decks and Fences

Decks and fences take a serious beating from both weather and wear. Between foot traffic, direct sunlight, and constant exposure to rain, these surfaces require a paint that’s exceptionally tough. You need a product specifically formulated for horizontal surfaces that can resist fading, peeling, and scuffing. While a spray paint like Rust-Oleum 2X Ultra Cover can work for quick touch-ups on a fence, be mindful of overspray. For a deck, a dedicated porch and floor paint will provide a much more durable, long-lasting finish. Always remember that proper prep, including a thorough cleaning and priming, is the most important step for a deck paint job that holds up.

Setting Expectations: How Long Should Your Paint Job Last?

A fresh coat of paint is one of the most satisfying home updates, but it’s also a significant investment of time and money. So, it’s completely fair to wonder, "How long will this actually last?" The answer isn't set in stone, as it depends on the quality of the paint, the prep work, and your local climate. However, you can get a pretty good idea of what to expect and how to get the most out of your paint job. Let's break down the typical lifespan and what you can do to extend it.

Expected Lifespan by Paint Type

Generally, a quality exterior paint job on wood siding should last between five and seven years, and sometimes even up to 10 years under ideal conditions. The key word here is quality. Higher-end acrylic latex paints often offer the best durability and color retention, giving you a longer-lasting finish. Cheaper paints might save you money upfront, but they often fade, crack, or peel much sooner, leading to more frequent repainting. Think of it as an investment: a premium paint, applied correctly, provides better protection and maintains its look for years, saving you from extra work down the road.

How Weather Impacts Durability

Here in Georgia, our homes face a unique set of challenges. The intense summer sun, high humidity, and heavy rain can be tough on exterior paint. UV rays can cause colors to fade, while moisture can lead to mildew, blistering, and peeling if it gets behind the paint film. That’s why it’s so important to choose a paint specifically formulated to handle these conditions. Look for paints with UV protection and mildew-resistant properties. A durable paint acts as the first line of defense for your home’s exterior, protecting the wood from the elements and keeping it looking great despite the weather.

Creating a Simple Maintenance Plan

You can help your paint job last longer with a little bit of care. The most critical step happens before a single drop of paint is applied: proper surface preparation. As the pros say, a paint job is only as good as the surface underneath it. This means ensuring the wood is clean, dry, and free of any peeling paint. Once the paint is on, a simple annual inspection can work wonders. Gently wash the siding to remove dirt and mildew, and keep an eye out for any small cracks or chips. Touching up these minor issues early prevents them from turning into bigger problems that require a full repaint. This proactive approach is a core part of our exterior renovation services.

Pro Tips for a Flawless, Long-Lasting Finish

A beautiful paint job is about more than just picking the right color. The real secret to a finish that stands the test of time lies in the application and the upkeep. With a few professional tricks up your sleeve, you can ensure your hard work pays off with a vibrant, durable coat that protects your home for years. Whether you’re tackling a small project or planning a full exterior refresh, these tips will help you get a professional-quality result.

Of course, if the project feels too big or you want a perfect finish without the hassle, our team at Total Roof Solutions is always here to handle your exterior painting needs from start to finish.

Application Tips for a Smooth Finish

The foundation of a great paint job is laid long before you open the can. For maximum adhesion, you have to start with a surface that is clean, dry, and properly primed. Skipping this step is a recipe for peeling and chipping down the road. It’s also smart to invest in high-quality paint; it really does last longer and offers better protection against moisture and fading. Finally, pay attention to the weather forecast. Most paints need temperatures above 50°F for proper curing, so painting on a mild, dry day is key to achieving that smooth, durable finish you’re after.

Your Guide to Seasonal Touch-Ups

To keep your exterior paint looking its best, a little seasonal maintenance goes a long way. After a year or two, walk around your home and look for any small chips, cracks, or areas where the paint has worn thin, especially on window sills and door frames. Addressing these spots early prevents moisture from getting underneath the paint and causing bigger problems. When you do touch-ups, remember that applying multiple thin coats can offer better protection from the sun than one thick one. Keeping a small amount of your original paint properly sealed makes these quick fixes simple and seamless.

Know the Signs: When It's Time to Repaint

Even the best paint job has a lifespan. A quality exterior paint can keep stucco looking fresh for up to 10 years and wood siding for about seven, but climate and prep work play a huge role. Look for widespread cracking, peeling, or bubbling, which are clear signs that the paint is failing and no longer protecting your wood. Another telltale sign is significant fading or a chalky residue that comes off when you touch it. If you see these issues across large areas, it’s time to plan for a full repaint. Remember, even the most expensive paint won't last if it was applied over a poor-quality primer or a dirty surface.

Related Articles


CONTACT US


Frequently Asked Questions

What's the single most important factor when choosing an exterior paint for a home in Georgia? For our climate, weather resistance is everything. You need a paint that can handle intense humidity, heavy rain, and strong UV rays without breaking down. Look for a 100 percent acrylic latex formula, as its flexibility helps it expand and contract with the wood during our temperature swings, which prevents cracking and peeling.

Is it really necessary to use a separate primer, or can I just use a paint-and-primer-in-one? While all-in-one products are convenient for surfaces in good condition, a separate, high-quality primer is almost always the better choice for exterior wood. Primer is specifically designed to seal the wood, block stains from bleeding through, and create a strong bond for the topcoat. This step is especially critical for bare wood or when making a big color change, as it ensures a more durable and even finish.

How do I decide between latex, acrylic, and oil-based paints? Think about the specific job. Oil-based paint creates a very hard, durable finish that's great for high-traffic areas like porch floors. However, modern acrylic latex paints are the best all-around choice for siding. They offer excellent flexibility to prevent cracking, great color retention against sun damage, and are much easier to clean up.

Does spending more on a premium paint brand actually make a difference? Yes, it absolutely does. Premium paints contain higher-quality ingredients, like more pigments and better binders. This means you get better coverage with fewer coats and a finish that resists fading and chalking for much longer. While the upfront cost is higher, a top-tier paint can last years longer than a budget option, saving you the cost and effort of repainting sooner.

My old paint is just a little flaky. Do I really have to scrape it all off before repainting? Yes, you need to address any and all unstable paint. Painting over flaking or peeling spots is like building on a shaky foundation; the new paint will just peel off along with the old layer underneath. Taking the time to scrape and sand those areas creates a solid surface for the new paint to grip, which is the key to a long-lasting finish.
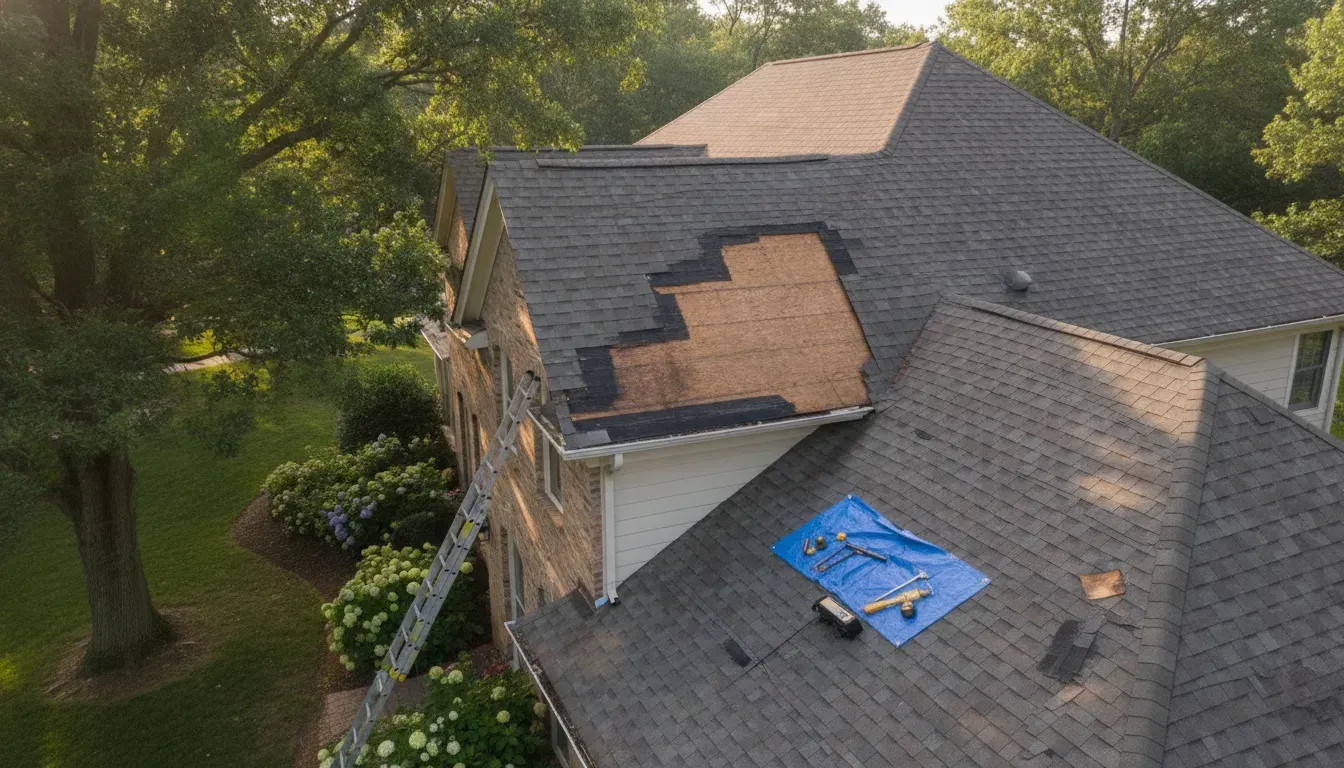
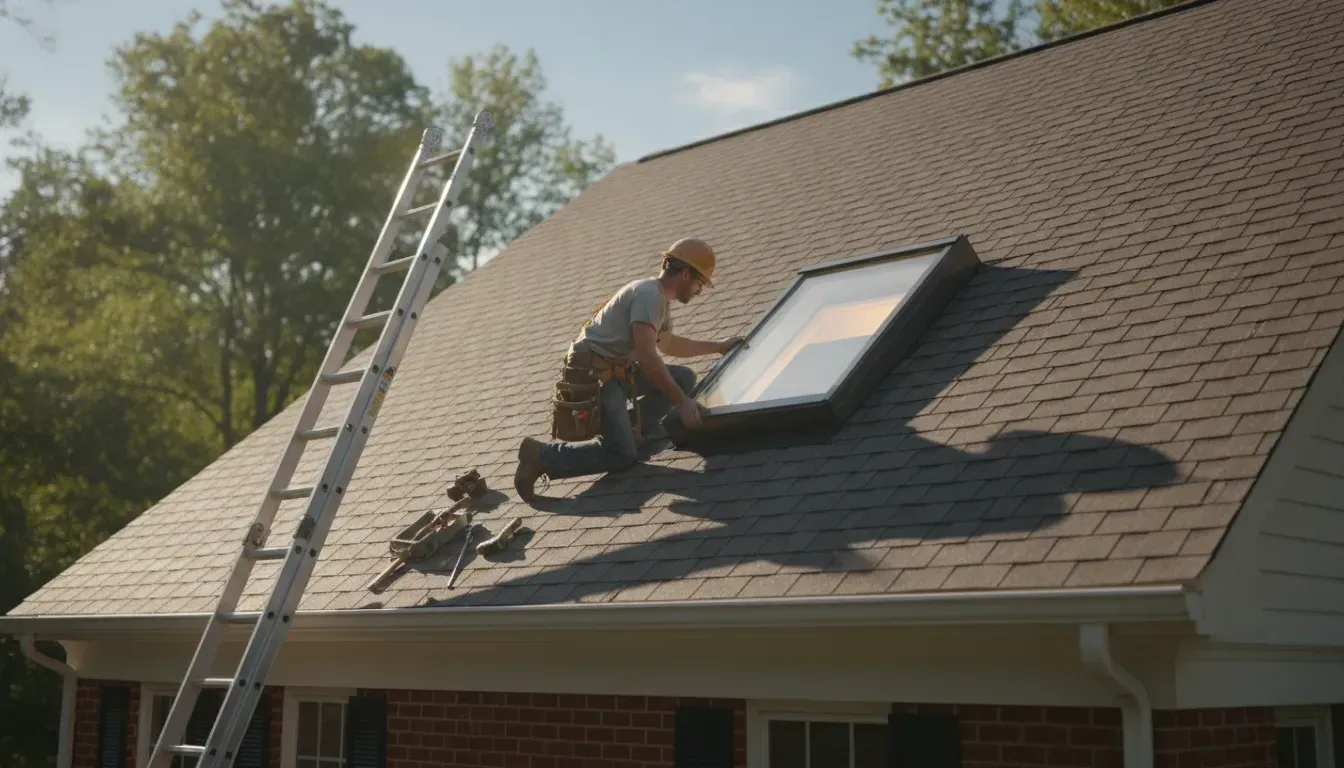

By MEGA MEGA August 4, 2026
Schedule a free roof inspection. Get the 2026 metal roof installation cost Atlanta guide with material prices, labor costs, and ROI for Georgia homes.
By MEGA MEGA August 3, 2026
Schedule a free roof inspection in Georgia. Learn how to extend your asphalt shingle roof lifespan with proper ventilation, maintenance tips, and premium Owens Corning shingles.
By MEGA MEGA July 31, 2026
The body content of your post goes here. To edit this text, click on it and delete this default text and start typing your own or paste your own from a different source.
Commercial building with a flat roof under Atlanta sky, professional roofing technician inspecting t
By MEGA MEGA July 29, 2026
Schedule a free commercial roof inspection in Atlanta. Learn how commercial flat roof maintenance protects your building, extends system life, and prevents costly repairs.
A professional roofer installing architectural shingles on a residential home in McDonough Georgia on a sunny day
By MEGA MEGA July 27, 2026
The body content of your post goes here. To edit this text, click on it and delete this default text and start typing your own or paste your own from a different source.
A beautifully maintained Georgia home with a warm-toned asphalt shingle roof under a bright blue sky
July 24, 2026
Get a free roof inspection in McDonough. Learn what asphalt shingle roof lifespan Georgia homes expect, compare shingle types, and spot signs of wear.
By MEGA MEGA July 23, 2026
Schedule a free roof inspection in Atlanta to decide if roof repair vs replacement Atlanta is right for your home. Compare costs, warning signs, and local options.
Professional seamless aluminum gutter installation on an Atlanta home with gutter guard system
By MEGA MEGA July 21, 2026
Schedule a free gutter replacement Atlanta consultation today. Compare seamless aluminum gutters, 6-inch vs 5-inch sizing, costs, and lifespans for your home.
By MEGA MEGA July 17, 2026
Georgia storm seasons leave thousands of homeowners with hidden roof leaks and missing shingles each year. Failing to file your claim quickly can lead to expensive repairs that insurance will not cover later. Schedule a free roof inspection with Total Roof Solutions today. A storm damage roof insurance claim Georgia homeowners submit must prove that a recent weather event caused clear and direct harm to the home. Most standard policies in the state cover perils like wind, hail, and falling trees, but you must act fast to meet strict deadlines. While Georgia law often gives you 12 to 24 months to start a claim, filing within 60 days prevents many insurance claim denials. A professional roof inspection gives you the written proof needed to show that a storm caused the leaks or missing roof shingles. Working with a top contractor helps note every bit of damage. That way you get the full new roof value that your policy pays. It is vital to know which perils your policy protects before you start the filing process. Read on to learn what types of storm damage your homeowners insurance covers in Georgia and how to navigate the claims process. Storm Damage Roof Insurance Claim Georgia: What Types of Storm Damage Does Homeowners Insurance Cover in Georgia? Georgia storms bring high winds and large hail that can hurt your roof. Most home insurance plans in the state help pay for this kind of loss. This includes damage from wind, hail, and trees that fall during a storm. If you have a storm damage roof insurance claim in Georgia , you need to know what your plan covers. Sudden damage from lightning, fire, or the weight of ice and snow is also usually covered by standard plans. You should check your roof right after any large storm to find signs of loss. Common storm damage types Most Georgia plans cover a set of common storm events. These are often called perils in your plan papers. They include: High winds and windstorms Hail and falling ice Falling trees and debris Lightning and fire Weight of ice and snow Wind and hail are the top causes of roof loss for Georgia homes. A strong wind can lift or tear off your shingles. It can also blow large tree limbs onto your house. Hail can leave dents or cracks that let water into your home over time. Most plans cover these issues because they are sudden and happen by chance. You can find more details in our guide on how to get insurance to pay for roof replacement in Georgia . It is vital to act fast so you can fix these problems before they get worse. Georgia homeowners often have 12 to 24 months to file a claim after a storm hits. But it is best to file within the first 30 to 60 days. This makes it easier to prove that the storm caused the damage you see. You can read more about the insurance claim process for roof damage in Georgia to see the common steps. Filing fast helps you avoid more loss from leaks or mold that can grow in your attic. Items not covered by your policy Your insurance will not pay for every type of roof problem. Plans do not cover damage that happens slowly over many years. This includes normal wear and tear or a roof that has reached the end of its life. If your roof has rot or mold because you did not fix a small leak, the insurance company may deny your claim. Poor work from a past repair is also not covered by most plans. Keeping your roof in good shape helps you stay ready for any storm. You should have a pro look at your roof once a year to find small issues. Neglect is one of the main reasons a claim might be denied. Insurance is for sudden events, not for a roof that has been ignored for a long time. If the wood under your shingles is soft or rotten from years of leaks, the company will likely not pay to fix it. This is why a pro check is so helpful after a storm. It can show the difference between new storm damage and old wear. Knowing your cash value options When you file a claim, the insurance company will look at how they pay for the loss. There are two main ways they do this. FeatureReplacement Cost Value (RCV)Actual Cash Value (ACV)What it paysFull cost to replace your roof with new materialsDepreciated value based on roof age and wearBest forNewer roofs and homeowners who want full coverageBudget policies with lower premiumsOut-of-pocket costDeductible onlyDeductible plus depreciation amountCommon in GeorgiaPreferred by most homeownersOften used for older roofs or lower-cost plansClaim outcomeYou get a new roof of similar qualityYou pay the gap between depreciated value and actual cost Replacement Cost Value (RCV) pays the full cost to get a new roof of the same kind. You only have to pay your deductible. Actual Cash Value (ACV) is different. ACV takes away money for the age and wear of your old roof. This means you get less money if your roof is old. You will have to pay more out of your own pocket to get a new roof. You should also check your deductible for wind and hail. In Georgia, many plans use a part of your home's value for this cost. This is often between 1% and 5%. If your home is insured for $300,000 and you have a 2% deductible, you must pay $6,000 yourself. Knowing roofing insurance coverage in Georgia can help you plan for these costs before a storm hits. How to Document Storm Damage Before Filing Your Claim Taking the right steps after a storm can make the difference between a fast approval and a long dispute. The storm damage roof insurance claim Georgia process depends on clear proof. You should start collecting evidence as soon as the weather clears and it is safe to go outside. Proper records help your adjuster see the full scale of the loss and ensure you get the funds needed for repairs. Prioritize safety and ground inspection Safety is the most vital part of the process. The Georgia Office of Commissioner of Insurance advises owners to avoid risks while checking for damage. Do not climb on your roof to find leaks or missing shingles. Wet surfaces and loose materials can lead to falls. Instead, walk around your home at a safe distance and look for issues from the ground. Look for shingles in the yard or visible dents in your gutters and siding. If you see fallen trees or debris, take note of where they hit the structure. You can use a pair of binoculars to get a closer view of the ridge and eaves. This ground-level check keeps you safe while providing a clear list of visible issues for your agent. Capture clear photos and videos Visual proof is the backbone of your claim. Take high-quality photos and videos of all visible damage from many angles. Start with wide shots that show the entire house to give the adjuster context. Then, move closer to document specific spots like bruised shingles, cracked tiles, or dented metal vents. Do not forget to record the date and time of the storm. Local weather records can back up your claim, but your own photos are hard to dispute. Keep a digital folder of these files so you can share them quickly with your insurer. Having a visual timeline of the damage helps prove that the issues were caused by a single event. Check for interior signs of leaks Roof damage often shows up inside your home before you see it on the outside. Go into your attic with a bright light to search for damp insulation or water spots on the wood. Check the ceilings and walls in your top-floor rooms for new stains or bubbling paint. These interior signs are key evidence that the roof system has failed. Note any areas where water is dripping or where you smell musty odors. Take pictures of these spots just as you did for the exterior. Interior damage often signals that you need hail damage roof repair and insurance help right away. Documenting these leaks shows the insurer that the damage is urgent and affects the safety of your home. Get a professional roof inspection While your own photos are helpful, an official report from a pro is much stronger. A trained contractor can find hidden issues that a homeowner might miss. They will check for small cracks, compromised seals, and granule loss that lead to long-term leaks. This official report provides the technical details that insurers trust most. Call a local expert to schedule a full storm damage checkup. Walk with the pro to point out the interior leaks you found. Ask for a written summary that lists all damaged areas and parts. Request a repair estimate that uses current market rates for Georgia. Keep this report ready for when the insurance adjuster visits your site. A professional inspection significantly lowers the risk of a claim denial. In Georgia, most owners have 12 to 24 months to file a claim , but acting fast is best. A pro can also meet with the insurance adjuster to make sure all damage is seen. This step ensures your claim is based on facts rather than a quick glance. The Step-by-Step Roof Insurance Claim Timeline in Georgia Filing a storm damage roof insurance claim in Georgia is a set process with clear steps. Knowing what happens at each stage helps you stay ready and keeps the work on track. Most claims move from the first call to a full fix in just a few weeks if you have the right help. Total Roof Solutions offers hail damage roof repair and insurance support to guide you through this cycle. How the claim starts The path begins with a full check of your home after a storm. You should look for missing shingles or leaks, but a pro can find hidden hits that most people miss. Once you have proof of loss, you call your carrier to start the case. They will give you a claim number and set a time for their expert to visit. You should share any photos or notes you have of the storm at this stage to help your case. File your claim with the insurer. Call your carrier or use their app to report the loss. Give them the date of the storm and a brief list of the harm you found. They will assign an adjuster to look at the roof and see how much it will cost to fix. Meet with the insurance adjuster. The adjuster will walk your roof to find signs of storm hits. It is vital to have your roofing contractor there for this meeting. They make sure the adjuster sees all the damage so nothing gets left off the report. A documented inspection is the best way to prove your loss. Review the first estimate. Your carrier will send a list of what they will pay for. This often takes about a week to arrive. This estimate shows the cost of materials and labor for the job. Do not worry if the first offer seems low, as there are ways to fix gaps in the budget. Submit a supplement if needed. Many times, the first price from the carrier is not enough to cover the full work. Your contractor can file a supplement with the insurer to ask for more funds. This covers things like code updates or extra materials found once the old roof is off. This step ensures the job is done right. Start the roof repairs. Once the budget is set, you can pick your shingle color and set a date. Most roof jobs in Georgia take just one to three days to finish. Total Roof Solutions works fast to get your home back in top shape. The team cleans the yard and hauls away old junk when the work is done. Close out the claim. After the work is done, your contractor sends proof to the insurer. The carrier then sends the last payment. You will pay your part, which is the deductible, and the job is marked as done. Always keep your final bills for your home records. Working with the adjuster The meeting with the insurance adjuster is the most important part of the whole timeline. You want to make sure they see every hail hit and wind-torn shingle. Having a pro from Total Roof Solutions there helps keep things fair. We know what to look for and can speak the same language as the adjuster. This team effort helps to get your claim approved without long delays or missed spots. After the adjuster leaves, it may take a few days to get your first check. This check often covers the actual cash value of the roof now. You will get the rest of the funds once the new roof is on your home. This ensures the money goes toward the fix as planned. You can check the standard cost guides to see if your quote is in the right range for local rates. What Happens If Your Roof Insurance Claim Gets Denied? A denied storm damage roof insurance claim in Georgia can be stressful. Many homeowners feel stuck when they get a denial letter after a heavy storm. However, a denial is not always the final word on your roof repair. You have rights and steps you can take to get the coverage you need for your home. Common reasons for a claim denial Insurance firms in Georgia often deny claims for a few reasons. One common issue is the mix of old wear with new storm damage. If an adjuster thinks your roof was already weak due to age, they may not pay for the loss. Poor proof or missing the filing date can also lead to a quick denial. Old roof issues are another hurdle for many people. If you had leaks before the wind or hail hit, the firm might blame those older flaws. It is vital to show that the storm caused the new harm. You can learn more about roofing warranties and insurance differences to see how these two types of protection work for you. Steps to take after a denial If your claim is rejected, your first step should be to read the denial letter in full. This page lists the exact reasons why the firm will not pay. Once you know their stance, you can ask for a new check. You have the right to ask for a second look, mainly if you have new proof of damage. Getting a second opinion from a licensed expert is a smart move. A local pro can walk the roof with the adjuster to point out missed hail hits or torn shingles. If the firm offers a check that is too small, your pro can also file a supplement. As noted by industry experts, these filings help get the real cost of repairs when first bids fall short. Filing an appeal in Georgia You can file an official appeal with your insurance firm if you do not agree with their choice. During this task, you may need to give more photos, bids, or weather reports. Having a pro report from a local roof expert can help your case. This proof shows the firm that the storm was the main cause of the damage. Keep in mind that Georgia law has strict rules for these tasks. For example, state law prohibits roofing pros from waiving or rebating insurance deductibles for any homeowner. Always work with a team that follows these laws while helping you through the appeal. If you stay firm and gather the right facts, you can often turn a denial into a win. Why Choose Total Roof Solutions for Storm Damage Insurance Claims Total Roof is the best team to help with your storm damage roof insurance claim in Georgia. We have the skill and the tools to make sure your claim is right. Our team works hard to make the steps easy for you from start to finish. We help people in 16 plus counties from our office in McDonough. Expert Help with Your Claim We give a free roof check to find all signs of storm damage. Our reports are full of detail. They give the proof that insurance firms need to see. This helps you start your storm damage roof insurance claim in Georgia with trust. We do more than just find the damage. We also help you talk to your insurance agent. Our team can bill your insurance company. This means you do not have to handle the math or the files. We take the stress out of your roof claim. We know how the local laws and insurance rules work in Georgia. We also offer loans for those who need help to pay. If you need a new roof that costs more than 10,000 dollars, we can give you 500 dollars off. This helps you get a safe and strong roof for a fair price. Top Quality and Fast Work We are an Owens Corning Platinum Preferred Roofer. This is a top rank and only a few firms in Georgia have it. It means we use the best gear for every job. Our crew works fast to get your home back to normal. Most of our roof jobs finish in one to three days. You will not have to wait for weeks to get a safe roof. Our founder, Stephen Griswell, has a long family past in this trade. His dad and grand-dad were also builders. He has over 20 years of work in this field. He went to UGA and knows how to build roofs that stand up to our wind and hail. This local knowledge is key when you have a storm damage roof insurance claim in Georgia. We build every roof to last. Trusted and Local Team Our firm holds an A plus rating from the BBB. We are also TrustDALE proven. This shows we are a firm you can trust. We are licensed, bonded, and insured in Georgia. This keeps you and your home safe while we work. We treat every home like it is our own. You can count on us to be fair during the whole claim. Choosing a local team means we will be here for a long time. We know the towns we serve and we care about our neighbors. We have helped many people get the funds they need to fix their roofs. Let us show you why we are the top choice for storm damage work in Georgia. Frequently Asked Questions How long do I have to file a roof insurance claim in Georgia? Most often, Georgia homeowners have 12 to 24 months to file a claim after a storm. It is best to act fast and file within 30 to 60 days. As noted by industry experts, this helps show the damage is new. If you wait too long, the insurance firm might say the issues are from old age. Acting fast helps you get the money you need for repairs. Can a roofing contractor pay my insurance deductible in Georgia? No, Georgia law does not let roofers pay or waive your insurance deductible. This act is against the law and is seen as fraud. You must pay the out-of-pocket cost listed in your policy. Many Georgia policies use a deductible of 1% to 5% of the home's value for wind and hail. You can check your cost with your insurance agent to be sure. Should I call my insurance company or a roofing contractor first? You should call a local roofer for a free inspection before you call your insurance firm. A pro can find damage that you cannot see from the ground. They will give you photos and a report to use as proof. This step helps you avoid a claim if there is not enough damage for a payout. A pro inspection makes your claim stronger. What if the insurance estimate is lower than my roof repair cost? It is common for insurance firms to give a low first estimate for repairs. Your roofer can file a supplement to get more funds. This request covers the extra costs to fix the roof the right way. A good roofer will work with the adjuster to show these costs are fair. This process helps you get a safe and strong roof. Ready to schedule your free roof inspection in Georgia? If you do not file your claim soon, you might miss your chance to get help from your insurance firm before the time limit ends. Small holes from hail or wind that look tiny today can quickly turn into a major leak that rots the wood frame of your house. Waiting too long makes it hard to prove that the storm caused the damage which can lead to your claim being denied by the group. Setting up a visit with a pro to look at your roof now lets you find hidden problems and get your papers ready very early. Ready to schedule? Call (678) 752-8668 to schedule your free roof inspection and get expert help with your storm damage insurance claim today.
By MEGA MEGA July 14, 2026
 McDonough weather puts extreme stress on local roofs through four intense and clear seasons. These changing conditions test the strength of your shingles every month of the year. You might wonder how to start your own home care plan when the weather changes so often. To stay safe from rain and wind, you should look at the needs of each part of the year. The path begins with Spring Roof Maintenance in Georgia: Inspect and Prepare for Storm Season. Here is how. Roof Maintenance Tips: Spring Roof Maintenance in Georgia: Inspect and Prepare for Storm Season Spring in Georgia brings warm sun and green trees. But it also starts a rough time for your roof. From March through September, storms test how well your home stays dry. Taking a few small steps now can stop leaks before the next big rain. These roof maintenance tips help you stay ahead of the weather. Schedule a post-winter roof inspection The cold winter months can be hard on a home. Even in Georgia, ice and cold can cause roof parts to crack. To keep your home safe, you should schedule a roof inspection two times a year. Experts say the best times to check are in the spring and the fall. Regular checks help you find small leaks before they grow into big, costly problems. Checking your roof in the spring helps you find damage from winter winds. You should look for shingles that are loose, curled, or gone. Fixing these small spots now keeps your attic dry. It is cheaper to fix one shingle than to pay for a new roof after the wood rots. A quick check now saves you cash later. Clear your gutters for spring rain Georgia gets a lot of rain in the spring. If your gutters are full of old leaves, the water has no place to go. This can cause water to sit on the edge of your roof. It might also seep under the shingles and cause rot. Keeping your gutters clear is the best way to stop water from building up. Clogged drains often lead to mold growth in your attic space. Water that does not flow away can damage your walls and the base of your home. You should check your pipes to make sure they carry water away from the house. For more help, you can read our seasonal gutter maintenance tips for homeowners. Taking care of your drains is a vital part of keeping your home safe. Look for storm damage signs High winds can blow tree limbs onto your roof or tear shingles off. After a big storm hits, walk around your yard and look up. You do not need to get on a high ladder to see big problems. Look for these warning signs in your yard and home: Dark spots or stains on your attic ceiling. Piles of grit or sand from shingles in your gutters. Broken tree limbs resting on the roof surface. Bent or loose metal strips around the chimney. These are clear signs that you need a pro to look at your roof. A pro can find hidden cracks that you might miss from the ground. March and April are busy months for Georgia storms. Prepping your roof now gives you peace of mind when the sky turns gray. A clean roof and clear drains mean the water stays out of your home. By staying ahead of the clouds, you can make your roof last for a long time. Summer Roof Care: Heat, Humidity, and Algae Prevention The Georgia sun can be hard on your home. In Atlanta, summer heat often hits the mid-90s. With high humidity, the heat index can climb above 100 degrees Fahrenheit. These conditions test your roof every day. Without the right care, the hot sun can cause shingles to dry out or crack. Keeping up with roof maintenance tips helps your roof last longer during these hot months. Manage attic heat and airflow Your attic is the first line of defense against summer heat. When a roof lacks good airflow, attic heat can soar to 150 degrees Fahrenheit or more. This high heat bakes your shingles from the inside out. This can make the life of your roof much shorter. Good attic vents are vital for summer care. They help keep your attic cool and reduce the load on your AC unit. This is a key part of keeping your home safe. Make sure your vents are clear of dirt and nests. You should check that vents at the eaves and ridge are not blocked. Clean vents allow hot air to escape and fresh air to enter. According to North Carolina State University , home care is key to keeping your home value high. A cool attic prevents shingle damage and helps keep power bills low when the Georgia heat peaks. Stop algae and moss growth High humidity and rain create a place for algae and moss to grow. If you see dark streaks on your roof, it is likely a type of hardy algae. This algae feeds on the stone dust in shingles. The growth of moss or algae is a sign that a roof needs more care. Moss can trap water against the roof. This may lead to rot or leaks if you do not fix it fast. Keeping the roof clean is a simple way to avoid these issues. To prevent these problems, keep your roof clear of leaves and needles. Dirt holds water and helps algae grow. If you see growth now, you may need a pro to clean it. You might also need a roof life expectancy check to see if your roof is still in good shape. Clean roofs reflect more sun. This keeps the roof surface cooler during the hot parts of the day. Fall Roof Preparation: Getting Your Roof Ready for Winter Fall is the best time to check your roof before the Georgia winter starts. The mild weather in October and November makes it easy to find and fix small issues. Taking care of your home now can stop leaks and water damage when it gets cold. Following a few roof maintenance tips will keep your roof in good shape for many years. Clean Your Gutters and Downspouts Falling leaves quickly clog gutters and block water flow. When water stays in your gutters, it can seep under your shingles or rot your trim boards. Keeping your drains clear of clutter helps dispose of water quickly down the roof. You should also check for seasonal roof maintenance tips that include flushing your pipes to make sure they drain away from your home. Trim Tree Branches and Remove Debris Overhanging limbs pose a big risk during winter storms. Heavy ice or strong winds can snap branches and cause them to fall on your home. Such branches are at risk of falling on the roof, which can lead to big structural damage. Trimming these limbs back at least ten feet from your roof line is a key part of seasonal roof maintenance in Georgia. You should also clear away pine needles and twigs that trap wetness on your shingles. Check Your Seals and Flashing Cold air and ice can make small cracks in your roof seals much worse. Check the metal parts around your chimney, vents, and roof lights to make sure they are tight. If you find loose or missing shingles, fix them now to stop leaks. Proper roof maintenance and repair tips suggest that you should also look for signs of wear in your attic, such as water spots or damp filling. Catching these problems early can add years to the life of your roof. Winter Roof Monitoring: Preventing Cold-Weather Damage Georgia winters are often mild compared to northern states. But our local weather still puts a lot of stress on your home. The biggest risk in our area is the freeze-thaw cycle. During this time, the air gets cold at night and warms up during the day. Water gets into small cracks and turns to ice. As the ice grows, it pulls the roof parts apart. This can turn tiny gaps into major leaks in just one season. Following these roof maintenance tips in the cold months can save you from big repair bills later. Stop Ice Dams Before They Start Ice dams can be a major problem during a cold snap. They happen when snow or ice on the upper roof melts and runs down to the gutters. Since the edge of the roof is colder, the water freezes again. This forms a thick ridge of ice that traps more water behind it. This trapped water often seeps under your shingles and into your home. Once inside, it can soak your walls and stain your ceilings. You can stop this by making sure your attic stays cold. Good air flow is the best way to keep the roof surface at a steady heat. Monitor Attic Insulation and Heat Good insulation is a top tool to fight winter damage. It keeps heat in your rooms and out of the attic space. If heat leaks up, it warms the roof from below. This heat causes the snow to melt and starts the ice dam cycle. Check your attic to see if your insulation is dry and level. You should also look for blocked vents that stop air from moving. You can find more home care facts through the NC State Extension. Keeping your attic cool helps your roof stay strong for years. Visual Inspections After Winter Storms Our winter storms often bring high winds and cold rain. After a storm passes, take a few minutes to look at your roof. Stand back in the yard to get a clear view. Look for shingles that are loose, cracked, or missing. Check the spots near the chimney for branches or leaves. If you see a leak or a major flaw, you should call for emergency repairs right away. Do not try to walk on a roof that is wet or icy. A simple check from the ground is a safe way to catch issues before they grow. DIY Roof Maintenance vs. When to Call a Professional Roofer Your roof is the main shield for your home. Taking care of it can stop small flaws from turning into big problems. Finding leaks early helps you save money on work over time. While some jobs are easy to do, others are best left to pros. It is vital to know your own limits. Staying safe is always more vital than trying to fix a leak yourself. Safe tasks for you to do You can do some roof care from the ground or a ladder. Ground checks are a great way to find trouble without any risk. Use a scope or a pair of lenses to look for missing parts or bent metal. You should also check your attic for water stains or damp wood. These signs often show a leak that needs a quick fix. If you see light coming through the roof boards, call for help right away. Cleaning out gutters is one more vital task you can do. Trash and leaves in your gutters can block water flow. This leads to wood rot and basement leaks. Also, keep an eye on tree limbs. Trim back any branches that hang over your roof. This stops heavy wood from falling during a storm. If a branch is too big for a hand saw, hire a tree crew to handle it safely. When to call a pro Most roof work is unsafe for someone without the right gear. Walking on a steep slope takes special shoes and safety tools. If your roof is very high, you should never try to climb it. Pros have the tools to work safely at any height. They can also find small leaks that most people miss. A pro knows how to walk on shingles without causing new damage. Fixing metal trim and shingles always needs a skilled hand. The trim around vents and chimneys keeps water out. If it fails, water will get into your walls and cause mold. A professional roof repair keeps these spots sealed tight. Pros use the right parts to make sure the job lasts for years. They also know how to match the color of your old shingles for a clean look. Expert help after a storm Heavy rain and wind can cause damage you cannot see. It is wise to inspect your roof after any major storm in Georgia. High winds can lift shingles or crack the seals on your vents. Some of these issues are hard to spot from the ground. A trained eye can find these weak spots before the next rain starts. This keeps your home dry and safe from the rain. Total Roof Solutions offers a free check to help you find these issues. We can look at your roof and give you a full report on what we find. Our team has the training to spot signs of wear that others might miss. If your roof needs help, we can guide you through the next steps. We help you pick the best way to fix the problem without spending too much. Six Signs Your Roof Needs More Than Seasonal Maintenance Seasonal checks are a great way to keep your home safe. But even the best care has limits. Some issues show that a roof needs more than a quick fix. If you spot these signs, you may need a pro to look at the site. Finding these flaws early helps you avoid high costs later. Check the age of your roof Most roofs last about 20 years. If yours is 15 to 20 years old, it may be time for a change. You can check your roof life expectancy to see where your home stands. Old roofs may look fine from the street but can fail during a big storm. Watch for granule loss Check your gutters for small, sandy bits. These are shingle granules. They protect your roof from the hot sun. When shingles lose these bits, they get thin and weak. This is a sign of old age that regular roof maintenance tips cannot fix. Check the roof age. Most asphalt roofs reach their limit between 15 and 20 years of use. Look for granules in gutters. Excess sand in your downspouts shows your shingles are wearing out. Find curling shingles. Shingles that turn up at the edges or look wavy no longer shed water well. Inspect the attic for light. Go to your attic and look for sunlight coming through the roof deck. Check for sagging spots. A wavy roof line can mean you have trapped moisture or rot in the wood. Monitor energy bills. High cooling costs can mean your roof does not vent heat well. Inspect your attic for damage Your attic tells the story of your roof. Look for dark spots or damp wood on the deck. Expert tips from Oregon State University say you should check for cracks after a big storm. Light coming through the roof is a clear sign that water can get in too. Look at the roof line A straight roof line is a healthy roof line. If you see dips or curves, the wood under your shingles may be soft. This often happens from leaks that stayed wet for a long time. These soft spots need a pro to check if the roof is still safe. Frequently Asked Questions How often should you inspect your roof? You should check your roof at least twice each year. The best times to do this are in the spring and fall. You should also look for signs of damage after a big storm or high winds. Finding small leaks or missing shingles early helps you avoid large repair bills. As experts at Oregon State say, doing these checks helps your roof last a long time and protects your home. Why is roof venting key in Georgia summers? Georgia summers get very hot. Without good airflow, your attic can reach 150 degrees. This heat bakes your shingles from below and makes them break easily. Good attic airflow helps cool your house and lowers your power bill. It also stops heat from aging your roof too fast. Keeping your attic cool helps your shingles last longer. It also helps your AC unit work well when it is hot outside. This keeps your home safe and cool all summer long. How do I safely remove debris from my roof? Do not walk on your roof to clean it. Use a leaf blower from a safe ladder to clear away dry leaves. A long brush can also help you reach far spots without leaving the ladder. If you cannot reach the mess, it is best to call a local pro. Keeping your roof clear stops rot. It also stops water from going under your shingles when it rains. Clearing your gutters at the same time will help water flow away from your home and foundation. When should you call a professional for roof care? Call a pro if you see leaks, sagging, or dark spots on your ceiling. Experts have the right tools to fix metal flashing and seal pipes safely. If your roof is steep or has lots of moss, do not try to fix it yourself. A quick check by a pro can find small issues before they get worse. The team at Total Roof Solutions offers free checks to help you stay safe. Quick fixes now can save you a lot of money later. Ready to protect your Georgia home with a free roof check? Small roof leaks can quickly turn into large and costly repairs if you wait too long. A simple check now can save you thousands of dollars by finding issues before the next heavy storm hits. You will have peace of mind knowing your house is safe for the coming months. Our team helps you stay ahead of the weather and keeps your roof in top shape all year. Do not let minor wear lead to major water damage in your attic or walls. You can find more about our work on our roof repair page . Starting now means you avoid the rush when storm season arrives and keep your family dry. We have worked in Georgia since 2009 and know how to spot trouble early. Our pro team can see things that a homeowner might miss from the ground. Taking this step today protects your home and helps your roof last much longer. Ready to schedule? Call 470-333-7863 to schedule a free roof inspection.