How to Find a Roof Leak: A Step-by-Step Guide
MEGA MEGA • August 18, 2026
Learn how to find a roof leak indoors then outdoors, from ceiling stains and attic tracing to shingle and flashing checks, before professional repair.

A small ceiling stain is easy to dismiss, but it can signal water moving through your roof long before a steady drip appears. Finding the likely entry point helps you contain damage, explain what you found, and make a professional repair more efficient.
To learn how to find a roof leak, start indoors by checking the ceiling, attic, rafters, and insulation for dampness, staining, mold, or water trails. Then, only when conditions are dry and safe, inspect likely outdoor entry points such as flashing, pipe boots, skylights, and valleys. Do not climb a steep or wet roof, and call a roofer if the source remains unclear. The EPA notes that leaking roofs can create moisture problems that support mold growth, while unchecked leaks may damage building materials. Learn more from the EPA.
Water does not always fall straight down. It may travel along rafters or sheathing before appearing inside, so a careful inspection should move from the visible symptom toward the surrounding roof system. The steps below begin with the safest indoor clues and build toward a focused outdoor check.
Schedule a free roof inspection
How to Find a Roof Leak Before It Becomes a Bigger Problem
Early action limits the damage. To find a roof leak, look for moisture inside your home, trace it toward the roof, and arrange a professional inspection before the problem spreads. A small ceiling mark can signal water moving through roofing materials, insulation, or framing.
Moisture does not stay in one place. Leaking roofs are a common source of excess moisture in buildings, and unchecked moisture can support mold growth. Mold can grow on organic materials such as wood and insulation when moisture and oxygen are present. Over time, it may contribute to damage in those building materials. The EPA explains how moisture supports mold growth.
Follow the evidence, not just the drip. Water can travel along rafters or roof sheathing before it appears as a stain on the ceiling. That means the visible spot may not be directly below the roof opening. In the attic, use a flashlight to look for damp areas, water trails, stained wood, or wet insulation. Mark what you find, but do not step on areas that may be unsafe.
Pay particular attention after heavy rain or a storm. Look around roof penetrations, flashing, and other areas where materials meet. Our guide to identifying roof leak sources can help you understand why the entry point is not always obvious. If the weather has recently turned severe, our advice on how to check for roof leaks after a storm offers another practical starting point.
Do not wait for a larger stain. The EPA recommends checking for leaks regularly and addressing them as soon as possible because leaks can waste water and cause serious damage in a home. This applies even when the ceiling appears mostly dry between storms. A recurring musty smell, bubbling paint, or a stain that grows deserves attention.
Homeowners can document signs and inspect accessible areas safely, but finding the source is not the same as making a lasting repair. If the leak is active, widespread, or difficult to trace, avoid climbing onto a wet or steep roof. A qualified roofer can assess the entry point and the surrounding materials before hidden moisture creates a more disruptive problem.
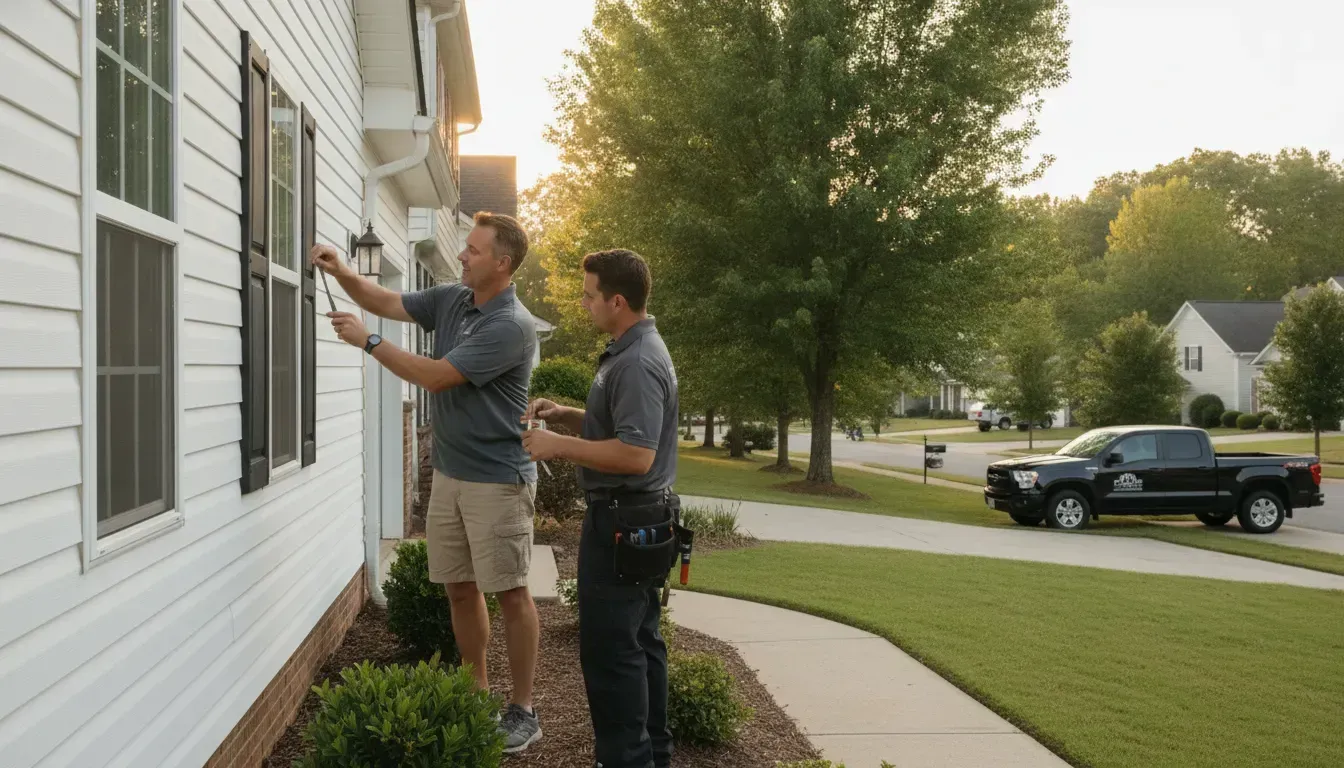
At Total Roof Solutions, our team provides free inspections for potential roof leaks. A prompt inspection can clarify what is happening and help you choose the next safe step.
Why Is a Roof Leak So Hard to Pin Down?
A roof leak is often hard to locate because the water may enter in one place and appear somewhere else. Before it reaches a ceiling stain or drip, moisture can travel along roof rafters, sheathing, insulation, or other building materials. The visible damage is a clue, but it is not always the source.
That is why simply looking directly above an indoor water spot can lead to a false conclusion. The actual entry point may be several feet away, especially after wind-driven rain or when the roof has multiple layers and intersections.
- Water follows the easiest path. Gravity pulls moisture downward, but roof framing and sheathing can redirect it sideways. A small opening near a flashing detail may send water along a rafter before it drops into the ceiling below.
- The drip may appear later. Insulation and other materials can hold moisture before the water becomes visible indoors. A stain may therefore remain after the original rain has stopped, or it may grow gradually over several storms.
- One roof problem can affect more than one area. Valleys, penetrations, seams, and flashing transitions can collect and redirect water. Multiple stains do not automatically mean there are multiple entry points.
What the ceiling spot can tell you
Start with the location and pattern of the damage, then work outward rather than assuming the roof opening is directly overhead. A circular stain, bubbling paint, damp drywall, or an intermittent drip can help establish where water is collecting. The timing also matters. A leak that appears only during heavy rain may behave differently from one caused by melting ice, condensation, or a plumbing issue.
When conditions are safe, inspect the attic from inside first. Look for damp insulation, water trails, stained wood, or discoloration along rafters and sheathing. A flashlight can reveal changes that are difficult to see in normal daylight. Marking suspicious areas can help you compare them with the roof surface later, but do not climb onto a wet or unstable roof to confirm a theory.
Finding the source quickly matters because ongoing moisture can support mold growth on materials such as wood or insulation. The EPA notes that mold can grow when moisture and oxygen are present and may contribute to structural damage if left unchecked: EPA mold guidance. Treat the indoor stain as evidence of a moisture path, not proof of the exact roof opening.
Where Does the Water Show Up Inside Your Home?
Water stains, soft drywall, and a musty smell can all point to a roof leak, even when the roof itself looks intact. Start indoors by tracing the moisture carefully, then protect the area and arrange a professional inspection before the damage spreads.
Interior warning signs are often easier to notice than the original roof opening. Look for these clues:
- Ceiling stains: Yellow, brown, or spreading discoloration may indicate that water has entered above the ceiling. A fresh stain after rain deserves prompt attention, even if it feels dry later.
- Bubbling or soft drywall: Paint that bubbles, sags, or peels can signal moisture trapped behind the surface. Do not press hard on a swollen ceiling or wall, since weakened drywall can fail unexpectedly.
- Visible drips: Place a container under active dripping and move furniture or belongings away from the area. If water is near a light fixture, outlet, or other electrical component, avoid contact and seek qualified help.
- Musty odors: A persistent damp or earthy smell may mean that insulation, wood, or another hidden material has stayed wet. Odor without an obvious stain still warrants investigation.
If you can safely access the attic, use a flashlight to look for damp spots, water trails, staining, or mold on the rafters and insulation. The visible ceiling mark may not sit directly below the entry point because water can move along framing and sheathing before it reaches the room below. Marking the edges of a stain and checking whether it expands after rainfall can help a roofer narrow the search.
Do not wait for a dramatic drip before acting. The EPA recommends checking for leaks regularly and addressing them as soon as they are identified because leaks can waste water and cause serious damage in a home. A leaking roof also adds moisture that can support mold growth, so prompt action matters for both the structure and the people who live there. Read what to do while you wait for practical steps to limit damage before help arrives.
How to Find a Roof Leak From Inside the Attic
To find a roof leak from inside your attic, use a sturdy flashlight to inspect the rafters. Roof sheathing, and insulation for dampness, stains, mold, water trails, or visible daylight. Follow any trail upward toward the peak, then mark the likely entry point so it can be checked and repaired safely.
Water does not always appear directly above the ceiling stain. It can travel along rafters or sheathing before it becomes visible, so a careful attic inspection is often more useful than looking straight above an indoor drip. If you want more context on identifying roof leak sources, use this process as a focused first check.
- Gather the right tools. Bring a sturdy flashlight, work gloves, a marker or chalk, and a stable ladder if one is needed to reach the attic opening. Wear shoes with good traction. Keep your weight on safe walking surfaces, such as joists or installed boards, rather than stepping between them onto the ceiling below.
- Choose a safe time to inspect. Do not enter the attic during an active electrical hazard, severe storm, or unsafe weather. Wet insulation, exposed wiring, poor footing, heat, and limited headroom can all create risks. If the space is steep, cramped, or difficult to access, stop and arrange a professional inspection.
- Start near the indoor symptom. If you know where a ceiling stain, drip, or damp patch appeared, inspect the attic area above it first. Look across the underside of the roof for darkened wood, damp insulation, soft spots, mold, or narrow water trails. Mold can grow on materials such as wood and insulation when moisture and oxygen are present, and persistent moisture can contribute to damage over time.
- Look for daylight. With the flashlight off briefly, scan the roof sheathing for pinpoints or slivers of daylight. Light may reveal a gap, damaged flashing area, lifted shingle, or another opening, but do not assume every bright spot is the leak. Mark suspicious areas only when you can do so without climbing onto unstable surfaces.
- Trace the water uphill. Follow each damp mark or water trail upward toward the roof peak. Check where rafters, seams, penetrations, and roof planes meet. The entry point may be several feet away from the place where water first appeared, so inspect the surrounding path rather than stopping at the wettest spot.
- Mark and document the likely entry point. Use your marker or chalk to identify the area from inside the attic. Note whether the wood or insulation is wet, stained, or moldy, and take a photo from a safe position if possible. These details can help a roofer match the attic evidence to the exterior roof surface.
Finding the trail is useful, but it is not the same as confirming the repair. If the leak is extensive, the roof is unsafe, or the source remains unclear, avoid disturbing the roofing materials and have a qualified professional investigate it.
5 Common Places Roofs Leak and How to Check Each
Answer capsule: Start with the roof details that interrupt the shingle surface: pipe boots, vent flashings, chimneys, skylights, valleys, and the shingle edges near gutters and eaves. These areas are common paths for water to enter, especially after wind or heavy rain.
Before checking from outside, inspect from the attic when possible. Water can move along rafters or roof sheathing before it appears as a ceiling stain, so the visible drip may not sit directly below the entry point. A flashlight, marker, and sturdy ladder can help you trace and mark what you find.
Common roof leak locations and quick checksLeak LocationCommon CauseQuick DIY CheckPipe boots and vent flashingsCracked rubber, loose flashing, or failed sealant around the penetrationFrom the attic, look for damp decking near the pipe. From the ground, check for split boots or lifted edges.Chimney flashingOpen seams, damaged step flashing, or a deteriorated seal where the chimney meets the roofLook for gaps, rust, or loose metal around the chimney base. Do not pry or disturb flashing.Skylight edgesWorn seals, blocked drainage channels, or flashing damage around the frameCheck the ceiling and attic area around the skylight for staining, then inspect the outside perimeter from a safe position.Roof valleysAccumulated debris, damaged shingles, or compromised valley flashingFrom the ground, look for missing material or debris lines. Never walk into a valley just to investigate.Shingles near gutters and eavesAge, wind damage, lifted tabs, or water backing up beneath the lower shingle coursesCheck for missing, curled, cracked, or visibly displaced shingles, plus sagging or overflowing gutters.
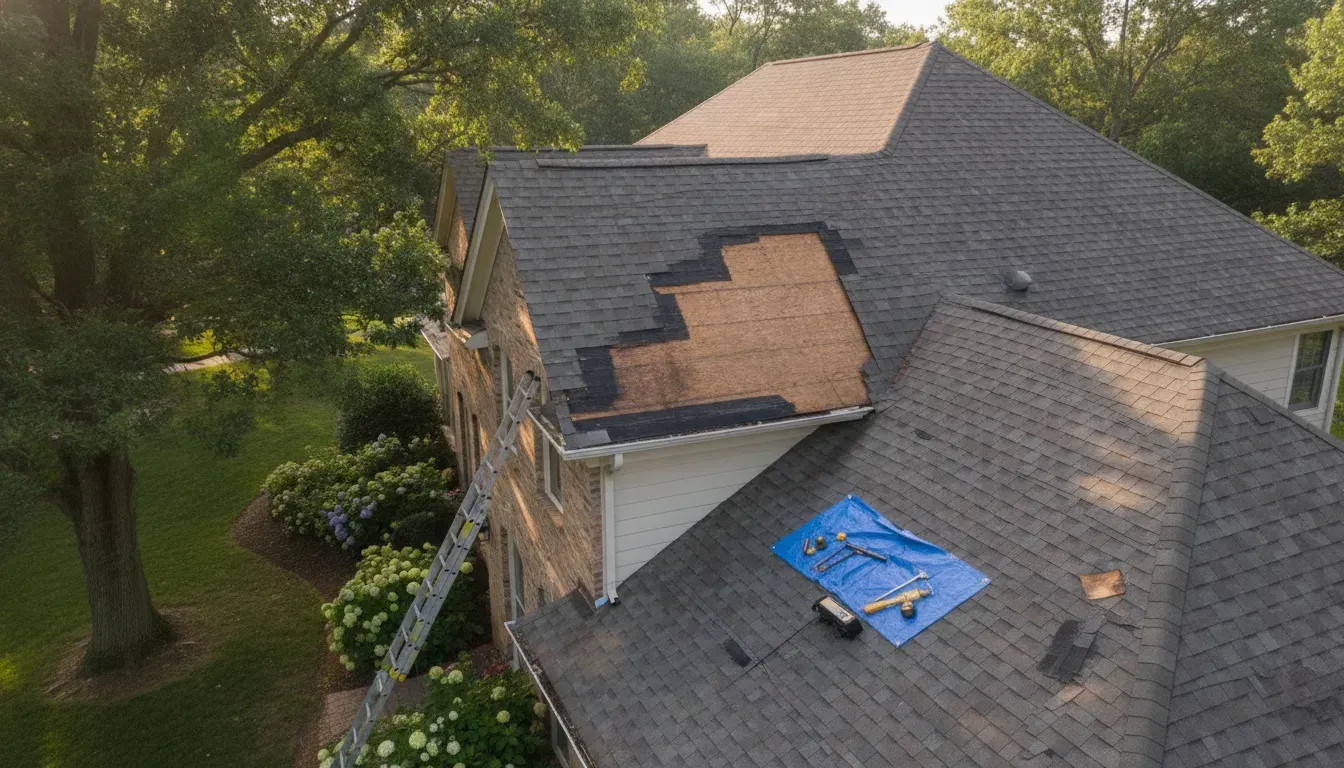
Be careful with outdoor checks. Only use a stable ladder on dry, level ground, wear shoes with secure footing, and avoid climbing in wet or windy conditions. If you cannot safely reach an area, leave it alone. A roof leak can also be hidden beneath intact-looking materials, so do not remove shingles or force flashing during a quick inspection.
After a storm, you can follow our guide to check for roof leaks without turning a suspected problem into a fall hazard. Mark visible concerns, take photos from the ground, and arrange a professional inspection when the source remains unclear.
How to Find a Roof Leak From the Outside
Answer: Start with a ground-level inspection, then check only safe, dry, low-pitch roof areas for damaged shingles, loose flashing, or worn pipe boots. If the source is still unclear, a controlled garden-hose test can help connect the exterior area to water entering the attic.
Put safety first. Never walk a steep roof to look for a leak. Avoid wet, icy, or windy conditions, wear footwear with reliable traction, and use a stable ladder that is properly positioned on firm ground. If you cannot inspect without stretching, climbing onto a high section, or stepping near an unprotected edge, stop and call a professional.
Begin from the ground
Use binoculars before going near the roof. Look for shingles that are missing, cracked, blistered, or curling at the edges. Pay attention to dark or uneven areas, exposed underlayment, and loose debris that may point to storm or age-related damage. A roof can leak even when the shingles look mostly intact. So treat the ground inspection as a way to narrow the search, not a guarantee that you have found the entry point.
From a safe ladder position, if one is genuinely necessary, inspect the visible seams around flashing. Check where flashing meets a wall, chimney, or roof plane, and look for gaps, lifted edges, or failed sealant. Pipe boots deserve a close look as well. Cracked rubber, separated collars, or flashing that has shifted can allow water around the pipe penetration.
Use a garden hose carefully
When the weather is dry and a safe inspection is possible, have one person remain in the attic with a flashlight while another works outside. Start at the lowest portion of the suspected roof area. Spray a small section with a gentle stream for several minutes, then pause and watch for water entry before moving higher or testing the next section.
Keep the test controlled. Do not flood the roof, spray directly under shingles, or assume that a quick drip means the closest exterior point is the source. Water may travel along roof decking or framing before it appears inside. Mark each tested area so you can match the timing of any attic moisture to the correct section.
Know when to stop. If the leak is extensive, the roof is steep or unsafe, or the hose test does not identify the entry point, leave the roof alone. A professional inspection can locate concealed damage without turning a small leak investigation into a fall or a larger water problem.
When Should You Stop and Call a Professional Roofer?
Call a professional roofer when a leak is extensive, the roof is unsafe, or two careful DIY attempts still have not revealed the entry point. Finding the source can be useful, but it should never require climbing onto a steep, wet, or unstable roof, or continuing while water is reaching electrical fixtures.
Escalate when the leak keeps returning. A small ceiling mark that reappears after each storm may indicate an entry point that is hidden beneath flashing, roofing materials, or another roof penetration. If you have inspected the attic, checked likely exterior areas, and tried a controlled hose test without success, stop after two attempts. Continuing to guess can spread water farther through the roof system and interior materials.
Do not investigate around electrical hazards. Water near a ceiling light, outlet, wiring, or electrical panel requires caution. Keep clear of the wet area and contact a qualified professional who can assess the roof and help coordinate any needed electrical evaluation. Do not touch wet fixtures or rely on a bucket as a long-term solution.
Visible movement or decay is a clear warning. Sagging roof decking, bowed ceilings, soft wood, rotted framing, or widespread staining can signal that moisture has affected more than the surface. Mold can grow on materials such as wood and insulation when moisture and oxygen are present, and unchecked mold can contribute to damage in building materials. At that point, the priority is a proper inspection, not another round of trial and error.
Roof access is not worth the risk. Even a dry roof can be hazardous if it is steep, difficult to reach, or covered with fragile materials. Avoid inspections during wet or windy weather, use stable ladders, and wear suitable footwear. If you cannot safely see the suspected area from the ground or attic, let a professional handle the inspection.
Total Roof Solutions offers free inspections with no pressure, so you can get an informed next step without committing to work. Our team can help determine whether you need roof repair or a different solution. To discuss what you are seeing, schedule a free roof inspection.
Schedule a free roof inspection
Frequently Asked Questions
How do you find a roof leak from inside the house?
Start with the attic if it is safe to enter. Use a flashlight to look for damp insulation, water trails, stained wood, mold, or daylight around rafters and roof penetrations. Then trace the moisture uphill, remembering that water can travel along rafters or sheathing before it reaches a ceiling stain.
Can I find a roof leak without getting on the roof?
Often, yes. Inspect the attic and the underside of the roof first, then check ceilings, walls, and nearby trim for stains or dampness. This approach can help you identify the likely area without adding the risks of walking on a roof. Do not enter an attic with unsafe flooring, exposed wiring, or extensive water damage.
What is the hose method for finding a roof leak?
In dry, calm weather, one person remains in the attic while another sprays a small roof section with a garden hose. Start near the lower edge and work upward, pausing at each section while the person inside watches for water. Stop if conditions become unsafe, and do not confuse condensation or plumbing leaks with roof-related moisture.
Where are the most common places for roof leaks to occur?
Pay close attention to pipe boots, flashing around chimneys, skylights, valleys, and roof vents. These areas contain joints or penetrations where seals and surrounding materials can deteriorate. Compare each outdoor area with the indoor water trail rather than assuming the closest roof feature is the entry point.
When should I call a professional for a roof leak?
Call a professional when the leak is extensive, the roof is steep or unsafe, weather conditions are poor, or your inspection does not reveal the source. A roofer can investigate concealed moisture and complete repairs without exposing you to a fall or causing additional damage. Address active leaks promptly because unchecked moisture can contribute to mold and structural damage, as noted by the EPA.
Schedule Your Free Roof Inspection
Finding the likely source of a roof leak can help you explain what you noticed. But a complete inspection can identify hidden moisture and the repairs your home may need. Our team at Total Roof Solutions can assess the roof and help you choose a practical next step. To schedule a free roof inspection, contact Total Roof Solutions through our online form.